INSTALLATION GUIDE
Skylight
4
6
MOUNT THE INSTALLATION BRACKETS
Bracket Placement
Position installation brackets so their centerlines are 4
N
1
/
2
"
from the ends of the
headrail.
If your shade has a support cord, position a third bracket 1
N
"
to the left of the
center of the headrail.
Measure and mark all bracket centerlines.
N
For outside mount applications, use the installation brackets to mount the
N
anchor rail.
For inside mount applications, attach the anchor rails directly to the sill
N
with screws.
Inside Mount Applications
The depth required for a fully recessed mount depends upon the application.
NOTE:
Add the dimension of obstructions such as window cranks or handles
to the minimum depth.
Use one mounting screw to attach each installation
N
bracket to the top sill of the window opening.
Place the screws on the marked centerlines and align
N
the brackets so their front edges are recessed.
If the anchor rail does not have mounting holes,
N
space installation brackets on the bottom sill the same
distances as used for the top sill. Attach the anchor
rail to the brackets.
Use the rear hole of the bracket if the mounting depth
N
is between
1
/
2
" and 1".
4
1
/
2
"
4
1
/
2
"
1"
Center Of Headrail
Installation Bracket
Centerline
4½"
(¾" Bracket Shown)
See Chart
For Depth
3/8”
3/4”
Use one mounting screw to attach each installation
bracket to the top jamb of the skylight opening.
Place the screws on the marked centerlines and
align the brackets so their front edges are equal.
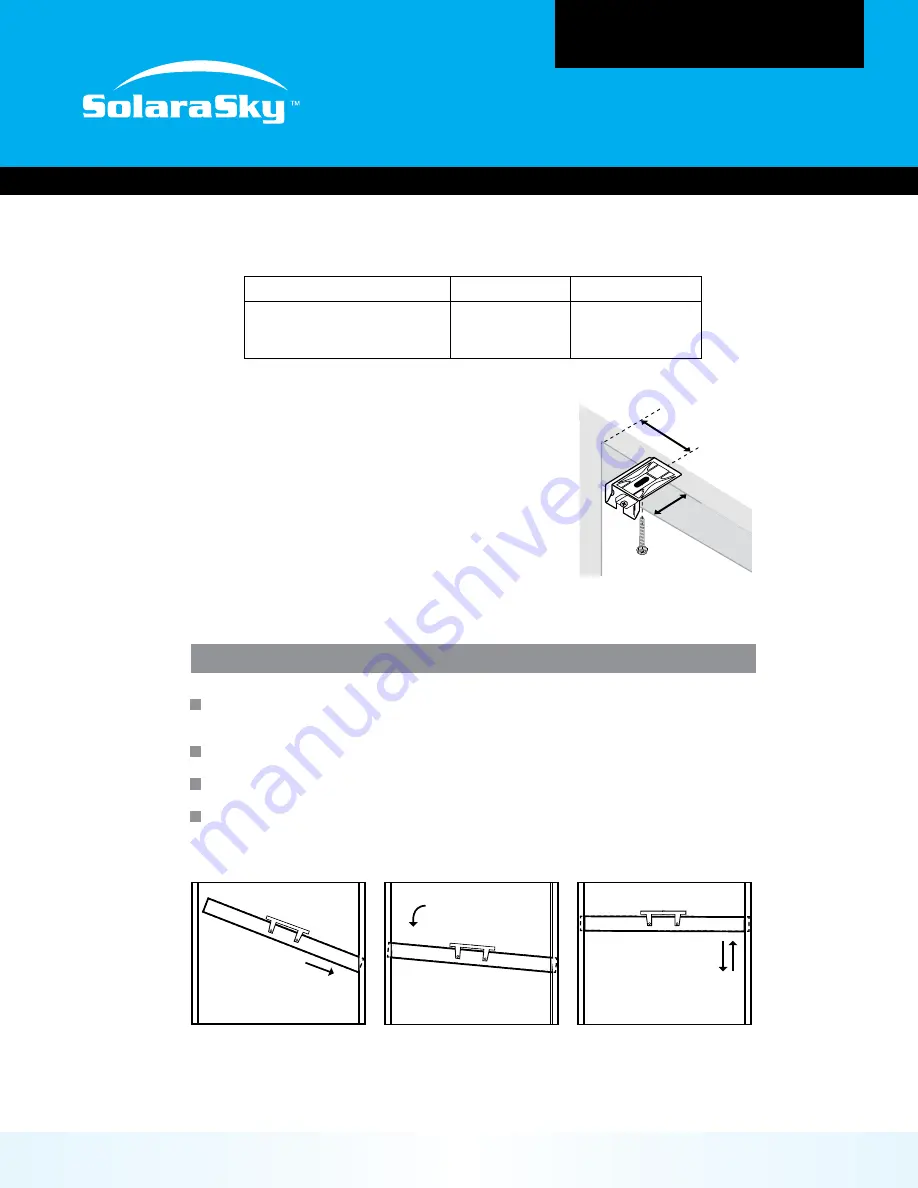
INSTALL SHADE INTO SIDE TRACKS
Position shade on a slight diagonal inside the
skylight track opening.
Push one movable rail guide (grey plastic M shape) into the track. (Step 1)
Be careful not to tangle the tension cord.
Bring to a horizontal position and push the second movable rail guide into the
opposite track. (Step 2)
Shade should move freely
within the tracks
Step 1
Step 2
*click
*click


