31
TIG SET UP - CONTINUED
11C
12A
12B
For DC Welding
Rotate left knob to adjust welding current.
Rotate right knob to adjust the welding voltage.
Ref AC / DC Welding Guide on page 34-35
For AC Welding
Rotate left knob to adjust welding current.
Rotate right knob to adjust the welding voltage.
Press one time on the right knob for
AC Balance
; this control allows the
operator to adjust the balance between the
penetration (EN) and cleaning action (EP)
portions of the cycle.
It produces a greater cleaning action to
remove heavy oxidation and minimizes
penetration, which may help prevent burn-
through on thin materials. Reducing the
EN cycle, however, decreases tungsten
electrode life and increases balling action
because more heat is being directed into
the electrode. This creates a large ball at
the end of the tungsten and causes the arc
to lose stability, making it hard to direct the
arc weld puddle.
Press two times on the right knob for
AC Frequency
; it controls the width of
the arc cone. Increasing the AC frequency
provides a more focused arc with increased
directional control. Decreasing the AC
frequency softens the arc and broadens the
weld puddle for a wider weld band.
Ref AC / DC Welding Guide on page 34-35
For Spot Welding
Spot welding is quick and easy and creates
a strong join. It doesn’t use any flux or filler
metal, so there is no need to grind excess
slag when finished, and there is no dangerous
open flame.
It can only create localized joins and can be
challenging to join oddly shaped pieces of
metal.
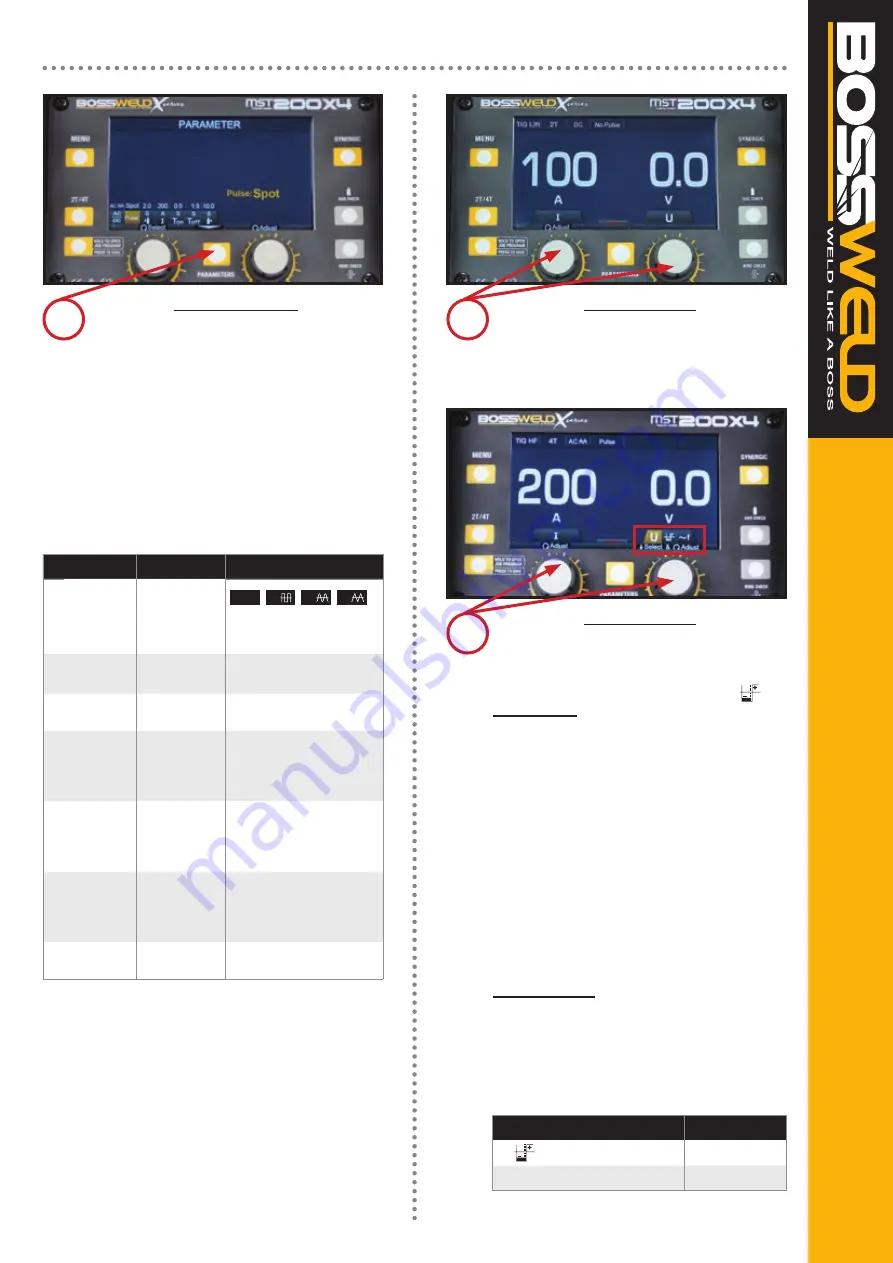
To adjust functions, press parameter button,
rotate left knob for function selection and
rotate right knob for adjustment then press
parameter button again for confirmation.
Function
Setting
1
AC/DC
AC: Sine,
Square &
Triangle
DC
DC
AC
AC
AC
Selection and DC output or
AC wave output
2
Pulse
Weld
On or off
(TIG HF: Spot)
Selection for Pulse,
No Pulse or Spot
3
Pre-Flow
0.1s ~ 2.0s
Selection for gas flow time
prior to the arc starting
4
Welding
Current
10A ~ 200A
Selection for the current
that flows through a
circuit while a weld is
being made.
5
Time on
0.2s ~ 1.0s
The amount of time
welding, to ensure welds
are the same size and or
length.
6
Time off
0s ~ 10s
The time between welds,
to allow to move the torch
position to new location /
stitch weld.
7
Post Flow
0.1s ~ 10s
Selection for gas flow time
after the arc finishes
Function
Setting
AC Balance
-5 ~ 5
~f
AC Frequency
50 ~ 250Hz
Note:
It is advisable to run a few test welds using scrap
or offcut materials, in order to tune the machine
to the correct settings prior to welding the job.


