5
26
26
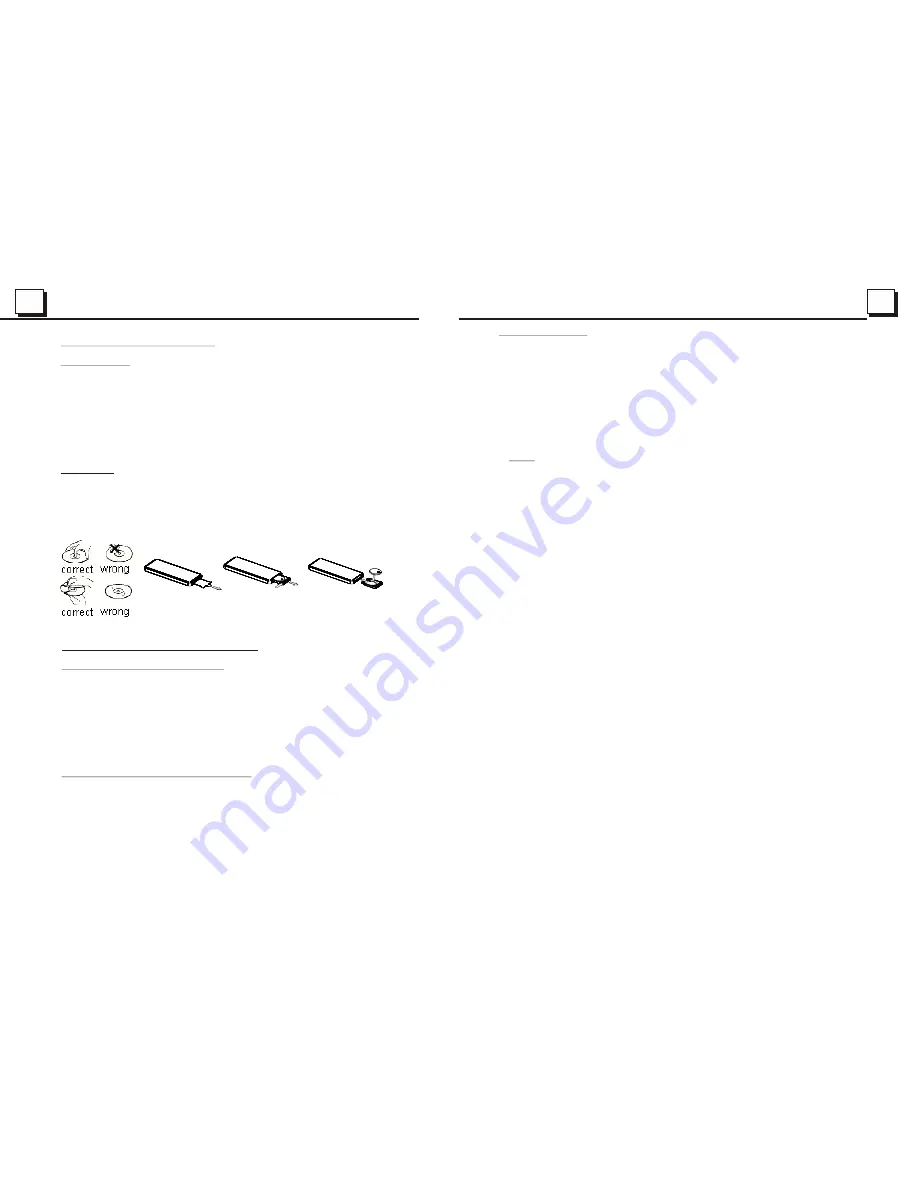
1.3 Maintenance and Cleaning of Discs
Disc Maintenance
1. To
h
1.
Do not use petrel, thinner, commercially cleaner or anti-static spray used to
plastic LP to wipe disc.
keep the disc clean, andle the disc by its edge, do not touch the disc
surface of the play side.
2. Do not stick paper or tape on the disc. If there is glue (or analog) on the
disc surface, must wipe it up before using.
3. Do not expose the disc to direct sunlight, or nearby heat sources such as
caliduct, or leave it in a car parked in direct sunlight where there can be a
considerable rise in temperature.
4. Put the disc inside disc case to keep temperature after finishing playback.
Disc Cleaning
Before playing, wipe the disc with a clean lint. wipe the disc outwards from
the disc center.
2.
1.4 Battery Information of the Remote Control
Replace Battery in the Remote Control:
Note about the Battery of the Remote Control:
1.
3.Do not short the battery.
4.Do not throw the battery into the fire.
5.To avoid the risk of accident, keep the battery out of reach of children.
1.Before using the remote control for the first time, pull the insulating
sheet out of the remote control as the direction indicated by the
arrow.(see fig.1)
2.Press the movable block hold as the direction indicated by the A arrow
(See fig.2), then pull the battery holder out of the remote control as
the direction indicated by the B arrow(see fig.2).
3.Replace the old battery by a new battery with (+) polarity side upward.
(See fig.3).
4.Insert the battery holder to the original position in remote control.
(See fig.3).
Improper use of battery may cause overheating or explosion. so that
Result in injury or fire .
2.Battery leakage may cause damage to the remote control(Battery
Life: 6 months with normal use in normal room temperature).
Fig.1
Fig.2
Fig.3
4.25 Parental Control
Q:After inserting DVD disc into disc compartment, a dialogue window will appear
asking for a password of 4 digits. Why ?
A:This is because the disc movie you are playing was rated with the Parental
Control, and the current rating level of DVD player is lower than one of current
disc. You must input right password and enter it to entry Parental Control setup
menu and then set a equal or higher rating level than one of current disc. So that
you can playback the disc.
! NOTE
* If you have not changed the password, the factory preset password for the DVD
player will be empty. So that you should input a desired password and input it
again to verify it to enter the Parental Control setup menu.
* For the rating level setup of Parental Control of the DVD player, please refer to
the relative content of LOCK setup menu for details.
Accessories: Parental Control
The Parental Control function of a DVD player can control the playback of movie
rated level in a disc. You can set the DVD player to be a certain rating level with
SETUP MENU on TV screen. If the rating level set in the disc is higher than one set
in the DVD player, the DVD player can not playback the disc. Sometimes the Parental
Control sequences in some discs are different from each other. The rating level setup
can be protected by the password. Therein, if you select Unlock item, the Parental
Control function will be invalid, the content of disc will be played totally.
The disc movie can be designed as that the DVD player will playback the different
version of content of a same movie according to the different rating level set by
Parental Control. Depend on the DVD feature of seamless switching described above,
the scenes that are not fitting for children will be cleared or replaced by the other
fitting scene automatically.
All rating levels of Parental Control are as follows:
Unlock
1 Kid Safe
2 G
3 PG
4 PG 13
5 PG R
6 R
7 NC 17
8 Adult
Содержание BV7342B
Страница 1: ......


