background image


3

1.3 Panel 

Specifications 


Screen Size:

 17 inches 


Display Format:

 1280 x 1024 pixels 


Pixel Pitch:

 0.264(H) x 0.264(V) m/m 


Color:

 16.2M color (RGB 6-bit + FRC data) 


Brightness:

 300 cd/m

2


Contrast Ratio:

 500:1 


Response Timer:

 8ms 

1.4  Power Supply Specifications  


Input Voltage:

 100~240VAC full range 


Input Frequency:

 47~63Hz 


Input Current:

 4A max. 115vrms at 60Hz; 2A max. 230Vrms 

at 50Hz 


Inrush Current:

 50A cold, 80A ware at 132VAC 


Hold Up Time:

 17ms min. at full load & nominal input voltage 


Output Power:

 +3.3V and +5V total output should not exceed 

61W 


Power Good Signal:

 Turn on delay 100~500ms 


Thermal System: 

4cm ball bearing cooling fan x 1 

1.5 Control 

Keys 


OSD Control Keys Define 


Menu:

 Menu/Item select 


Down:

 Cursor down control 


Up:

 Cursor up control 


Return:

 Return to menu 

Содержание BPC-6671

Страница 1: ...BPC 6671 17 Industrial Panel PC with MainBoard Touch Screen 180W ATX P S...

Страница 2: ...granted permission by BOSER Technology Co Ltd BOSER Technology Co Ltd reserves the right to change or improve the contents of this document without due notice BOSER Technology Co Ltd assumes no respon...

Страница 3: ...2 Unpacking 5 2 1 Opening the Delivery Package 5 2 2 Inspection 5 Chapter 3 Hardware Installation 7 3 1 Install Hard Disk Drive 7 Chapter 4 Touch Screen Driver Installation 9 4 1 Touch Screen Driver I...

Страница 4: ...mpleted on a sample of the equipment identified below Equipment Class Information Technology Equipment Product Model Series BPC 6671 This Product Complies With EN55022 Class A for Radiated emissions E...

Страница 5: ...r cord is damaged in anyway Do not insert objects into openings Do not immerse product in water or permit liquids to spill inside Turn off power when unattended or not in use Unplug product before mov...

Страница 6: ...e with use The expected operating lifetime of the backlight time to reach 50 initial brightness is 30 000 hours assuming continuous lit state at 25 degrees C Actual lifetime before replacement is abou...

Страница 7: ...n that operate under all types of working environments It offers OSD On Screen Display on the left side for user s operation The BPC 6671 is IBM PC AT compatible and can draw from a large body of hard...

Страница 8: ...cessor Memory Two DDRII sockets supports up to 2GB OSD Provides OSD function Touch Screen 17 touch screen Display Onboard graphics controller Ethernet Onboard 10 100 Based LAN controller Wireless LAN...

Страница 9: ...ll range Input Frequency 47 63Hz Input Current 4A max 115vrms at 60Hz 2A max 230Vrms at 50Hz Inrush Current 50A cold 80A ware at 132VAC Hold Up Time 17ms min at full load nominal input voltage Output...

Страница 10: ...4 1 6 Dimensions...

Страница 11: ...to the board from static electricity Integrated circuits will sometimes come out of their sockets during shipment Examine all integrated circuits particularly the BIOS processor memory modules ROM Di...

Страница 12: ...6 This page intentionally left blank...

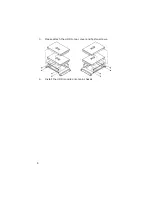
Страница 13: ...er tells how to install components into the Panel PC system External interface please refers to system board s manual 3 1 Install Hard Disk Drive 1 Please loose screws and detach the HDD module from m...

Страница 14: ...8 3 Please attach the HDD to rear cover and fasten screws 4 Install the HDD module onto main chassis...

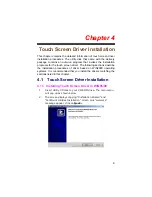
Страница 15: ...owing sections describe the installation procedures of driver based on WIN2000 operating systems It is recommended that you install the drivers matching the sections listed in this chapter 4 1 Touch S...

Страница 16: ...10 3 The next screen is Software License Agreement select I accept and click on Next 4 The next screen is Ready to Install the Program click on Install...

Страница 17: ...r Click on Finish to exit the wizard 4 1 2 Installing Touch Screen Driver in WIN2000 1 Insert Utility CD Disk to your CD ROM drive The main menu will pop up as shown below 2 The screen displays copyin...

Страница 18: ...12 3 The next screen is Software License Agreement select I accept and click on Next 4 The next screen is Ready to Install the Program click on Install...

Страница 19: ...13 5 Once the Install Shield Wizard finishes updating your system it will prompt you to restart the computer Click on Finish to exit the wizard...

Страница 20: ...the display with touch screen click on Calibration and follow the calibrate point to do calibration there are five points on screen for calibration Draw Test or demonstrate PenMount touch screen opera...

Страница 21: ...utton When select this function there is a mouse icon shown in the right button place of screen It shows Left Button being as default for normal use touch this mouse icon to change the next touch to b...

Страница 22: ...16 This page intentionally left blank...

Отзывы: