1 695 656 135
2011-01-12
|
Robert Bosch GmbH
24 | WBE 4100 | Auto-diagnosis menu
en
position, at the bottom, under the main shaft). The dis-
play will show “C-5” and the value of the position angle.
Keep the wheel in this position and press SPLIT (which
has both Leds on).
The calibration is automatically memorized perma-
nently .
After the first phase of the calibration (C-1) or by using
"SET” in the calibration menu, you can enter the cali-
bration of the automatic gauges: on the left display you
will see "D-1
”.
Put the internal slider, which is divided into millimetres
with the distance, in position of rest; set up on the key-
board the number that you read on the bar divided into
millimetres using + and – DIAMETRE.
You will see the data on the right display. Be sure that
the internal slider is in position of rest and press + DIS-
TANCE; press SET until you see the notice to memorize
the data.
Left Display
Right Display Description
D-1
0 or higher.
Calibration of the distance po-
tentiometer: position of rest
You will see “D-2” on the left display.
Move the internal slider to 200 mm in opening and set
up the value that you read on the keyboard. You can
also do this step by keeping the tracer point in this po-
sition and pr DISTANCE.
Left Display
Right Display Description
D-2
200
Calibration of the distance po-
tentiometer: position at 200mm
You will see “H-1” on the left display.
Mount an iron wheel of 14” or 15”.
Move the internal slider against the internal border of
the circle and set up the correct value on the keyboard.
You can do this step by keeping the tracer point in this
position and pr DISTANCE.
Left Display
Right Display Description
H-1
ex.: 14“
Calibration of the diam-
eter potentiometer
Now you have finished to calibrate the gauges.
NOTES FOR THE ASSISTANCE:
It can happen that after the calibration, the machine
works in a correct way but it does not memorize the
parametres permanently. In order to check you must:
R
turn off the machine;
R
wait until 10sec.;
R
turn it on again;
R
check that the gauges acquire the measures in a cor-
rect way;
R
verify that the machine balances in a perfect way.
8.
Auto-diagnosis menu
On every Bosch balancing machine, you can find an
auto-diagnosis menu that you can use during the assist-
ance in order to check the machine very carefully.
8 .1
Msr
The first step in the test menu is checking the pick-ups;
this procedure, that will be analysed in details later on,
is fundamental to identify any sensor problem.
BALANCING SYSTEM
The tool that is used to measure the wheel unbalance
has a mechanic system based on a lever at 1°degree.
The piezoelectric sensors which are in the lower part of
the shaft, at its sides, detect vibrations by converting
the strength into electric tension.
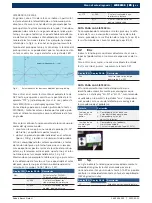
Fig. 2:
Position of the piezoelectric sensors
TENSIONS
The piezoelectric sensors, according to where they are,
receive a different stress and weight. In fact, the inter-
nal one, in the left side of the shaft, is excited less than
the external one. So we can say that the ratio between
them is 1.6, that is, the tension measured by the exter-
nal pick-up is 1.6 times higher than the tension meas-
ured by the internal pick-up.
Fig. 3:
Stress spread on the shaft
PHASE ANGLE
In general, we use the word phase to identify a particu-
lar moment during a periodical phenomenon (in this
case it is the electrical signal generated by the pick-up
during the launch of the wheel). When we consider two
signals (generated by the internal and the external pick-
up), we can say that there is a phase angle between
them which means that there is a difference between
the tensions. For instance, in this picture, if the black
signal represents the tension of the external pick-up
and the red signal represents the tension of the internal
pick-up, we can say that the tensions are opposite, that
Содержание WBE 4100
Страница 2: ...1 695 656 135 2011 01 12 Robert Bosch GmbH 2 WBE 4100 2WBE 4100 ...
Страница 17: ...1 695 656 135 2011 01 12 Robert Bosch GmbH Elektrische Anlage 17 de 11 Elektrische Anlage ...
Страница 30: ...1 695 656 135 2011 01 12 Robert Bosch GmbH 30 WBE 4100 Electrical system en 11 Electrical system ...
Страница 31: ...1 695 656 135 2011 01 12 Robert Bosch GmbH Electrical system 31 en ...
Страница 44: ...1 695 656 135 2011 01 12 Robert Bosch GmbH 44 WBE 4100 Instalación eléctrica es 11 Instalación eléctrica ...
Страница 45: ...1 695 656 135 2011 01 12 Robert Bosch GmbH Instalación eléctrica 45 es ...
Страница 58: ...1 695 656 135 2011 01 12 Robert Bosch GmbH 58 WBE 4100 Impianto elettrico it 11 Impianto elettrico ...
Страница 59: ...1 695 656 135 2011 01 12 Robert Bosch GmbH Impianto elettrico 59 it ...


