28
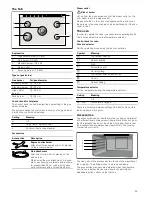
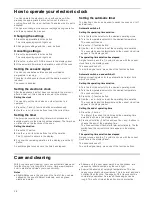
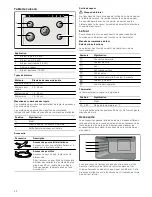
How to operate your electronic clock
You can operate the electronic clock with one hand. After
pressing the appropriate function button, set the time or
cooking time with the + and - buttons. The value which is set is
adopted.
You can also change or cancel your settings during operation
and thereby cancel the process.
Changing the settings
1.
Press the appropriate function button.
The corresponding symbol lights up
2.
Change your settings with the + and - buttons.
Cancelling settings
1.
Press the appropriate function button.
The corresponding symbol lights up
2.
Press the - button until 0
⋅
00 is shown in the display panel.
3.
If the automatic timer was in operation, switch off the oven.
Setting the acoustic signal
You can choose between three sounds provided no
programme is running.
Press the - button several times until the desired sound is
reached.
The sound is adopted.
Setting the electronic clock
After the appliance has first been connected to the mains or
after a power cut, three zeros are shown in the display.
Setting the clock
You can only set the clock when no other function is in
operation.
1.
Press the
r
and
q
function buttons simultaneously.
2.
Use the + and - function buttons to set the current time.
Setting the timer
The timer is a reverse counting timer which produces an
audible signal once the duration set has elapsed. The timer has
no influence on the functions of the oven.
Setting the duration
1.
Press the
U
button.
2.
Use the + and - function buttons to set the duration.
The
U
symbol is shown in the display.
3.
To show the remaining duration in the display, press the
U
button.
An audible signal sounds once the time has elapsed.
Setting the automatic timer
The electronic clock can be used to switch the oven on or off
automatically.
Automatic switch-off
Setting the operating time duration
1.
Turn the function selector to the desired operating mode.
2.
Turn the temperature selector to the desired temperature.
The oven switches on.
3.
Press the
r
function button.
4.
Use the + and - buttons to set the operating time duration.
The oven starts and the
A
symbol and the current clock time
appear in the display panel.
The operating time duration has elapsed
A signal sounds and the
r
symbol is shown with the current
clock time in the display panel.
The oven switches off.
To end the signal early, press one of the function buttons.
Automatic switch-on and switch-off
Baking or roasting starts for the set duration at a later time
which you chose.
Setting the operating time duration
1.
Turn the function selector to the desired operating mode.
2.
Turn the temperature selector to the desired temperature.
The oven switches on.
3.
Press the
r
function button.
4.
Use the + and - buttons to set the operating time duration.
The oven starts and the
A
symbol and the current clock time
appear in the display panel.
Setting the end of operating time
1.
Press the
q
button.
The total of the current clock time and the operating time
duration is shown in the display panel.
2.
Press and hold the
q
button and use the + and - buttons to
change the end of the operating time.
The oven switches off and starts later automatically. The
A
symbol and the current clock time appear in the display
panel.
The operating time duration has elapsed
A signal sounds and the
r
symbol is shown with the current
clock time in the display panel.
The oven switches off.
To end the signal early, press one of the function buttons.
Care and cleaning
With good care and cleaning, your oven will remain clean and
fully-functioning for a long time to come. Here we will explain
how to maintain and clean your oven correctly.
Notes
■
Slight differences in the colours on the front of the oven are
caused by the use of different materials, such as glass,
plastic and metal.
■
Shadows on the door panel which look like streaks, are
caused by reflections made by the oven light.
■
Enamel is baked on at very high temperatures. This can
cause some slight colour variations. This is normal and does
not affect their function. The edges of thin trays cannot be
completely enamelled. As a result, these edges can be
rough. This will not impair the anti-corrosion protection.
Содержание HSB738155Z
Страница 2: ......

