7
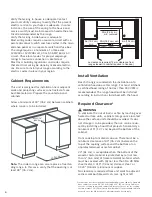
Clearance from range top to adjacent vertical walls
must be at least 4" (10.2 cm).
note: Some cabinet finishes cannot survive the
temperatures allowed by safety standards, particu-
larly self-cleaning ovens; the cabinets may discolor or
stain. This is most noticeable with laminated cabinets.
prepare walls and floor
Seal any holes in the walls or floor. Remove any ob-
structions (extra electrical or gas connections, etc.)
so that range will rest against wall properly.
countertop requirements
Countertops must be smooth and level.
procedure
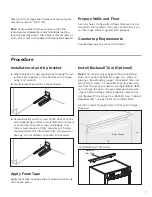
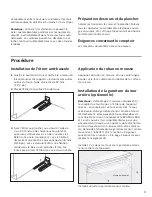
Installation of anti-tip bracket
1. Adjust height of range and level by rotating the ad-
justable leg supports on the bottom of the range,
using 1-1/4" wrench.
2. Locate bracket position as shown below.
3. Secure bracket with 2 screws to the floor or to the
wall. Depending on floor or wall material use wood
or anchorless concrete screws (included). Con-
crete screws require a 3/16" masonry bit. Screws
should provide firm attachment into solid wood or
flooring. Do not attempt to anchor into drywall.
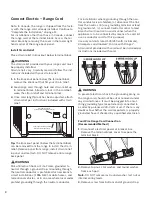
apply foam tape
Apply foam tape to underside of cooktop trim in one
continuous piece.
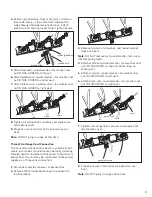
Install Backwall trim (optional)
note: This step is only required if the countertop
does not connect behind the range (i.e.; when re-
placing a free-standing range). If backwall trim and
attachment screws are required, they may be orde-
red from the service center by calling 800-944-2904
at no charge for up to one year after purchase date
of your Slide-In Range. When ordering, refer to Ser-
vice Backwall Trim Kit part no. 652010. See “Cabinet
Requirements” on page 6 for more information
Install 2 screws through holes in trim and in range
backwall.
Back of Range
Install Backwall Trim Strip
Backwall
Trim Strip


