10
| English
1 609 92A 2T6 | (31.3.16)
Bosch Power Tools
Product Description and Specifica-
tions
Intended Use
The glue pen is intended for solvent-free bonding of e. g., pa-
per, cardboard, cork, wood, leather, textiles, foam, plastics,
(except PE, PP, PTFE, Styropor® and soft PVC), ceramics,
porcelain, metal, glass and stone.
Product Features
The numbering of the product features refers to the illustra-
tion of the glue pen on the graphics pages.
1
Nozzle
2
Silicone cap
3
Feed trigger
4
On/Off button
5
LED indicator
6
Glue stick*
7
Glue stick opening
8
Socket for charge connector
9
Plug connector for charger
*Accessories shown or described are not part of the standard de-
livery scope of the product. A complete overview of accessories
can be found in our accessories program.
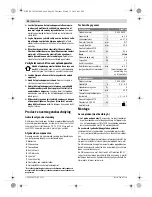
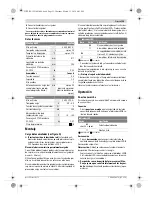
Technical Data
Assembly
Battery Charging (see figure A)
Observe the mains voltage!
The voltage of the power
supply must correspond with the data given on the name-
plate of the battery charger. Battery chargers marked with
230 V can also be operated with 220 V.
The battery is supplied partially charged.
To ensure full battery capacity, completely charge the battery
(at least 2–3 hours) before using for the first time.
The glue pen cannot be used during the charging procedure;
it is not defective, when it does not function during the charg-
ing procedure.
The lithium-ion battery can be charged at any time without re-
ducing its service life. Interrupting the charging procedure
does not damage the battery.
The “Electronic Cell Protection (ECP)” protects the lithium-
ion battery against deep discharging. When the battery is dis-
charged, the glue pen is switched off by a protective circuit:
The glue is no longer heated.
– Plug the mains plug of the battery charger into the socket
outlet and the charger plug
9
into socket
8
.
Disconnect the battery charger from the mains supply when
not using it for longer periods.
Protect the battery charger against moisture!
A significantly reduced working period after charging indi-
cates that the battery is used and must be replaced.
Observe the notes for disposal.
Operation
Starting Operation
To save energy, only switch the glue pen on when you are us-
ing it.
Switching On
– To
start the operation
, press the On/Off button
4
until the
LED indicator
5
lights up green.
Cordless glue pen
GluePen
Article number
3 603 BA2 0..
Heating time
s
approx. 15
Gluing temperature
°C
approx. 170
Glue stick, diameter
mm
Ø 7
Glue stick, length
mm
150
Weight according to
EPTA-Procedure 01:2014
kg
0.14
Battery
Li-Ion
Rated voltage
V=
3.6
Capacity
Ah
1.5
Number of battery cells
1
Operating duration per bat-
tery charge (according to
Bosch testing procedures)
min
approx. 30
(corresponds with
approx. 6 glue sticks)
Battery Charger
Article number
2 609 120 4..
Charging time
h
3.0–4.0
Output voltage
V=
5
Charging current
mA
500
Allowable charging tempera-
ture range
°C
+5 ... +40
Weight according to
EPTA-Procedure 01:2014
kg
0.07
Protection class
/
II
LED Indicators
red
green
Meaning
–
The battery is being charged
–
The battery is fully charged
–
The battery has less than 30% of its
capacity and should be charged
–
The battery is completely discharged
Flashing
Continuous light
LED Indicators
green
Meaning
for approx. 15 s
The glue is being heated
Glue pen ready for operation
Flashing
Continuous light
OBJ_BUCH-1693-004.book Page 10 Thursday, March 31, 2016 4:01 PM


