25
Cleaning / replacing the door seal
Regularly check the seal for dirt, damage and air
tightness!
Checking the seal for air tightness
•
Clamp a thin piece of paper at various points for
testing. The paper must be equally difficult to pull
through at all points.
Cleaning the gasket
•
Clean the gasket with clear water only!
•
CAUTION, grease and oil makes the seal porous
and brittle. Wipe up grease or oil immediately with
a damp, clean cloth.
Replacing the seal
•
Remove the contents of the appliance and, if nec-
essary, defrost the unit. Pay attention to how the
old gasket is attached. Most gaskets are only
plugged in.
•
Remove the worn gasket rubber by removing it
from the groove. Carefully clean the appliance
door and the groove below the rubber and re-
move any adhesive residue.
•
Attach the new rubber. If necessary, heat the rub-
ber seal with a hair dryer or hot water and shape
it by hand. Start pressing the gasket in one corner
and then press it around the door into the groove
provided for this purpose.
•
Continue to check the seal regularly for dirt and
damage!
Defrosting
CAUTION:
Never use metal objects (e.g. knifes) to remove ice
from the evaporator. Otherwise, it can be damaged.
To achieve better cooling and to save energy, defrost
the appliance regularly as follows:
•
To start the defrosting process, disconnect the
appliance from the power supply.
•
Remove the contents of the appliance and store
everything covered in a cool place.
•
Once the ice has melted, wipe up the condensa-
tion and dry the inside of the appliance.
•
Then you can put the appliance back into opera-
tion by connecting it to the power supply and ad-
justing the temperature control.
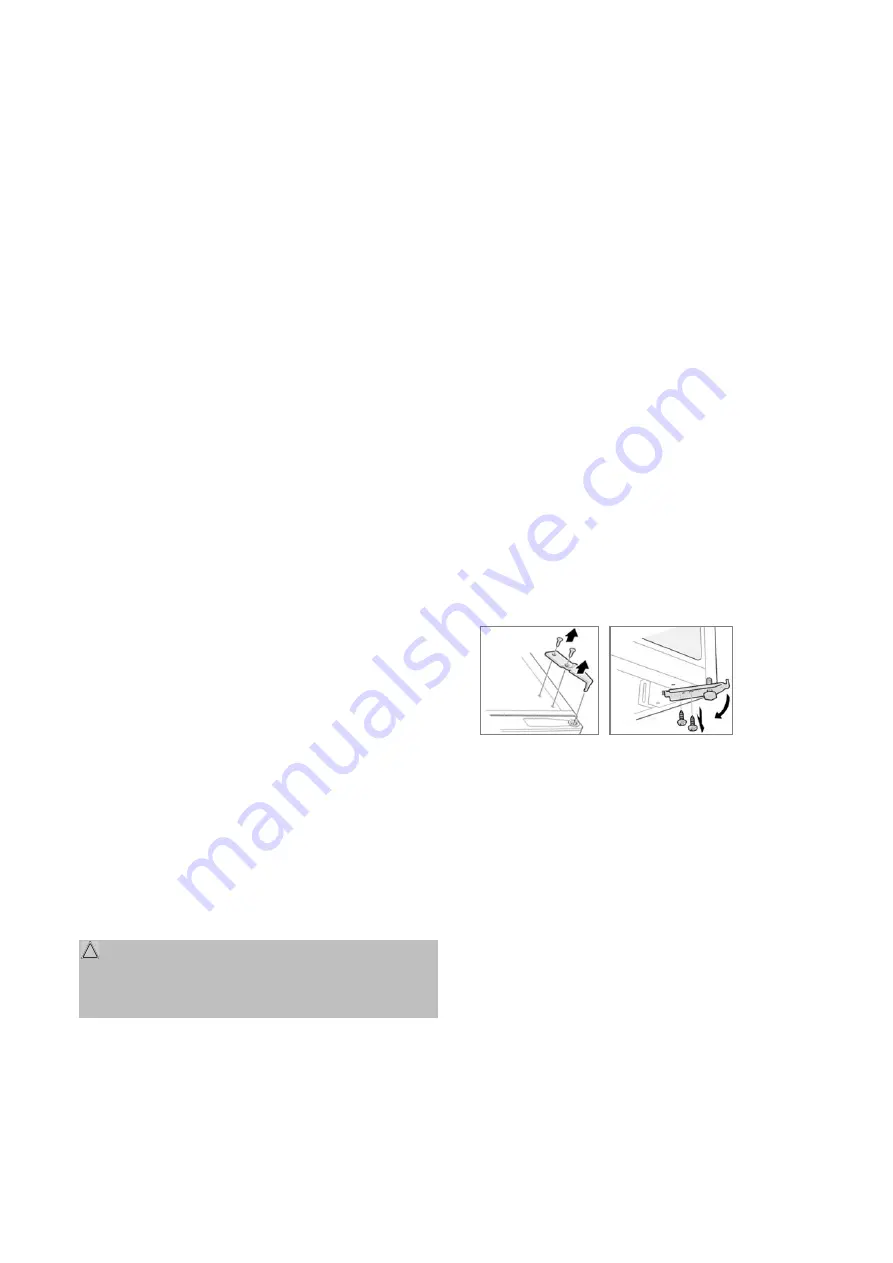
Replacing the door hinge
If the appliance door starts to stutter, crack or jam
when you open it, it is probably due to a worn or
damaged hinge.
It is recommended to replace all door hinges at the
same time, otherwise the next repair will soon be
beckoning.
•
Remove the contents of the appliance and the in-
terior parts.
•
Tilt the appliance backwards and block it in this
position to prevent the door from sliding out.
•
Remove the hinge cover and disassemble the up-
per door hinge.
•
Turn out the stand and disassemble the lower
door hinge.
•
The respective hinge assembly is carried out in
reverse order.
•
Open and close the appliance door for a test run,
readjust the hinges if necessary. In any case,
make sure that the door fits tightly and accurately.
Содержание 772460
Страница 62: ...62...
Страница 63: ...63...
Страница 64: ...64 C Bomann GmbH www bomann germany de Made in P R C Stand 09 2022...


