14
blueprintlab.com
6. If a UDP or TCP connection is required, the IP Address and Port boxes will appear where you can type
in the IPv4 IP Address and Port numbers.
NOTE:
Reach Control can only act as a UDP or TCP client, not as a host.
7. If you are connecting via the RS232 bus on the manipulator, set the connection to full duplex by
clicking on the 2 reversed direction parallel arrows in the “Duplex” selector. If you are connecting via
the RS485 bus on the manipulator, set the connection to half duplex by clicking on the double-ended
arrow in the “Duplex” selector. The connection will assume it is half-duplex by default.
8. To the right of each Method button is the power icon. If the power icon is orange, then the connection
is active and connected. You can toggle the connection on and off by clicking the power icon.
9. Close the CONNECTIONS panel after configuration.
Step 7 - Vehicle Setup
This step configures the vehicle system (or bench setup) according to the manipulators, controllers, and
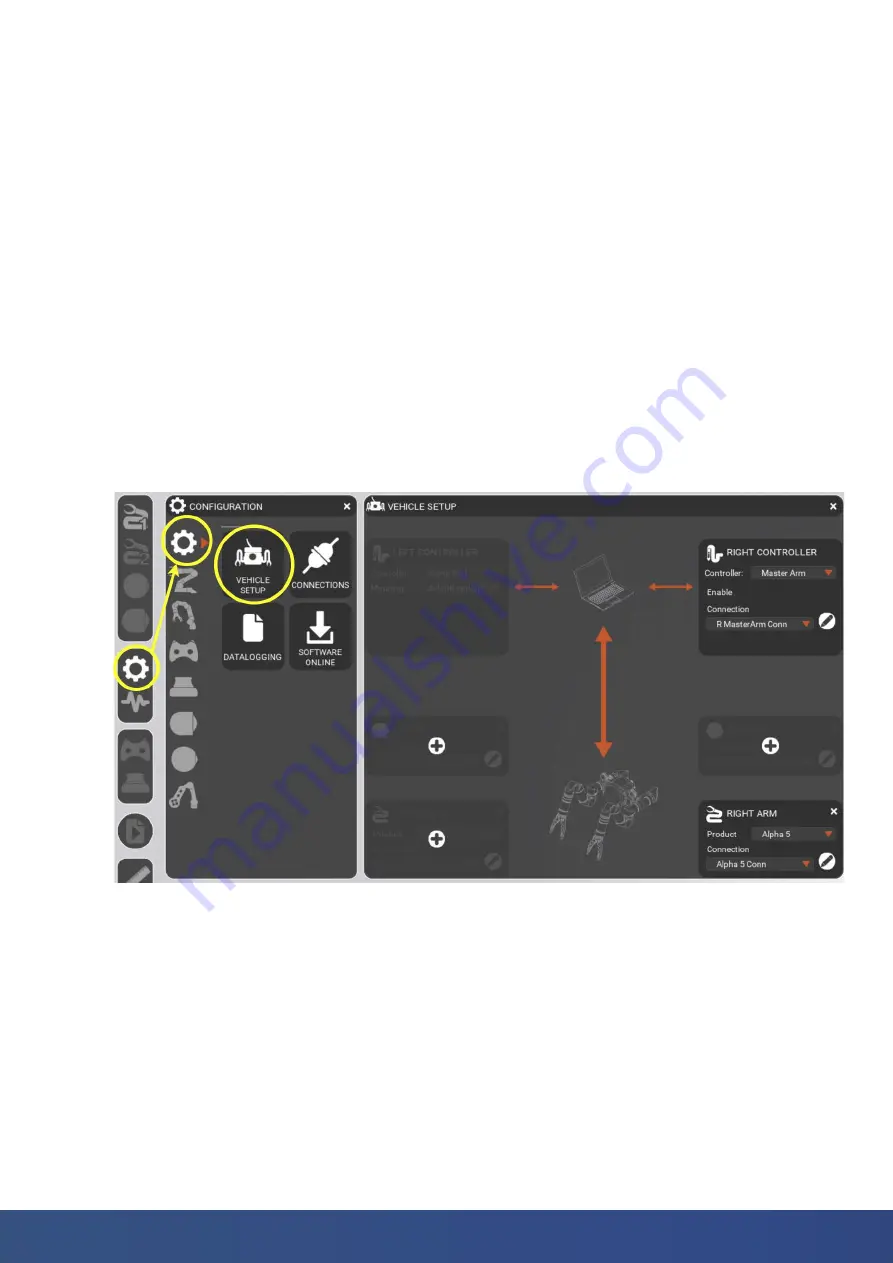
any other devices in use. To access the VEHICLE SETUP tool, see Figure 14.
For example:
: If you have one Alpha 5 and one Master Arm, click on the “Add” button on the
bottom right product tab (RIGHT ARM). If not already set, select the product type you have (Alpha
5) via the Product Select dropdown list. On the top right, select the Controller Select dropdown
and click ‘Master Arm’.
Figure 14. VEHICLE SETUP access and tool
1. The VEHICLE SETUP panel will show a list of products and controllers that are bound to the
product. The RIGHT ARM tab will be shown as default, along with its RIGHT CONTROLLER tab.
2. Click on the “Add” button for each product you need. See Figure 15.


