background image

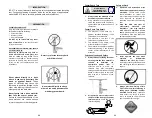
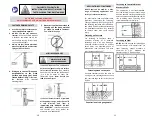
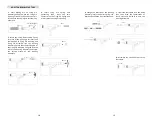
NOTE: Use of partially used
load strips.

If you want to use a partially fired load
strip, the end of the strip containing
the live loads should be placed into
the bottom of the tool handle. Count
the number of unfired loads in the
strip before inserting it and keep a
count as the fastenings are being
made, you can easily determine when
all the loads have been used.

13

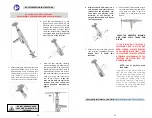
6.

Check the tool frequently to ensure
that the muzzle bushing and loads
strip track are clear, if you are
working at a site with dirt and
debris.

CHECK THE NOSEPIECE BUSHING

AND LOAD STRIP TRACK FOR
DEBRIS

IF YOU DECIDE NOT TO MAKE A
FASTENING AFTER THE TOOL HAS
BEEN LOADED, ALWAYS REMOVE
THE POWDER LOADS FIRST, THEN
THE FASTENER. THIS WILL PREVENT
ACCIDENTAL DISCHARGING OF THE
FASTENER OR PISTON INTO THE
OPERATION HAND.

Please watch the videos on our website: 

http://bpfasteners.com/licensing/video

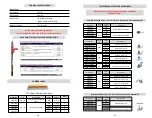
5.

After all 10 shots are fired, pull the
load strip from the

TOP

of the tool.

NEVER

PULL

IT

FROM

THE

BOTTOM.

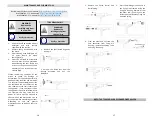
4.

After one shot is fired, point it in a
safe direction and insert the next
fastener into the Nosepiece, and
then press the Advance Lever
Assembly

of

the

housing

to

advance the next load, and repeat
the firing operation.

BP-27C OPERATING INSTRUCTIONS

12

BP-27C IS NOT A STAND-ALONE TOOL.

IT MUST ALWAYS BE USED MOUNTED ON A BLUE POINT POLE.

DO NOT USE EXCESSIVE 

FORCE WHILE INSERTING A 

FASTENER

3.

Raise the tool upwards carefully
without bumping any other object
and gently place it on the ceiling
where you want to fasten. Hold it
perpendicular to the work surface
and push upwards to compress the
firing pin spring and release the
sear to fire the tool.

If the tool

does not fire, hold the tool for 30
seconds and then follow the
misfire procedure described on
page 10.

2.

With the tool pointing in a safe
direction and your fingers off the
Advance Lever, insert the strip load
through the bottom of the handle
and push through until your fingers
touch the handle recess.

Never try

to insert a load strip into the tool
from the top of the receiver.

1.

After checking to make sure that the
tool is not loaded, point it in a safe
direction and insert a fastener into
the

Nosepiece of the tool until it is

fully seated. If a clip assembly is
being used, be sure it is positioned in
the cutout section of the Spall Guard.

Содержание BP-27C

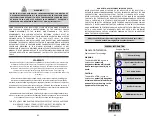
Страница 1: ...ING DO NOT OPERATE THE TOOL UNTIL YOU HAVE READ THIS TOOL TRAINING MANUAL AND EDUCATION HAS BEEN RECEIVED ACCORDING TO ANSI STANDARD A 10 3 1995 READING AND FOLLOWING THIS INSTRUCTION MANUAL CAN HELP AVOID SERIOUS INJURY OR DEATH 01 ...

Страница 2: ...S REGARDING THE USE OF POWDER ACTUATED TOOLS MAY PERIODICALLY BE REVISED WITHOUT NOTICE ANY SUCH REVISIONS MAY CHANGE THE SAFETY AND OPERATING PROCEDURES DESCRIBED IN THIS MANUAL BLUEPOINT FASTENERS IS NOT RESPONSIBLE FOR ANY SUCH REVISIONS WHICH OCCUR AFTER PUBLICATION OF THIS MANUAL IT IS THE RESPONSIBILITY OF THE USER TO MAINTAIN ALL KNOWLEDGE OF THE LAWS REGULATIONS AND STANDARDS THAT APPLY TO...

Страница 3: ...sted in the individual sections 2 Use as recommended The tool is designed for use only by professionals in the construction industry for fastening applications where fasteners or composite fasteners are driven into steel concrete 3 Inappropriate use Modification or manipulation of the tool is not permitted Unless the tool is approved for such use it should not be used in a flammable or an explosiv...

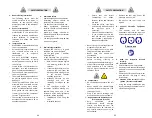
Страница 4: ...oaded tool around or play with the tool 9 Never allow untrained persons to operate the tool 10 Using or cleaning tools or handling loads in poorly ventilated areas may result in exposure to lead and other substances known to cause birth defects and physical changes Always ensure adequate ventilation at all times and wash thoroughly after exposure 6 Always unload the tool and store it along with th...

Страница 5: ...er against the work surface and check the results 1 Operators and bystanders must always wear approved ear and eye protection Failure to do so can cause blindness or serious eye injury from debris and hearing loss from exposure to constant or repeated noise from the fastening tool 2 Keep the work area clear of unnecessary materials and bystanders that may interfere with the safe operation of the t...

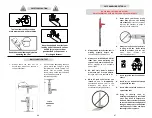
Страница 6: ... fastening always maintain a minimum of 1 1 2 between the fasteners and 1 2 from any edge 11 FAILURE TO FOLLOW THESE INSTRUCTIONS CAN RESULT IN INJURY TO THE TOOL OPERATOR OR BYSTANDERS 10 5 Never drive a fastener close to the edge of the base material or close to another fastener See installation page MISFIRE PROCEDURE If the tool does not fire continue to hold the tool against the work surface f...

Страница 7: ...the next fastener into the Nosepiece and then press the Advance Lever Assembly of the housing to advance the next load and repeat the firing operation BP 27C OPERATING INSTRUCTIONS 12 BP 27C IS NOT A STAND ALONE TOOL IT MUST ALWAYS BE USED MOUNTED ON A BLUE POINT POLE DO NOT USE EXCESSIVE FORCE WHILE INSERTING A FASTENER 3 Raise the tool upwards carefully without bumping any other object and gentl...

Страница 8: ...1 4 PDAC120 25F10 1 With 120 angle clip PDAC120 32F10 1 1 4 PDACTH90 22F10 7 8 With Top hat and 90 angle clip PD157 100C90 157 1 With 90 angle clip PD157 114C90 1 1 4 PD157 100C120 1 With 120 angle clip PD157 114C120 1 1 4 PD157 78THC90 7 8 With Top hat and 90 angle clip PD157 78HNC 157 7 8 With Top hat and Ninja clip PD157 100HNC 1 PD157 114HNC 1 1 4 Model No Shank Dia Shank Length Description CC...

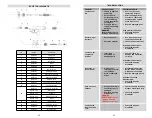
Страница 9: ...r this may cause loss of power All parts must be cleaned as above with oil and brushes Be sure to dry all parts when assembling your tool Depending on tool use general maintenance has to be done every six months Use Eye Protection TOOL DISASSEMBLY WARNING Remove the cartridge strip from the tool first Use Eye Protection 1 Remove the Spall Guard by gently pulling it 2 Unscrew the Guide Nut from the...

Страница 10: ...onnector on the Firing Pin Spring and screw it onto the Firing Pin Housing 2 Insert the Firing Pin Assembly Spring into rear of the Housing Next insert the combination of Firing Pin Housing and Firing Pin Assembly into the Housing Assembly Ensure that the Braking Pin of the Firing Pin Assembly is aligned into the slot of the Housing Assembly and screw the Locking Sleeve on the Housing Assembly 1 P...

Страница 11: ...amaged piston Disassemble and clean Barrel Piston Fastener Guide and re assemble Replace damaged piston If the tool cannot be disassembled Contact Bluepoint distributor Strip does not advance Strip not inserted in tool correctly or is damaged Damaged indexing mechanism WARNING Never attempt to pry a cartridge from the magazine strip or tool Check load strip Properly dispose of damaged strip Contac...

Страница 12: ...23 NOTES 22 NOTES ...

Страница 13: ...with your hand 4 Never point the tool at yourself or bystanders 5 Only adults that are certified and qualified may operate the BP 27C tool 6 Always unload the tool prior to cleaning or maintenance 7 Do not operate the tool in an explosive or flammable atmosphere 8 When fastening if the cartridge does not fire hold the tool in place for at least 30 seconds 9 When advancing an unfired cartridge alwa...

Отзывы: