24
BA
05/2019
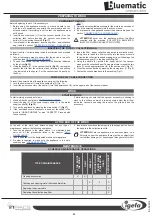
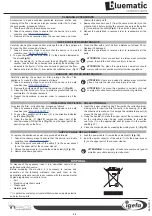
To dispose of the appliance, take it to a demolition centre or an
authorised collection centre.
Before scrapping the machine, it is necessary to remove and
separate out the following materials, then send them to the
appropriate collection centres in accordance with the environmental
hygiene regulations currently in force:
•
Felt
• Electric and electronic parts*
• Plastic parts
•
Metallic parts
(*) In particular, contact your local distributor when scrapping electric
and electronic parts.
DISPOSAL
Accessories in a good condition guarantee improved suction and
cleaning of the floor, as well as a longer vacuum motor life. To clean
the accessories, proceed as follows:
1. Take the machine to the maintenance area.
2. Take all necessary steps to ensure that the device is in a safe
condition (see “
MACHINE SAFETY
”).
3. Remove all the accessories from the vacuum hose and clean
CLEANING ACCESSORIES
them with a damp cloth.
4.
Remove the vacuum hose (1) from the vacuum nozzle (2) on the
collection tank, before pulling the vacuum hose press the button
(3) for unlocking the catch
(Fig.3)
. Clean it with a damp cloth.
5. Repeat the operations in reverse order to reassemble all the
parts.
Carefully cleaning the intake air filter prolongs the life of the appliance.
To clean the filter, proceed as follows:
1. Take all necessary steps to ensure that the device is in a safe
condition (see “
MACHINE SAFETY
’”).
2.
To open the aspirator pull the lever (2) in the direction indicated by
the arrow
(Fig.12)
.
3.
Using the handle (3), in the vacuum tank lid
(Fig.13)
, remove the
vacuum tank lid from the collection tank (rotating it and shifting it as
indicated in the figure). Put the vacuum tank lid gently on the floor.
4.
Remove the inlet air filter (1) from inside the collection drum (Fig.19)
INLET AIR FILTERS MAINTENANCE
5.
Clean the filter with a jet of air from a distance of at least 20 cm.
Replace it if damaged.
6. Repeat the operations in reverse order to reassemble all the
parts.
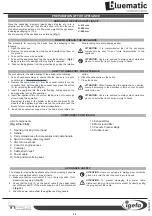
ATTENTION:
Users are advised to always wear protective
gloves, to avoid the risk of serious injury to hands
.
ATTENTION:
The place this operation is carried out should
comply with current environmental protection regulations.
Carefully cleaning the exhaust air filter prolongs the life of the
appliance. To clean the filter, proceed as follows:
1. Take all necessary steps to ensure that the device is in a safe
condition (see "
MACHINE SAFETY
”).
2.
Remove the outgoing air filter from the appliance (1)
(Fig.20)
.
3.
Clean the filter with a jet of air, at a distance greater than twenty
centimeters. If damaged replace it.
4. Repeat the operations in reverse order to reassemble all the
parts.
EXHAUST AIR FILTER MAINTENANCE
ATTENTION:
Users are advised to always wear protective
gloves, to avoid the risk of serious injury to hands
.
ATTENTION:
The place this operation is carried out should
comply with current environmental protection regulations.
To replace the filter - collection bag, proceed as follows:
1. Take all necessary steps to ensure that the device is in a safe
condition (see "
MACHINE SAFETY
”).
2.
To open the aspirator pull the lever (2) in the direction indicated
by the arrow
(Fig.12)
.
3.
Using the handle (3)
(Fig.13)
remove the upper part of the
vacuum cleaner; (Tilting it as in
(Fig.13)
. Lay the upper part of the
aspirator gently on the floor
REPLACING THE FILTER – COLLECTION BAG
4.
Insert the paper collection bag filter inside the collection drum,
making sure to insert the filter correctly in its housing (4), inside
the collection drum and not to damage the cardboard support (6)
present in the bag (5) (Fig.14)..
5.
Using the handle (3), place the upper part of the vacuum cleaner
on the collection barrel. Paying great attention to insert the
two forks (7) on the appropriate seat (8) present in the suction
shaft(Fig.13)
6.
Close the suction device by pressing the closing lever (2)
(Fig.15)
SUPPLY CABLE REPLACEMENT
To replace the appliance’s power cord, proceed as follows:
1. Take all necessary steps to ensure that the device is in a safe
condition (see “
MACHINE SAFETY
”).
2.
Extract the quick connector of the cable (1) in the power socket
(2) on the upper part of the vacuum cleaner.
3.
Unlock the power cable (1) inside the cable holder(3)
(Fig. 16)
4. Remove the damaged cable.
5.
Lock the power cable (1) inside the cable stop(3)
(Fig. 16)
6.
Insert the quick connector of the cable (1) into the power socket
(2) on the upper part of the vacuum cleaner.
ATTENZIONE:
Si consiglia di indossare sempre dei guanti
protettivi per evitare lesioni gravi alle mani.
Содержание CUBE
Страница 2: ...2 BA 05 2019 DEUTSCH 4 ENGLISH 15 FRANÇAIS 26 ITALIAN 38 ESPAÑOL 49 ...
Страница 61: ...61 BA 05 2019 Notizen ...
Страница 62: ...62 BA 05 2019 Notizen ...

