background image

SOUND

START

POWER

NETWORK

CoNNECt to PowER

2

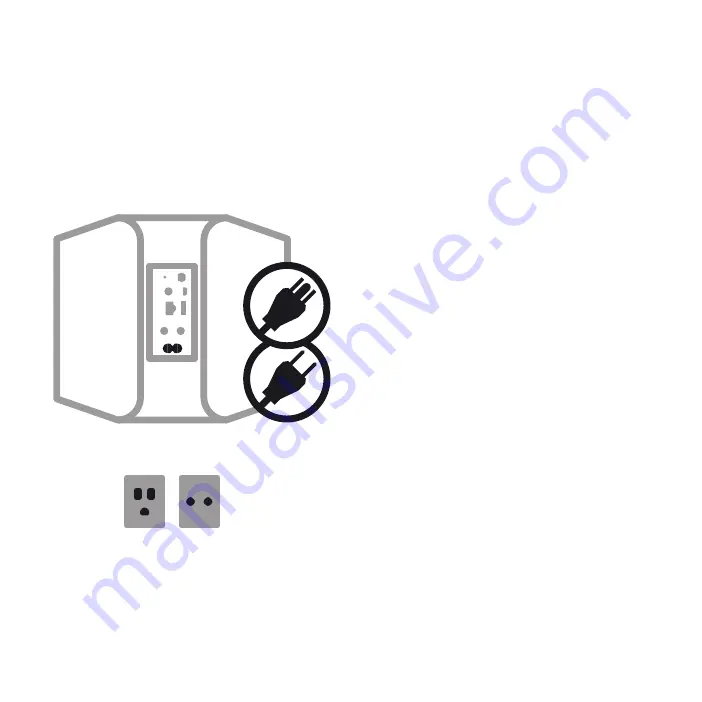
A  Select the AC Power Cord appropriate for your  

  region and plug it into the unit, and then into  

  your wall outlet.

  Never force a power cord into a wall outlet.  

  An adaptor may be necessary in certain regions.  

C 25

M 10

Y 0

K 100

C 0

M 0

Y 0

K 45

_5

Содержание N100

Страница 1: ...bluesound com Quick Setup Guide ...

Страница 2: ...Included Accessories Stereo RCA to RCA Cable 2m 3 5mm Stereo Mini Plug to RCA Cable 2m 120V AC Power Cord 230V AC Power Cord Ethernet Cable 2m ...

Страница 3: ...English 4 Français 8 Español 9 Italiano 10 Português 11 Deutsch 12 Nederlands 13 Svenska 14 Pусский 15 N100 Wireless Streaming Music Player ...

Страница 4: ...r existing stereo amplifier or home theatre receiver B Alternatively using the Mini Plug to RCA cable provided connect the Node directly to your computer dock player or bookshelf system A digital optical cable not included can also be used to connect the Node to equipment with a digital optical input 4_ ...

Страница 5: ...power 2 A Select the AC Power Cord appropriate for your region and plug it into the unit and then into your wall outlet Never force a power cord into a wall outlet An adaptor may be necessary in certain regions _5 ...

Страница 6: ...network from the Configure Wireless drop down menu E Enter your home network s Wireless Password in the field provided if it is a protected network F Select a Room Name from the drop down list or create a customized room name in the field provided G Select Update and wait for the unit s light to turn solid blue H Repeat steps A G for each additional Bluesound device Alternatively the Node can be c...

Страница 7: ... Launch the App Select TuneIn from the Music Sources menu home icon and select your favorite radio station from anywhere on the planet Live To play music stored on a computer or NAS device select the Settings icon gear shaped choose Configure Player from the pop up menu and select Configure Network Shares Follow the screen prompts and open your whole home to the pleasure of streaming HiFi music Fo...

Страница 8: ...ervé à cet effet Wireless Password si le réseau est protégé CONNEXION WiFi suite F Sélectionnez un nom de pièce Room Name dans le menu déroulant ou créez un nom de pièce personnalisé dans le champ prévu à cet effet G Sélectionnez Update Mise à jour et attendez que le voyant de l appareil demeure allumé en bleu H Répétez les étapes A à G pour tous les autres appareils Bluesound Le Node peut aussi ê...

Страница 9: ...nalámbrica en el campo Wireless Password Contraseña de red inalámbrica indicado CONEXIÓN A LA RED WiFi continuación F Seleccione un Room Name Nombre de sala de la lista desplegable o cree un nombre de sala personalizado en el campo indicado G Seleccione Update Actualizar y espere a que la luz de la unidad cambie a azul sólido H Repita los pasos A a G para cada dispositivo Bluesound O bien el Node ...

Страница 10: ...rete wireless della propria rete domestica nel campo apposito F Selezionare un Room Name nome della stanza dal menu a discesa oppure creare un nome personalizzato per la stanza nel campo apposito CONNESSIONE A WiFi continuazione G Selezionare Update aggiornamento e attendere fino a quando la spia dell unità non si illumina di luce blu continua H Ripetere le operazioni da A a G per ciascun disposit...

Страница 11: ...stica no campo fornecido no caso de ser uma rede protegida LIGAÇÃO A Wi Fi continuação F Seleccione um Room Name Nome de Divisão a partir da lista pendente ou crie um nome de divisão personalizado no campo fornecido G Seleccione Update Actualizar e aguarde que o indicador luminoso da unidade acenda a azul H Repita os passos A G para cada dispositivo Bluesound adicional Em alternativa pode ligar o ...

Страница 12: ...ngen konfigurieren das Heimnetzwerk aus E Wenn es sich um ein kennwortgeschütztes Netzwerk handelt geben Sie im entsprechenden Feld das Wireless Kennwort ein F Wählen Sie im Dropdown Menü Raumnamen einen der Namen aus oder geben Sie in das Feld einen neuen Raumnamen ein WLAN VERBINDUNG Fortsetzung G Wählen Sie Aktualisieren und warten Sie bis die Geräteanzeige blau aufleuchtet H Wiederholen Sie di...

Страница 13: ...werk uit het snelmenu Draadloos Configureren E Voer het Draadloze Wachtwoord in in het beschikbare veld als het een beveiligd netwerk is F Selecteer Kamernaam uit de snelkeuzelijst of maak speciaal een kamernaam aan in het beschikbare veld AANSLUITEN OP WIFI vervolg G Selecteer Bijwerken en wacht tot het lampje van de unit blauw blijft branden H Herhaal stappen A G voor elk Bluesound toestel dat u...

Страница 14: ...figurera Trådlöst nätverk E Mata in ditt nätverks lösenord för det trådlösa nätverketi fältet om det är ett skyddat nätverk F Välj ett rumsnamn i i rullgardinsmenyn eller skapa egna rumsnamn i fältet G Välj uppdatera och vänta på att enhetens lampa lyser stadigt blått ANSLUT TILL ETT TRÅDLÖST NÄTVERK fortsättning H Repetera steg A G för varje ytterliggare Bluesound enhet Alternativt kan Node anslu...

Страница 15: ...роводной сети если ваша домашняя сеть защищена паролем F Выберите Room Name название помещения из выпадающего списка или введите другое название помещения в соответствующее поле ПОДКЛЮЧЕНИЕ К WiFi продолж G Нажмите Update Обновить и подождите пока лампочка на устройстве не загорится синим светом H Повторите шаги A G для каждого дополнительного устройства Bluesound Также Node можно прямо подключить...

Страница 16: ...hrase HiFi for a wireless generation NODE and all other Bluesound product names and taglines are trademarks or registered trademarks of Bluesound International a division of Lenbrook Industries Limited All other logos and services are trademarks or service marks of their respective owners ...

Отзывы: