P a g e
|
13
S
ET THE CORRECT OUTPUT PATH
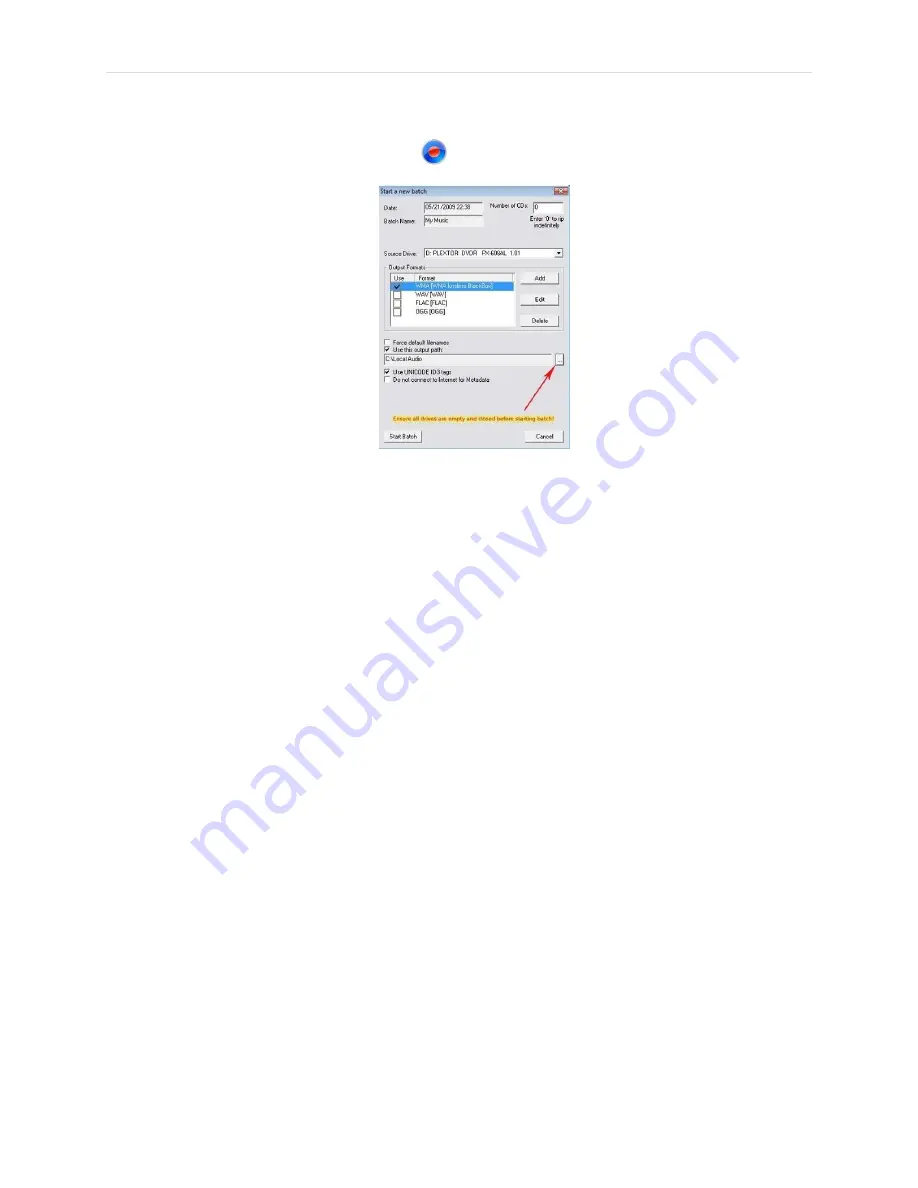
In the main screen, click the New Batch icon. The Batch Properties dialog box will open.
You will see that the default Output Path is C:\Local Audio. Change this to the folder where you are
storing your music files. For most users, this will be on a NAS.
To change the output path, click on the Browse button (see red arrow in figure above) and navigate to
the correct folder. Look under “Network” for the name of your NAS.
Under the name of your NAS, you should find the folder you created to store your music files. Click on
this folder and click "OK". Your output path should look like this:
\\NASname\Musicfoldername
(
with our suggested names
: \\BlueSmokeServer\Music)
R
IP A
CD
1.
DO NOT insert the CD quite yet!
2.
Click "Start Batch" on the bottom left of the dialog box.
3.
Insert CD.
4.
The program first searches the Internet for album information, then displays the ripping progress.
Once finished ripping, the CD will automatically eject. You can continue to feed new discs into The
Black Box™ until you have fed it all the discs you want ripped during a session.
We recommend that you rip just a few CDs at this time to familiarize yourself with the process.
5.
When done ripping your CDs, select "Cancel Batch" to end your session.
6.
You can exit BitPerfect™ Ripper by clicking on the red "X" in the upper right corner.
Once you get the hang of it, there are options to learn, such as choosing different output formats. For
more detailed instructions, look in the Help file of the BitPerfect™ Ripper program.


