9
Owner’s manual and assembly instructions: model 153110 natural gas outdoor patio heater 12/4/02
Contact 1-800-762-1142 for assistance.
Do not return to place of purchase.
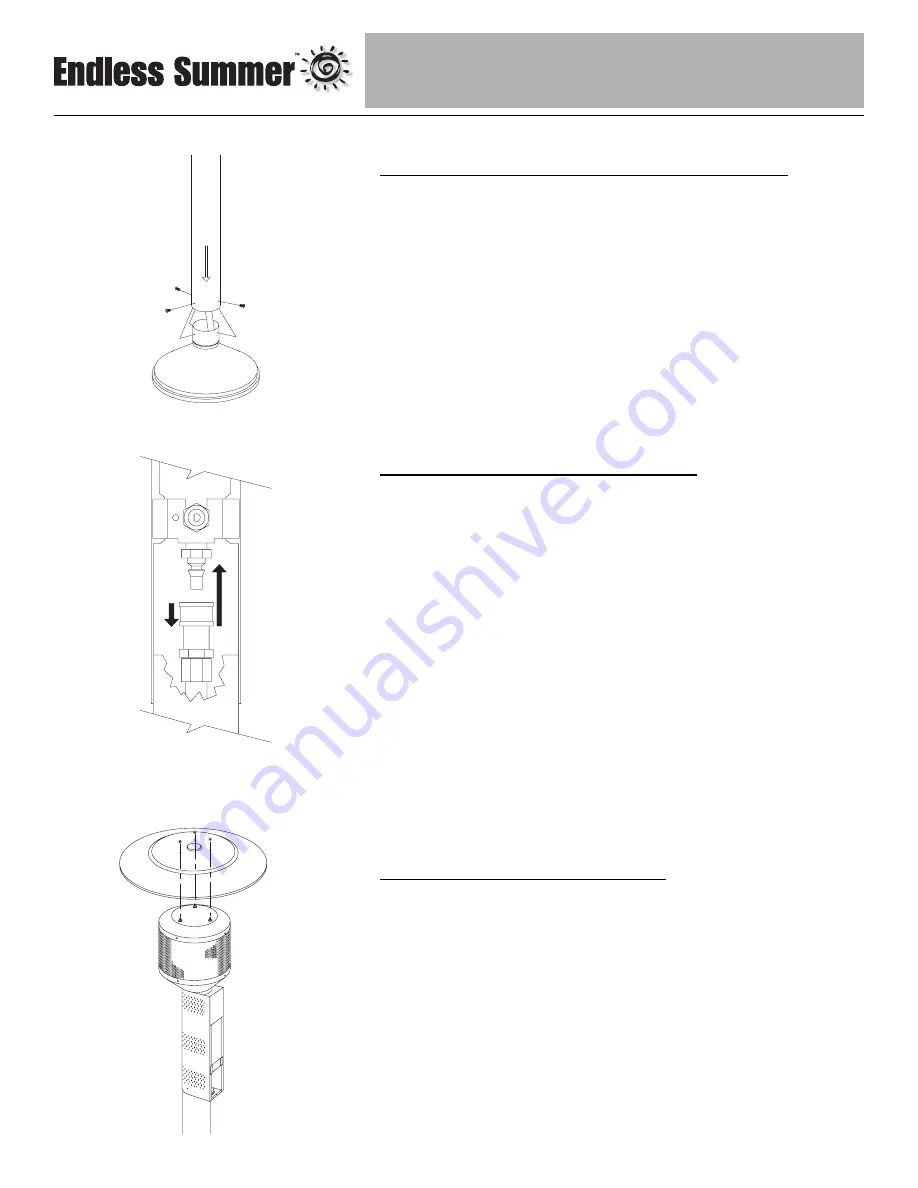
Step 8 – Connect Engine/Post Assembly to Cap
• Insert end of Post with (4) holes not threaded over Gas Line
• Line up Post holes with threaded Cap holes.
• Loosely Secure Post to Cap, using (4) Medium Screws, fully tighten
screws in Step 9.
Step 9 – Connect Gas Line to Engine
• To attach Gas Line to Control Valve:
• Pull collar of Gas Line down.
• Insert Gas Line over Control Valve.
• Release Gas Line Collar and it should lock in place. (Tip – push
Gas Line up from bottom of Post to make a good seating before
releasing Collar.)
• Gently tug on line to test for proper connection. If Gas Line moves
you are not properly connected.Do not proceed until a proper
connection has been made.
• After gas line is secure, fully tighten (4) screws from Step 8.
Step 10 – Attach Dome to Emitter
• Gently lay heater on its side
Tip: Use styrofoam end to prop up top half of heater.
• Align holes in Dome with Emitter Studs.
• Secure Dome to Emitter using (3) Cap Nuts.
• Leave heater on its side for next step.


