background image

BATTERY INSTALLATION

By using the provided remote control unit the V 120  can be 
controlled from your listening position. To use the remote
control unit, point it at the REMOTE SENSOR window of the 
V120.

Notes:
-Even if the remote control unit is operated within the 
effective range, remote control operation may be impossible if 
there are any obstacles between the unit and the remote 
control.
-If the remote control unit is operated near other appliance
which generate infrared rays, or if other remote control
devices using infrared rays are used near the unit, it may 
operate incorrectly.

Precautions concerning batteries
-Be sure to insert the batteries with correct p and
 negative - polarities.
-Use batteries of the same type. Never use different types of
batteries together.
- Rechargeable and non-rechargeable batteries can be used.
Refer to the precautions on their labels.
-When the remote control unit is not to be used for a long 
time(more than a month), remove the batteries from the 
remote control unit to prevent them from leaking. If the leak,
wipe away the liquid inside the battery compartment and 
replace the batteries with new ones.
-Do not heat or disassemble batteries and never dispose of 
old batteries by throwing them in a fire.

REMOTE CONTROL OPERATION RANGE

Use the remote control unit within a range of about 7
 meters and the angles of up to 30 degrees aiming at
 the remote sensor.  

REMOTE  CONTROL  

P15

1.  Remove the battery compartment cover.

2.  Insert two "AAA" dry batteries.

Make sure that the batteries are inserted with their

positive "+" and negative "-" poles positioned correctly.

3. Close the cover until it clicks.

If the distance required between the remote control unit and

main unit decreases, the batteries are exhausted. In this case,

replace the batteries with new one.

Содержание V 120

Страница 1: ...eo Amplifier V 120 Instruction Manual 1 11 12 21 Hi Fi Stereo Amplifier V 120 V 120 HI FI Stereo Amplifier Balance L R Volume Treble Bass Standby Tone Phono CD Tuner Aux Input Line In Headphone Line In Speaker On ...

Страница 2: ...V 120 8 9 10 5 6 7 11 Amplifier ...

Страница 3: ......

Страница 4: ......

Страница 5: ...ten Sie das Gerät fern von Feuchtigkeit Achten Sie darauf dass keine Gegenstände ins Gerät fallen Nehmen Sie das Gerät vom Netz wenn es lange Zeit nicht genutzt wird Achten Sie darauf dass keine Sprays oder Chemie an Ihr Gerät kommen Achten Sie darauf dass Ihr Gerät nicht abgedeckt wird Achten Sie darauf dass das Gerät nur von autorisierten Personen geöffnet wird ...

Страница 6: ...das die Bedienung beeinträchtigen Wenn Sie andere Fernbedienungen oder Sender in der Nähe benutzen kann das ebenfalls zu Störungen führen Achten Sie darauf dass Sie die Batterien richtig einlegen Polarisierung plus zu minus zu Benutzen Sie zwei gleiche Alkali Batterien Aufladbare Batterien können benutzt werden wir raten jedoch davon ab Entfernen Sie die Batterien wenn die Fernbedienung längere Ze...

Страница 7: ...en wie Bass Hochton Balance und Reset vornehmen 2 Lautstärke 3 Standby 4 Eingangswahl Schalter 5 Mute 6 Lautstärke CD STANDBY RADIO STANDBY AMP STANDBY SPK A B SPK A B IR100 INFO MEMORY P MODE F SCAN STEREO MONO AM PR PR FM INFO R100 AUTO AUTO FUNCTION INPUT 1 2 3 4 5 6 DAB Bedienung R 100 ...

Страница 8: ...Die Lampe leuchtet rot wenn das Gerät ausgeschaltet ist Balance Regler 8 A B und A B zu wählen ACHTUNG Bitte achten Sie darauf dass bei der Schaltung A B nur Lautsprecher mit der Impedanz von 8 Ohm benutzt werden Das Benutzen von Lautsprechern unter 8 Ohm kann zu Schäden an der Endstufe führen und führt zum Verlust der Garantie 9 Eingangswahl Schalter 10 Standby Taste Mit dieser Taste können sie d...

Страница 9: ...l ab 3 Netzkabelanschluss Gehen Sie sicher dass das Netzkabel nicht beschädigt wird 4 Warnhinweise Die Schilder zeigen an dass es um hohe Spannungen geht näheres auf Seite 2 5 Lautsprecherausgang A Achten sie darauf dass am Lautsprecher sowie am Gerät übereinstimmen Lautsprecherausgang B Achten sie darauf dass am Lautsprecher sowie am Gerät übereinstimmen 6 7 Pre Amp Signal Ein Ausgang mit einer B...

Страница 10: ...B A A B Main In Main In S 9 CONTROL P t r c e e s l s e t s o R 100 AM FM RDS PLL Tuner CD Spieler Radio Andere Audio Quellen ...

Страница 11: ...S 10 ...

Страница 12: ...o 5mV MM 0 2mV MC Line in CD Tuner Aux 300mV Ausgangsleistung 2 x 120 watts RMS Tone Kontrolle Treble 6dB Bass 6dB Frequenzgang 10Hz to 30KHz Verzerrung Less than 0 05 Signal noise ratio A weighted 88dB Netzteil Leistungsaufnahme AC 230V 50Hz 450W ...

Страница 13: ...ongratulations on purchasing this V 120 Amplifier It has been developed following an extensive research and development program that has culminated in what we regard as an exceptional hi fi product We trust that this amplifier will give you hours of listening pleasure and provide years of unparalleled performance Please do not operate this product at high volume levels immediately after switching ...

Страница 14: ...quipment that produces heat Protect the mains power cable from being damaged The lightning flash symbol with the arrowhead within an equilateral triangle is intended to alert the user to the presence of uninsulated dangerous voltage within the product s enclosure that may be sufficient to constitute a risk of electric shock to persons The exclamation point within an equilateral triangle is intende...

Страница 15: ...SAFETY INSTRUCTIONS Notes On Use P14 ...

Страница 16: ... and non rechargeable batteries can be used Refer to the precautions on their labels When the remote control unit is not to be used for a long time more than a month remove the batteries from the remote control unit to prevent them from leaking If the leak wipe away the liquid inside the battery compartment and replace the batteries with new ones Do not heat or disassemble batteries and never disp...

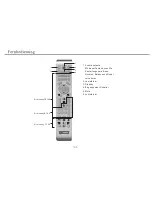
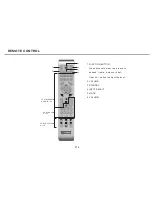
Страница 17: ...N STEREO MONO AM PR PR FM INFO R100 AUTO AUTO FUNCTION INPUT 1 2 3 4 5 6 FOR INTERNET RADIO IR 100 REMOTE CONTROL 1 FUNCTION BUTTON Allows access to menu features such as bass treble balance reset Use vol button to adjust the level 2 VOLUME 3 STANDBY 4 INPUT SELECT 5 MUTE 6 VOLUME P16 DAB FOR TUNER R 100 ...

Страница 18: ...WITCH LED INDICATOR it will turn on in red color when the unit is in standby mode 8 please confirm that the impedance of the speaker must be at least 8 ohms before you select speaker output to a b do not select to a b If the impedance of the speaker less than 8ohms 9 INPUT SELECTION KNOB 10 STANDBY BUTTON Press this button to turn to standby mode press again return to normal mode If no signal inpu...

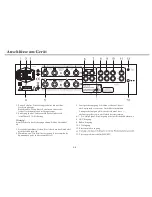
Страница 19: ... high voltages and should not be opened please refer to page 2 of this manual 5 LOUDSPEAKER A OUTPUTS Please ensure that connections are made properly between rear of the amplifier and loudspeakers Ensure wires are not frayed or touching LOUDSPEAKER B OUTPUTS Please ensure that connections are made properly between rear of the amplifier and loudspeakers Ensure wires are not frayed or touching 6 7 ...

Страница 20: ...MAKING THE CONNECTIONS P19 B A A B Main In Main In CONTROL P t r c e e s l s e t s o R 100 AM FM RDS PLL Tuner CD Player Radio Other audio device ...

Страница 21: ...TROUBLE AND SHOOTING P20 CARE AND MAINTENANCE ...

Страница 22: ...ECIFICATIONS Input sensitivity Phono 5mV MM 0 2mV MC Line in CD Tuner Aux 300mV Power output 2 x 120 watts RMS Tone control attenuation Treble 6dB Bass 6dB Frequency response 10Hz to 30KHz Distortion Less than 0 05 Signal noise ratio A weighted More than 88dB Voltage Power consumption AC 230V 50Hz Max 450W ...

Страница 23: ......

Отзывы: