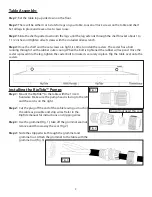
Table Assembly:
Step 1:
Set the table top upside down on the floor.
Step 2:
There will be either 4 or 6 slots for legs on your table. Loosen all lock screws on the table and shelf.
Set all legs in place and leave all set screws loose.
Step 3:
Slide the shelf upside down onto the legs until the leg extends through the shelf bracket about 1 to
1 1/2 inches and tighten all set screws with the included allen wrench.
Step 4:
Once the shelf and the set screws are tight, it’s time to install the casters. The caster has a bolt
running through it with a rubber outer casing. When the bolt is tightened the rubber will expand. Once the
caster is placed into the leg, tighten the caster bolt to insure its securely in place. Flip the table over onto the
casters.
Installing the RipTide™ Pumps
Step 1:
Step 2:
Step 3:
Step 4:
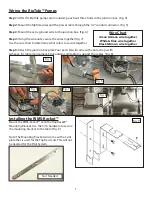
Mount the RipTide™ to the table with the 1/4-20
hardware. Make sure the pump head is facing to the left
and the cord is on the right.
Cut the plug off the end of the cable leaving as much of
the cable as possible and strip wires. Refer to the
RipTide manual for instructions on stripping wires.
Use the grommet (Fig. 1), take off the grommet seal nut,
remove and throw away the seal (Fig. 2).
Slide the stripped wire through the grommet and
grommet nut. Attach the grommet to the table with the
grommet nut (Fig. 3)
Fig. 1
You will not need this seal
Fig. 2
Fig. 3
2
Содержание Pro Series
Страница 7: ...7 ...
Страница 8: ...8 ...
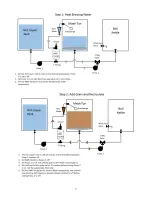
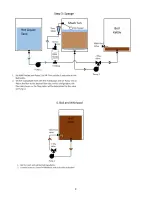
Страница 9: ...9 ...
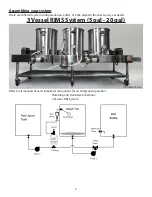
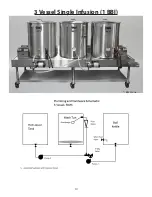
Страница 10: ...3 Vessel Single Infusion 1 BBl 10 1 BBL Shown ...
Страница 11: ...11 ...
Страница 12: ...12 ...
Страница 13: ...13 ...
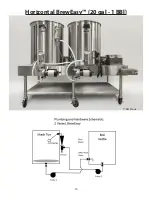
Страница 14: ...Horizontal BrewEasy 20 gal 1 BBl 14 1 BBL Shown ...
Страница 15: ...15 ...
Страница 16: ...16 ...
Страница 17: ...17 ...

