background image


3


Product Features 


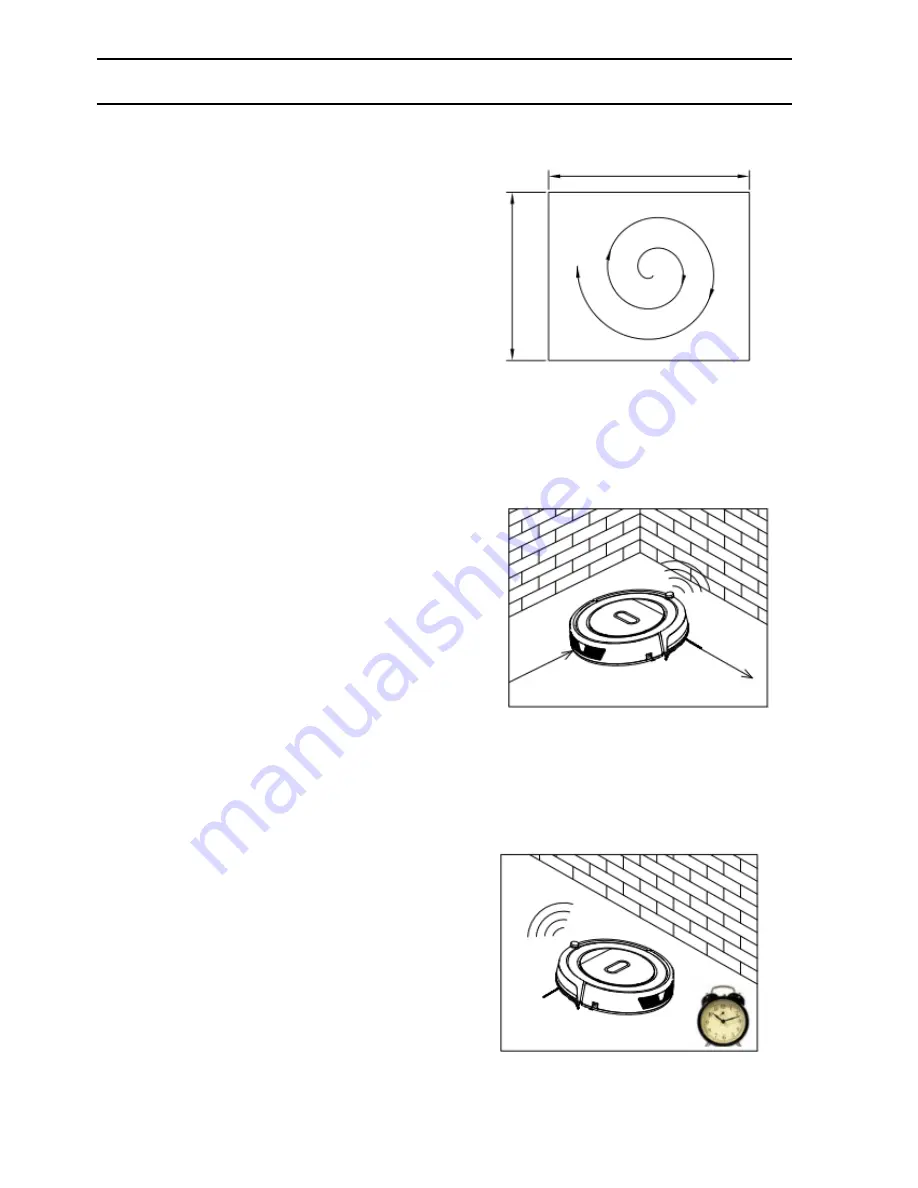
2. Spot cleaning mode


When using suction kit, the robot will clean intensively 

  in a spiral way while it detects a very dirty area.   


3. Edge cleaning mode 

In this mode, the robot will clean along the wall or obstacles.   


4. Scheduling mode 

After scheduled, the robot will leave charging Station and start working at scheduled time. 


Содержание Bluebot

Страница 1: ...Robotic Vacuum Cleaner Mop Blaupunkt Bluebot User Manual Please keep this user manual in your sight read it thoroughly and carefully before using this product ...

Страница 2: ...arting Up Standby Sleep Power Off 10 Scheduling 10 Cleaning Modes 12 Water Tank and Mopping Cloth Usage 14 Product Maintenance 15 Cleaning Side Brushes 15 Cleaning Dust Bin and Filters 15 Cleaning Sensors and Wheels 16 Cleaning Charging Poles 16 Cleaning Suction Passage and Dust Sensor 16 Cleaning Roller Brush Kit 17 Troubleshooting for Error Code for Sensors 18 Troubleshooting for Motors 20 Produ...

Страница 3: ...ord with heavy or sharp objects 12 Do not sit on top of this product or attach an object on the top of it Beware of children or pets while the product is in operation mode 13 Do not place this product where it is easy to drop off tables chairs etc 14 Turn off the power switch during product transportation or when you don t need to use this product for a long time 15 Before charging check the adapt...

Страница 4: ...ction power when different floor environments are detected This ability not only makes cleaning more efficient but also helps to save more power up to 30 User Friendly Design Operation is greatly simplified Touch the button and you could start the robot Washable Dust bin Dust bin and filters can be washed by water Simply wash dust bin under water after use to avoid dust blowing in the air to cause...

Страница 5: ...obot will clean intensively in a spiral way while it detects a very dirty area 3 Edge cleaning mode In this mode the robot will clean along the wall or obstacles 4 Scheduling mode After scheduled the robot will leave charging Station and start working at scheduled time ...

Страница 6: ...NO Description Quantity 1 Main Body 1 2 Charging Station 1 3 Adapter 1 4 Remote Control battery not included 1 5 Water Tank and Mopping Cloth each one piece 1 6 HEPA Filter 1 7 Cleaning Brush 1 8 Side Brushes 2 and Spare Brushes 2 4 9 User Manual 1 ...

Страница 7: ...in Body Diagram Power Switch LED display Touch key Roller brush component Bumper strip Suction component Left side brush Bottom cover Right wheel Charging socket Right side brush Left wheel Battery cover Universal wheel Auto charging pole Dust bin ...

Страница 8: ... Components Dust Bin Kit Roller Brush Kit HEPA filter Primary filter Dust bin Roller brush coverplate Handle Roller brush bushing HEPA filter shelf Roller brush holder Ball bearing Roller brush Bearing glusheath ...

Страница 9: ...irection buttons is a blank button without any function C Remove the batteries if the remote control will be left unused for a long period D If you use the remote control near the charging station the robot may not recognize the command and may not work Charging Station Remote Control Top cover Charging poles Charging socket Power indicator ...

Страница 10: ...uling mode D Start cleaning in standby mode 3 Auto homing number increment button A Press this button to increase number in scheduling mode B In other mode press this button to start auto homing and charging mode 4 Zig zag cleaning number decrement button A Press this button to decrease number in scheduling mode B In other mode press this button to start zigzag cleaning 5 Schedule button Press thi...

Страница 11: ... on remote control to operate the robot to go back to the charging station for recharging as shown in Fig b Note a When robot is being charged LED panel will gradually show 1111 from left to right b Once charging is complete LED panel will show FULL c In the standby status the robot will broadcast voice Please charge and LED panel will show when battery power is low d In the working status the rob...

Страница 12: ... s operation It can be changed to standby mode by one of the following methods a During robot cleaning press on main body to enter standby mode b During robot cleaning press ON OFF button on remote control to power off the robot C Sleep In sleep mode the robot can only be waken up from button on main body or ON OFF on remote control In order to save power you can turn the robot into sleep mode fro...

Страница 13: ...t setting will be invalid B Setting the scheduling time a In standby or charging status press and hold it for 3 seconds to start scheduling then the left two numbers on LED panel will flash press to increase hour or to decrease it b Press to enter minute setting mode the right two numbers on LED panel will flash press to increase it or to decrease it c Press gain to save the setting then press to ...

Страница 14: ...at user select spot cleaning in a very dirty area 3 Edge cleaning In cleaning mode press to enter edge cleaning mode The robot will clean along the obstacles 4 Zig zag cleaning The robot will automatically goes into zig zag cleaning when it detected it is in an open area Or press on the robot Note Press MODE button on remote control to select cleaning mode A Mode No 1111 shows on robot LED display...

Страница 15: ...placeable Just install either of them in appropriate place at the bottom of the robot as shown in the figure below the robot will bring up brilliant cleaning performance Suction component Roller brush component Left wheel Left side brush Battery cover Universal wheel Auto charging pole Right side brush Bottom cover Right wheel Charging socket ...

Страница 16: ... facing the appropriate sides and then to stick the mopping cloth on its sticking side 2 Fill water tank with water Take out rubber plug of water tank fill it with water and then put back the rubber plug tightly on its position in case of water leakage 3 Fit water tank on the robot Turnover the robot fix the water tank on the robot bottom make sure its bolts are firmly pressed into the fixing slot...

Страница 17: ...R mark on the bottom base of the robot 2 Cleaning Dust Bin and Filters Empty and clean the dust bin after each use following the steps as shown in the figures below Note a Wash the HEPA and primary filter after used for 15 30 days Max life span for HEPA and primary filter is 24 months b Reinstall the HEPA and primary filter after they are fully dry c HEPA and primary filter could be replaced if ne...

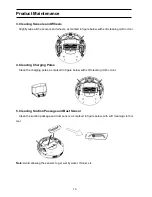
Страница 18: ...ning cloth or tool 4 Cleaning Charging Poles Clean the charging poles as marked in figure below with soft cleaning cloth or tool 5 Cleaning Suction Passage and Bust Sensor Clean the suction passage and dust sensor as marked in figure below with soft cleaning cloth or tool Note Avoid allowing the sensors to get wet by water thinner etc ...

Страница 19: ...oller Brush Take out and disassemble the roller brush kit as shown in figure below and clean it with soft cleaning cloth or tool The roller brush axle can be washed by water Note Please re install the roller brush axle after it is fully dry ...

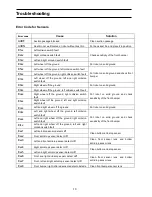
Страница 20: ...eel off the ground right collision switch fault Ebxx Right wheel off the ground left and right collision switch fault Ecxx Left and right wheel off the ground Put robot on solid ground Edxx Left and right wheel off the ground left collision switch fault Put robot on solid ground and check sensitivity of the front bumper Eexx Left and right wheel off the ground right collision switch fault Efxx Lef...

Страница 21: ...bumper sensor lens Ex2x Front bumper middle infrared sensors detect obstacle Ex3x Front bumper left and middle infrared sensors detect obstacle Ex4x Front bumper right infrared sensors detect obstacle Ex5x Front bumper left and right infrared sensors detect obstacle Ex6x Front bumper middle and right infrared sensors detect obstacle Ex7x Front bumper left middle and right infrared sensors detect o...

Страница 22: ...t side brush overloaded L0xE Right wheel left and right side brush overloaded L0xF Left and right wheel left and right side brush overloaded L02X Roller brush overloaded Note 1 There is no problem for the robot when it displays L000 2 X is the number or letter might appear on display for different fault 3 If robot displays E001 or E004 please find EXX1 or EXX4 for relative solution referred in tro...

Страница 23: ... Manual Charging Cleaning Mode Auto Spot Edge zig zag Schedule Charging Time 240 300 mins Cleaning Time 90 100 mins Main Body Button Type Touch pad LED display Battery Removal 1 Remove the screws on battery cover with a screw driver 2 Remove the battery cover 3 Grasp the insulating tape at two sides of the battery and lift the battery 4 Unplug the wire connector that links the battery and robot No...

Страница 24: ......

Отзывы: