


Installation
35
Lookup Tables (LUTs)
35
HDLink supports the use of LUTs to adjust the appearance of video on your monitor. Lookup tables can be used for
standard definition and high definition video.
1D LUTs are useful for making quick adjustments to a video image but any adjustments to color will also affect
brightness. They are often used when working with log video so that the image can be displayed on screen as
normal linear video. Built-in 1D LUTs are provided for log to linear conversion when playing video captured from
Panasonic Cinegamma
™
and Viper Filmstream
™
cameras. 1D LUTs are supported in all HDLink models.
How to use Lookup Tables in HDLink
Connect HDLink to your computer with a USB cable.
Launch the HDLink Utility from your Applications folder in Mac OS X or from Programs in Microsoft Windows.
The HDLink interface should immediately be visible and adjustable. If the interface does not appear to be “active”,
check the USB connection, try another USB cable or try another USB port and it should become active.
The lookup table interface in HDLink Utility can be adjusted using a method similar to that used for image
adjustment with the Curves feature in Adobe Photoshop
™
. The horizontal axis of each graph represents the
original color input values and the vertical axis represents the new color output values. When first opened, each
lookup table displays a straight diagonal line because the color values have not yet been changed.
Changes made to the lookup tables can immediately be seen on a monitor attached to the DVI/HDMI output of
HDLink. Changes are saved to the HDLink hardware by clicking the Download button so that you don’t need to
leave HDLink connected to your computer via USB. Lookup tables can be reset to original values by clicking the
Reset Unity button and this effectively disables the lookup tables. Click the Download button again if you wish
to save the original values.
Importing and exporting 1D LUTs
All HDLink models can import 1D LUTs. The 1D file format is any tab-delimited text file with red, green and blue
values for each record and the first line (title line) is skipped. Lookup tables need to be 1024 records long with
the first line reserved for the title line. Check out the sample 1D lookup table accompanying the HDLink software
installer. 1D lookup tables can be created in a spreadsheet program and then must be exported to a ‘tab separated’
text file prior to being imported in to HDLink Utility. Click the Load Table button to load lookup tables.
1D LUTs can also be exported from HDLink in the same text format mentioned above. Both 1D LUTs created with
the curves in the lookup table interface, and 1D LUTs imported from text files, are exported from HDLink in the
same text format. Click the Save Table button to save lookup tables.
The 1D LUT text file format is fully compatible with the following Blackmagic Design products which share the
same LUT format: HDLink Pro 3D, HDLink Optical Fiber, HDLink Pro DVI Digital, HDLink 2, HDLink, Multibridge
Eclipse, Multibridge Pro (October 2007 model), Multibridge Extreme (DVI output), DeckLink HD Extreme 2 and
DeckLink HD Pro 4:4:4 (PCI-X).
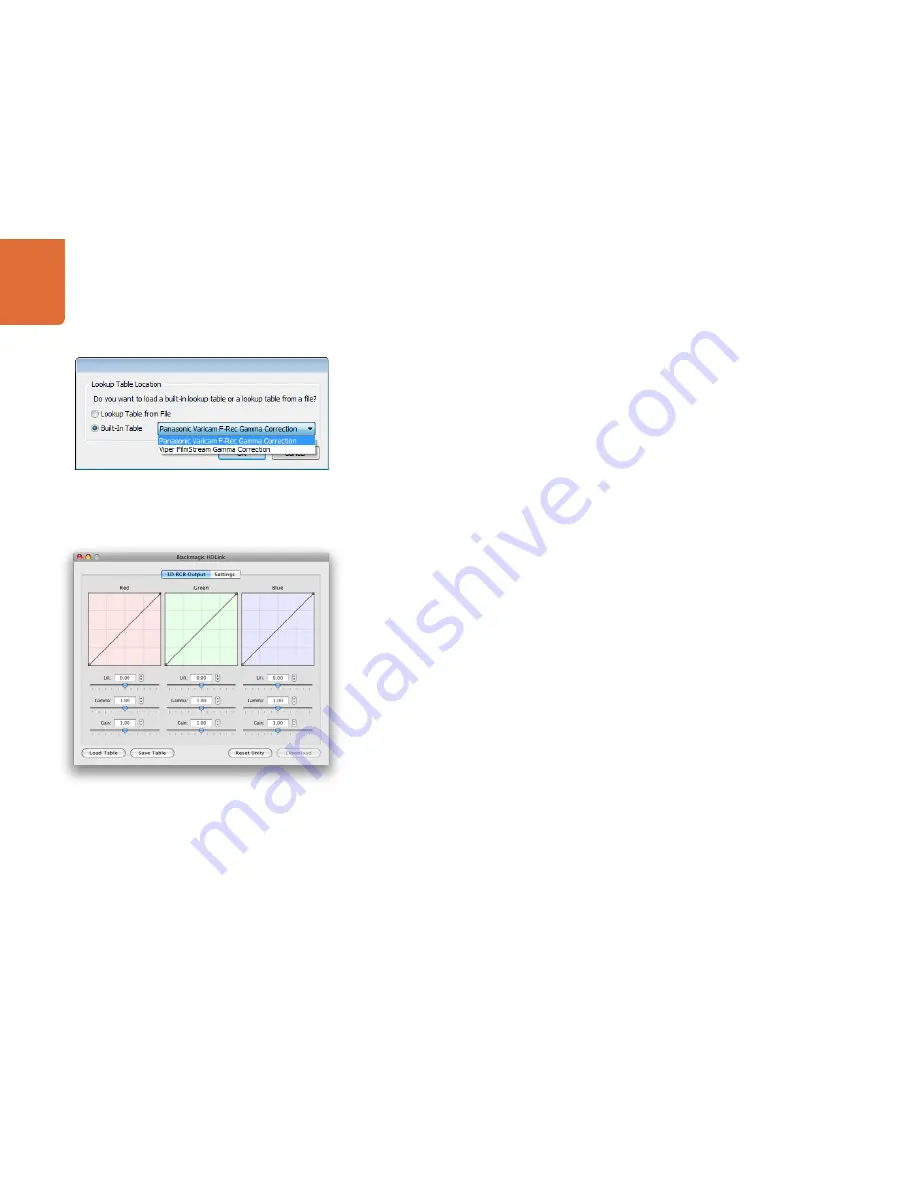
Built-in lookup tables can be loaded for log to linear conversion
Load Table and Save Table buttons can be found in the lower
left corner of the HDLink interface
USO
RESTRITO
Содержание HDLink Optical Fiber
Страница 1: ...Operation Manual HDLink Windows July 2010 Mac OS X USO RESTRITO ...
Страница 4: ...How to Install 4 USO RESTRITO ...
Страница 6: ...Software 6 USO RESTRITO ...
Страница 12: ...HDLink Models 12 USO RESTRITO ...
Страница 24: ...Helpful Information 24 USO RESTRITO ...
Страница 29: ...Developer Information 29 USO RESTRITO ...
Страница 33: ...Previous HDLink Models 33 USO RESTRITO ...
Страница 44: ...Warranty 44 USO RESTRITO ...


