background image

10

9

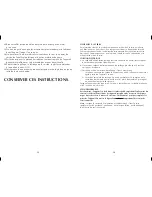
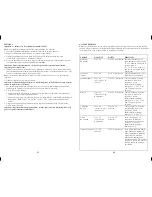
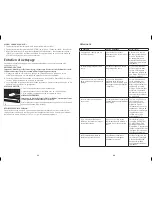
KEEP WARM FUNCTION

1. Set temperature control to Min setting (minimum temperature).
2. Set cooking fUNCTION selector to Keep Warm position.
3. Turn timer past 20 and then turn back or forward and set to desired number of minutes or to 

Stay On position.

Care and Cleaning

This product contains no user serviceable parts. Refer service to qualified service personnel.

CLEANING YOUR OVEN
Important: Before cleaning any part, be sure the oven is off, unplugged and cool. Always dry 

parts thoroughly before using oven after cleaning.

1.  Clean the glass door with a sponge, soft cloth or nylon pad and sudsy water. Do not use a 

spray glass cleaner.

2.  To remove the slide rack, open the door, pull the rack forward and out. Wash the slide rack in 

sudsy water or in a dishwasher. To remove stubborn spots, use a polyester or nylon pad.

3.  Wash the bake pan in sudsy water or in dishwasher. To minimize scratching, use a polyester or 

nylon pad.

CRUMB TRAY

1. Open oven door and pull out crumb tray 

(E)

.

2. Dispose of crumbs and wipe the tray with a dampened cloth, or wash 

in sudsy water or in the dishwasher.

3. Be sure to dry thoroughly before inserting the tray back into the oven.

ExTERIOR SURFACES
Important: The oven top surface gets hot; be sure the oven has cooled 

completely before cleaning. 

Wipe the top and exterior walls with a damp cloth or sponge. Dry thoroughly.

COOKING CONTAINERS

Metal, ovenproof glass or ceramic bakeware without glass lids can be used in your oven. follow 

manufacturer’s instructions. Be sure the top edge of the container is at least 1½” (3.81 cm) away 

from the upper heating elements.

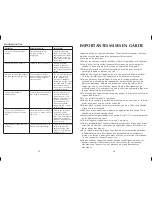
E

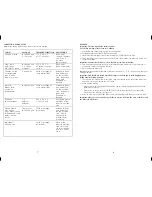
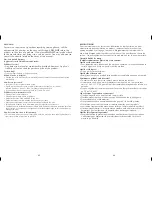
FOOD 

AMOUNT 

TIME 

PROCEDURE

Chicken pieces 

1-4 pieces 

30-40 minutes 

Arrange pieces skin-side  


down; turn after  


15-25 minutes.  


Continue broiling until  


170°f (77 °C) on meat  


thermometer, or juices  


run clear.

frankfurters 

1-8 frankfurters 

8-12 minutes 

for uniform browning,  


turn frequently.

Hamburgers 

1-4 (1/4 lb. 

12-18 minutes 

Turn after 8 minutes;  


(0,11 kg) each) 


continue broiling until  


145°f (63 °C) on meat  


thermometer, or done  


as desired.

Beef steaks 

1-2 (3/4" 

18-25 minutes 

Turn after 10 minutes;  


(19mm) thick) 


continue broiling until  


145°f (63 °C) on meat  


thermometer, or done  


as desired.

Pork chops 

1-4 (3/4" 

20-30 minutes 

Turn after 12 minutes;  


(19mm) thick) 


continue broiling until  


160°f (71 °C) on meat  


thermometer.

fish steaks 

1-4 (1"  

10-18 minutes 

Broil until fish flakes 


(26mm) thick) 


easily with a fork  


or 145°f (63 °C) on meat  


thermometer.

Open-faced 

1-4 slices 

7-10 minutes 

for crispier sandwich,  

cheese sandwich 


toast bread first. Top   


bread with tomato  


and sliced cheese,  


if desired. Broil until  


tomato is hot and cheese  


is melted.

BROILING GUIDE
Note: 

When broiling foods, slide the bake pan/drip tray underneath the slide rack/broil rack using 

the rack support rails. Insert rack into upper slot. Broiling times are approximate. Do not undercook 

ground beef, fish or poultry.

Содержание TRO4070DC

Страница 1: ...12 24 Countertop Convection Oven Four à convection pour le comptoir Model Modèle TRO4070DC Accessories Parts USA Canada Accessoires Pièces É U Canada 1 800 738 0245 60 Minute Timer Minuterie de 60 minutes Large Capacity Grande capacité Convection Bake Cuisson par convection USA Canada 1 800 231 9786 www prodprotect com applica ...

Страница 2: ...using containers constructed of other than metal or glass Do not store any material other than manufacturer s recommended accessories in this oven when not in use Do not place any of the following materials in the oven paper cardboard plastic wrap and the like Do not cover crumb tray or any parts of the oven with metal foil This will cause overheating of the oven IMPORTANT SAFEGUARDS SAVE THESE IN...

Страница 3: ... 02 4 60 minute TIMER TOAST shade selector Part TRO4070DC 03 5 Slide rack support rails 6 Removable slide out crumb tray Part TRO4070DC 04 7 Slide rack broil rack Part TRO4070DC 05 8 Bake pan drip tray Part TRO4070DC 06 9 Door handle 10 Rack slots 11 Extra deep curved interior Consumer replaceable removable parts CONTROL PANEL 1 Power indicator light 2 Temperature control 3 Cooking FUNCTION select...

Страница 4: ...EN THIS OVEN GETS HOT WHEN IN USE ALWAYS USE OVEN MITTS OR POT HOLDERS WHEN TOUCHING ANY OUTER OR INNER SURFACE OF THE OVEN GETTING STARTED Remove packing materials and any stickers Remove the slide rack and bake pan from oven Wash in sudsy water or in the dishwasher Replace slide rack in oven Select a location for the unit Do not place unit under cabinets or too close to the wall to allow heat to...

Страница 5: ...t goes off 9 Using an oven mitt or pot holder slide out broil rack together with bake pan to remove food Important Always use an oven mitt or pot holder to remove food from the oven as the door and the slide rack will be hot FOOD AMOUNT TEMPERATURE TIME PROCEDURE Chicken pieces to fit bake pan 375 F 191 C Bake until 1 4 pieces 45 55 minutes chicken registers 180 F 82 C on meat thermometer Ham lamb...

Страница 6: ... cloth or sponge Dry thoroughly Cooking Containers Metal ovenproof glass or ceramic bakeware without glass lids can be used in your oven Follow manufacturer s instructions Be sure the top edge of the container is at least 1 3 81 cm away from the upper heating elements E FOOD AMOUNT TIME PROCEDURE Chicken pieces 1 4 pieces 30 40 minutes Arrange pieces skin side down turn after 15 25 minutes Continu...

Страница 7: ...ncendie lorsque le grille pain est recouvert de matériaux inflammables comme des rideaux des draperies ou des revêtements muraux ou lorsqu il entre en contact avec ceux ci alors qu il fonctionne Ne rien ranger sur l appareil en service Ne pas nettoyer l appareil avec des tampons métalliques abrasifs Ces derniers peuvent s effriter et entrer en contact avec les composants électriques de l appareil ...

Страница 8: ...a terre à trois broches VIS INDESSERRABLE Avertissement L appareil est doté d une vis indesserrable empêchant l enlèvement du couvercle extérieur Pour réduire les risques d incendie ou de secousses électriques ne pas tenter de retirer le couvercle extérieur L utilisateur ne peut pas remplacer les pièces de l appareil En confier la réparation seulement au personnel des centres de service autorisés ...

Страница 9: ...ob past 20 then set to desired time Rotate knob past 20 then set to desired time Tourner le bouton jusqu à dépasser la position 20 puis régler le temps désiré A 1 2 3 4 6 7 8 9 10 11 5 C 65 93 121 150 177 205 232 WARM CHAUD BAKE CUISSON BROIL ROTISSAGE TOAST GRILLAGE Rotate knob past 20 then set to desired time Rotate knob past 20 then set to desired time Tourner le bouton jusqu à dépasser la posi...

Страница 10: ...essuie tout Remettre la grille en place dans le four Choisir un emplacement pour l appareil Celui ci ne doit pas se trouver sous des armoires ni trop près d un mur afin de laisser la chaleur circuler sans endommager l espace de comptoir Grillage Important Le dessus et les côtés du four deviennent chauds Note Il n est pas nécessaire de réchauffer l appareil pour le grillage 1 Tourner le sélecteur d...

Страница 11: ...ons de cuisson sur la grille d oignons cuisson sur l emballage Vérifier souvent pour et autres articles empêcher de trop dorer panés surgelés collations surgelées Pizza surgelée suivre les Placer la pizza instructions directement sur la grille sur l emballage pour obtenir une croûte croustillante ou dans le plat de cuisson pour obtenir un croûte moelleuse GUIDE PAR CONVECTION Note Lors de la cuiss...

Страница 12: ...s côtés du four deviennent chauds Nota Pour griller les aliments préchauffer le four pendant cinq minutes 1 Consulter le guide de rôtissage pour déterminer la durée de cuisson page 20 2 Régler le sélecteur de température au cycle de rôtissage BROIL 3 Utiliser la position supérieure de la grille Tourner le sélecteur de la fonction FUNCTION de cuisson à Rôtissage Broil 4 Ouvrir la porte du four et s...

Страница 13: ... à la fonction désirée Pendant le grillage seul l élément du haut fonctionne MODE GARDE AU CHAUD 1 Tourner le sélecteur de température à la température minimum Min 2 Tourner le sélecteur de la fonction FUNCTION de cuisson à Garde au chaud Keep Warm 3 Régler la minuterie pour le temps de réchaud désiré Sélectionner Fonctionnement continu Stay On si vous voulez contrôler vous même le temps de cuisso...

Страница 14: ...vince to province BESOIN D AIDE Pour communiquer avec les services d entretien ou de réparation ou pour adresser toute question relative au produit composer le numéro sans frais approprié indiqué sur la page couverture Ne pas retourner le produit où il a été acheté Ne pas poster le produit au fabricant ni le porter dans un centre de service On peut également consulter le site web indiqué sur la pa...

Страница 15: ...e Black Decker Corporation Towson Maryland É U Copyright 2008 Applica Consumer Products Inc Made in People s Republic of China Printed in People s Republic of China Fabriqué en République populaire de Chine Imprimé en République populaire de Chine Printed on recycled paper Impreso en papel reciclado Imprimé sur du papier recyclé ...

Отзывы: