2
Biotage
®
Extrahera
™
Installation and Safety | © Biotage 2020
Installation
Positive
pressure unit
The gas applied to the samples (i.e. the gas
connected to the
N
2
port) must be according to
ISO 8573-1, classification 1-6-1. This is essential to
prevent sample contamination and general fouling
of the pressure unit. The filter unit that is supplied
with the system delivers according to ISO 8573-1,
class 1-x-1. If the gas applied is not according
to class x-6-x, an air dryer needs to be ordered
separately (P/N 416441SP).
AIR
port requirements: 5 L/min (0.18 cubic feet/
min), 6
±
0.2 bar (0.6
±
0.02 MPa; 87
±
3 psi) for a
fully populated extraction plate/rack and lower to
approximately 4 bar (0.4 MPa; 58 psi) when 50%
of the plate/rack is populated and 3 bar (0.3 MPa;
44 psi) when 25% of the plate/rack is populated.
N
2
port requirements: 1 L/min (0.04 cubic
feet/min) during processing and 70 L/min
(2.5 cubic feet/min) during plate dry, 6 ± 0.2 bar
(0.6 ± 0.02 MPa, 87 ± 3 psi)
Connection: The gas tube supplied with the
system has a 6 mm (0.24") outer diameter and
4 mm (0.16") inner diameter.
External fire
protection
External fire protection should be installed
according to local regulations for equipment
operating unattended.
Move the System
Warning
»
Before moving the system, please read and observe the safety
requirements in "Safety Requirements" on page 9.
If you need to move the system within the laboratory or between
laboratories in the same building, follow the instructions below.
If you need to ship the system, please contact Biotage
®
1-Point
Support
™
for instructions.
1. Prepare the new site according to the site requirements
on page 1.
2. Clean the waste tubing as described in the user manual
(P/N 414158).
3. Empty the system of liquids by flushing it with air:
a. Remove the solvent inlet lines from their bottles and
place them in an empty, clean bottle.
b. Ensure that you have five empty solvent reservoirs in
the solvent rack in position
5
on the working area.
c. Press
Maintenance
in the main menu.
d. Press
Flush Solvent Inlets…
.
e. Enter the flush volume for S1. 25 mL is required to
empty the solvent inlet line and pump of liquid.
f. Press
Flush
for S1.
g. When you have finished flushing the solvent inlet line
with air, repeat steps e to f for the other solvent inlet
lines (S2-S5).
4. Remove the solvent racks in position
5
and
6
(if used) on the
working area
and empty the reservoirs.
5. Remove all accessories and consumables inside the system,
i.e. the pipette tip waste bin, plates, racks, etc.
6. Turn off the vacuum pump or, if your system is connected to
another vacuum source, close the valve.
7. Shut down the system by pressing
Shut Down
in the main
menu or login view (GLP) and then
Yes
to confirm.
8. When the message saying that it is safe to turn off the system
appears on the screen, turn off the system. The mains switch
is located on the right hand side at the rear of the system.
9. Unplug the power cord from the power outlet.
10. Turn off the gas supply/supplies, and disconnect the
pressure regulators and the gas tubes from 1) the supply/
supplies and 2) the
AIR
and
N
2
ports located on the right
hand side at the rear of the system.
11. Disconnect the waste outlet tube from the waste reservoir
and empty the waste reservoir.
12. Clean the interior of the system and the accessories as
described in the user manual (P/N 414158).
13. Clean the touch screen and the exterior of the system,
using a soft and clean cloth. The cloth can be dry or lightly
dampened with a neutral detergent or alcohol.
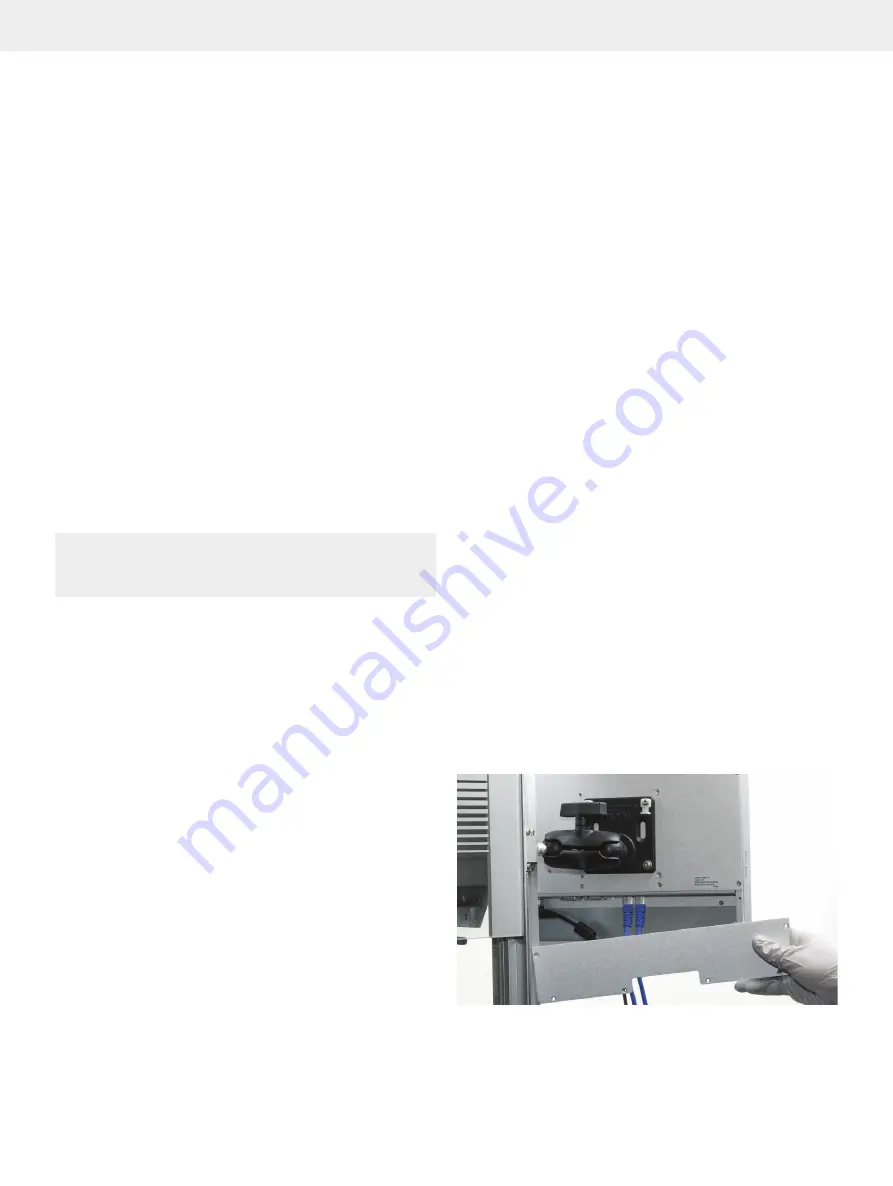
14. If you need to remove the touch screen (computer):
a. Adjust the ball mount angle so that the rear of the touch
screen can be accessed; see Figure 1.
b. Remove the lower panel by unscrewing the six screws
using a Philips #2 screwdriver.
c. Disconnect the power connector by unscrewing its
locking ring.
d. Disconnect the two Ethernet cables and any USB
devices.
e. Remove the touch screen by loosening the ball mount.
Note:
The touch screen must be placed on a flat and level
surface to avoid damage.
Figure 1.
The rear of the touch screen (computer).
Содержание Extrahera Classic
Страница 1: ...Biotage Extrahera Installation and Safety...
Страница 15: ......


