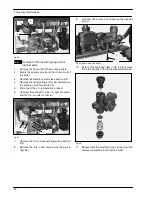


D.h.w. flow switch, filter and flow limiter
32
2
Remove the flow switch sensor (see section
14.4).
3
Remove the gas valve (see section 11.6).
4
Unscrew the plug 2 (Fig. 58) and extract the flow
switch group.
5
To remove the filter from the flow switch group
separate the body 7 from the plug 2 (Fig. 58) by
unscrewing it.
6
Reassemble the parts following the removing se-
quence in reverse order.
Attention: the ring 3 (Fig. 58) has a magnetic polarity
and must be correctly coupled with the spindle of
the float 4.
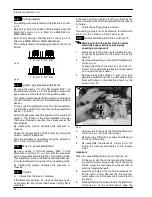
To determine the correct orientation of the ring proceed
as follows:
1
Set the function selector of the boiler in stand---by
mode (Fig. 59).
Fig. 59
2
Restore the mains electricity supply to the boiler.
Waring -- ensure that all the electric parts and
wirings are dry and do not touch other not
mentioned electric parts during the following
operations.
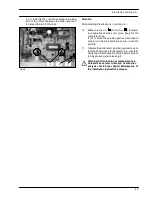
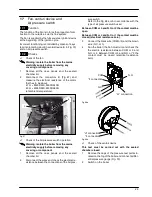
3
Hold the flow switch sensor 1 and bring the ring
in touch with the sensor as illustrated in Fig. 60.
4
Observe the lamp B placed on the sensor body
that should light. If not reverse the ring and repeat
the previous operation.
5
Fit the ring on the spindle of the float in the way
that lights the lamp B.
6
I
solate the boiler from the mains electricity supply
and reassemble the parts following the removing
sequence in reverse order.
1
3
B
4
Fig. 60
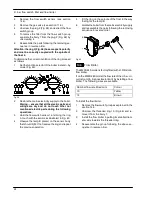
14.6
Flow limiter
The M90D.24S model is factory fitted with a 10 litre/min.
flow limiter.
If on the M90D.28S model the flow rate of the d.h.w. cir-
cuit is too high, it is possible to limit it by installing a flow
limiter. The following sizes are available:
Nominal flow rate (litres/min)
Colour
10
Yellow
12
Brown
To install the flow limiter:
1
Remove the flow switch group as explained in the
section 14.5.
2
Unscrew the threaded ring 10 (Fig. 58) and re-
move it from the body 7.
3
Install the flow limiter 9 putting its smaller diam-
eter side towards the threaded ring.
4
Reassemble the group following the above se-
quence in reverse order.
Содержание RIVA PLUS M90S.24S
Страница 2: ......
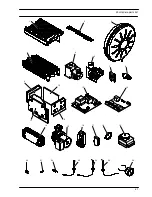
Страница 43: ...Short spare parts list 41 1 2 6 4 5 7 3 8 15 18 12 13 20 21 22 23 25 26 14 16 24 17 19 9 10 11 9...
Страница 44: ...1796209146 17962 0914 6 3804 44A4 UK...


