background image

10 


3. Useful advice 


3. 

Полезные


советы


3.1. Central heating 


3.1 

Центральное


отопление


For reasonably economical service install a 
room thermostat. 


Для


более


экономного


использования


установите


комнатный


термостат

Never shut off the radiator in the area where 
the room thermostat is installed. 


Никогда


не


перекрывайте


радиатор


в


том


помещении

в


котором


установлен


комнатный


термостат

If a radiator (or a convector) does not heat 
up, check that no air is present in it and that 
its tap is open. 


Если


радиатор

  (

или


конвектор

не


греет

проверьте

нет


ли


в


нем


воздуха


и


убедитесь

что


вентиль


открыт

If the ambient temperature is too high, do not 
alter the radiator taps. Reduce the central 
heating temperature instead by means of the 
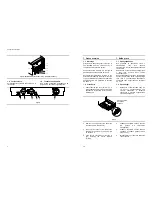
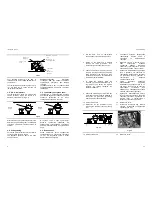
room thermostat and the knob (7 in Fig. 3.1). 


Если


температура


в


помещении


слишком


высокая

не


перекрывайте


радиаторные


вентили

Вместо


этого

уменьшите


температурные


значения


отопления


на


комнатном


термостате


и


на


котле


регулятором

 (7 

на


рис

.3.1). 


7


Fig. 3.1 


3.2. Frost protection 


3.2 

Защита


от


замерзания


The built in antifreeze system and any 
additional system protect the boiler from 
possible damages due to the icing. 


Настоящее


устройство


снабжено


встроенной


системой


защиты


от


замерзания

которая


предохраняет


котел


от


возможных


повреждений

This system doesn't guarantee the protection 
of the whole central heating system. 


Эта


система


не


гарантирует


защиту


всей


системы


отопления

In the case that the external temperature may 
be lower than 0 °C it is suggested to leave 
the system running setting the room 
thermostat at a low temperature 


В


случае

если


наружная


температура


опускается


ниже

 0 

градусов

рекомендуется


перевести


термостат


в


положение


минимальной


температуры

When the boiler is completely switched off for 
a long period, it's recommended to empty 
completely both central heating and domestic 
hot water circuits. 


Когда


котел


отключается


на


долгий


период

рекомендуется


полностью


слить


системы


центрального


отопления


и


водоснабжения

3.3. Periodic maintenance 


3.3 

Периодическое


обслуживание


For efficient and continuous operation of the 
boiler, it is advisable to arrange maintenance 
and cleaning by an Authorised Service 
Centre Engineer, at least once a year. 


Для


эффективной


и


продолжительной


работы


котла

мы


рекомендуем


производить


обслуживание


и


чистку


котла


не


реже

 1 

раза


в


год

.  


Commissioning 


31 

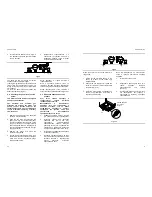
3  Unscrew the cap on the automatic air 

purger valve 21 (Fig. 6.2) one full turn and 
leave open permanently. 


Отверните


колпачок


на


автоматичемком


спускнике


воздуха


21 (

рис

. 6.2) 

на

 1 

полный


оборот


и


оставьте


его


в


этом


положении

4  Open the C.h. circuit filling valve 12 in  

Fig. 6.1 and fill the C.h. circuit (see 
section 2.2) 


Откройте


впускной


клапан

 12 

системы


отопления


на


рис

. 6.1 

и


заполните


систему

 (

см

раздел

 2.2).  

5 Open each radiator air release tap 

starting with the lower point and close it 
only when clear water, free of bubbles, 
flows out. 


Откройте


спускные


краны


на


всех


радиаторах

начиная


с


нижней


точки

и


закройте


их

когда


из


них


пойдет


чистая

без


пузырьков


вода

6 Purge the air from the pump by 

unscrewing the pump plug 20 (Fig. 6.2); 
release the pump by turning the rotor in 
the direction indicated by the arrow on the 
information plate. 


Спустите


воздух


из


насоса

открутив


винт

 20 (

рис

. 6.2); 

разблокируйте


насос

поворачивая


ротор


в


направлении

указанном


стрелкой


на


информационной


табличке

7  Close the pump plug. 


Заверните


винт


насоса

8  Continue filling the system. The actual 

reading should ideally be 1,3 bar and not 
less than 0,3 bar. 


Продолжайте


заполнение


системы

Идеальный


показатель


должен


быть


1,3 

бара


и


не


менее

 0,3 

бара

9  Close all air release valves on the c.h. 

system. 


Закройте


все


спускники


воздуха


в


системе


отопления

10 Inspect the boiler and the system for 

water soundness and remedy any leaks 
discovered. 


10 

Проверьте


котел


и


систему


на


шум


и


устраните


течи

в


случае


их


обнаружения

11 Cold flush the system to remove any 

loose particles and any system debris 
before starting the boiler for the first time 


11 

Промойте


холодную


систему

чтобы


удалить


из


нее


частицы


мусора


и


окалины


прежде

чем


запустить


котел


в


первый


раз

6.4.  Lighting the boiler 


6.4 

Запуск


котла


Some products incorporate an anti cycling 
time delay. It is normal when first switching 
the boiler on for the boiler to operate on 
heating for a few seconds then switch off. 
After 3-4 minutes has elapsed the boiler will 
then re ignite and operate perfectly normally. 
The ignition delay cycle does not prevent 
normal operation of the boiler to provide 
D.h.w.. 


Некоторые


котлы


оборудованы


антициклической


задержкой


времени

Это


нормальное


явление

когда


котел


включается


на


отопление


на


несколько


секунд


и


затем


выключается

По


истечении

 3-4 

минут


котел


включится


автоматически


и


продолжит


нормальную


работу

Задержка


включения


не


влияет


на


нормальную


работу


котла


на


приготовление


горячей


воды

If external controls are fitted (e. g. Timeclock, 
room thermostat) ensure they "call for heat". 


Если


котел


оснащен


внешними


устройствами


управления


(

напр

программатором

комнатным


термостатом

), 

убедитесь

что


они


работают


в


режиме

 "

запрос


тепла

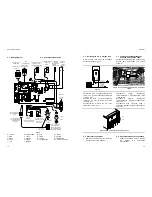
1  Turn on the electricity supply to the boiler, 

switching on the fused spur isolation 
switch. The appliance operation light 9 
will flash every 4 seconds. 


Включите


питание


котла


на


автомате

Индикатор


работы


котла

 9 

будет


моргать


каждые

 4 

сек

.  

Содержание PARVA CONTROL M90.24AV

Страница 1: ...1796211072 17962 1107 2 4606 52A5 PARVA CONTROL MODEL M90 24AV USER MANUAL AND INSTALLATION INSTRUCTIONS...

Страница 2: ...erous to obstruct even partially the air intakes used to aerate the room where the boiler is installed to use extractor fans fire places and the like in the same room at the same time as the boiler to...

Страница 3: ...the gas cocks get the assistance of a qualified person Do not touch the appliance with parts of the body that are wet or damp and or bare feet In case of structural work or maintenance near the exhaus...

Страница 4: ...ng the addition of an external control you can eliminate the boiler from your fault analysis Do not forget to range rate the boiler to suit the system requirements This procedure is covered in the com...

Страница 5: ...e boiler to follow the timed settings Some products incorporate an anti cycling time delay It is normal when first switching the boiler on for the boiler to operate on heating for a few seconds then s...

Страница 6: ...1 Warnings 39 7 2 Procedures 39 8 Maintenance 8 1 Warnings 41 8 2 Dismanting the external panels 41 8 3 Emptying the ch system 42 8 4 Cleaning the primary heat exchanger 42 8 5 Checking the pressurisa...

Страница 7: ...e left hand side panel adjacent to the data badge the self adhesive label included with the conversion kit indicating the type of gas and the gas pressures to which the appliance has been set 11 12 Re...

Страница 8: ...tructions relating to the procedures for adapting the boiler to the type of gas available and subsequent calibration described below are presented in sections 6 5 and 6 6 6 5 6 6 7 2 Procedures 7 2 1...

Страница 9: ...ur Fill in the details required on the Boiler Guarantee Certificate and hand to the User advising them to return the correct section for boiler Guarantee registration Finally advise the User that for...

Страница 10: ...s normally provided by the installer for this purpose 2 2 If you are in any doubt regarding this procedure you are advised to contact your Installer or an Approved Engineer This appliance is provided...

Страница 11: ...ment potentiometer marked RISC Fig 6 8 Rotating the potentiometer anti clockwise reduces the maximum supply current to the gas modulator device and thus reduces the gas pressure to the burner RISC 6 8...

Страница 12: ...e operation light 9 will flash every 2 seconds operating boiler 4 7 2 5 9 2 Commissioning 35 6 6 Adjusting the burner ignition 6 6 1 Turn off the boiler by means of the fused spur isolation switch pro...

Страница 13: ...ment will be necessary A full explanation of the gas pressure adjustment procedure is given in the Gas Valve section of the service manual If maximum and or minimum gas pressures are adjusted then the...

Страница 14: ...iance operation light 9 will flash every 4 seconds 7 2 9 9 4 Commissioning 33 5 Set the d h w and c h temperature control knobs to their maximum position 5 6 Switch on the boiler and if external contr...

Страница 15: ...panel of the case see section 8 2 in this manual 1 8 2 2 Open the gas valve inlet pressure test point 36 in Fig 6 5 at the valve input connect a suitable pressure gauge check the gas pressure of the s...

Страница 16: ...ll turn and leave open permanently 3 21 6 2 1 4 Open the C h circuit filling valve 12 in Fig 6 1 and fill the C h circuit see section 2 2 4 12 6 1 2 2 5 Open each radiator air release tap starting wit...

Страница 17: ...be inspected and cleaned This service can be part of a maintenance contract In particular you are advised to have the following checks carried out primary heat exchanger domestic hot water storage tan...

Страница 18: ...ter comes out of the pressure relief valve Check that the C h circuit filling valve is closed as described in the section 2 2 of this manual 2 2 Check on the temperature and pressure gauge 4 on sectio...

Страница 19: ...ting it upwards 5 14 Connect the two temperature probe wires between D h w storage tank temp probe terminals Fig 5 15 5 15 Insert D h w storage tank temp probe in the longest probe sheath Fig 5 16 5 1...

Страница 20: ...on switch Fig 5 11 T 1 2 L N 3 Room thermostat Power supply terminal block External controls terminal block Fig 5 12 5 Connect the electrical supply flexible cord coming from the fused spur isolation...

Страница 21: ...to facilitate the operations on the internal parts 3 5 9 45 4 Loosen the screws J and remove the service panel Fig 5 10 4 J 5 10 For the electrical connection to the boiler use electric wires which co...

Страница 22: ...C h temp probe NTC Primary circuit flow switch Three way diverter valve D h w storage tank temp probe NTC NTC Pump Gas valve Installation 25 5 7 Installing the D h w storage tank 5 7 D h w storage tan...

Страница 23: ...l information 17 4 4 Technical Data mod M90 24AV 4 4 Nominal heat input kW 26 6 Minimum heat input kW 11 0 Maximum useful output kW 24 0 Minimum useful output kW 9 3 Central heating Temp regulation ra...

Страница 24: ...ney working at the nominal heat input 1 Installation 23 5 3 Installing the bracket 5 3 Precautions Utilise the paper template supplied with the boiler to determine the fixing position for the bracket...

Страница 25: ...by promoting formation of a protective skin on metal surfaces and neutralising gases present in the water Technical information 19 4 5 Hydraulic specifications 4 5 0 00 0 10 0 20 0 30 0 40 0 50 0 2 0...

Страница 26: ...d only in an adequately ventilated room in conformity with the standards A minimum air flow rate of 2 m3 h per kW of max heat input must be ensured 2m3 For LPG the appliance must also conform with the...

Отзывы: