


12
6
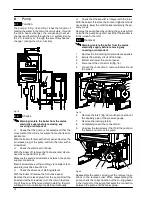
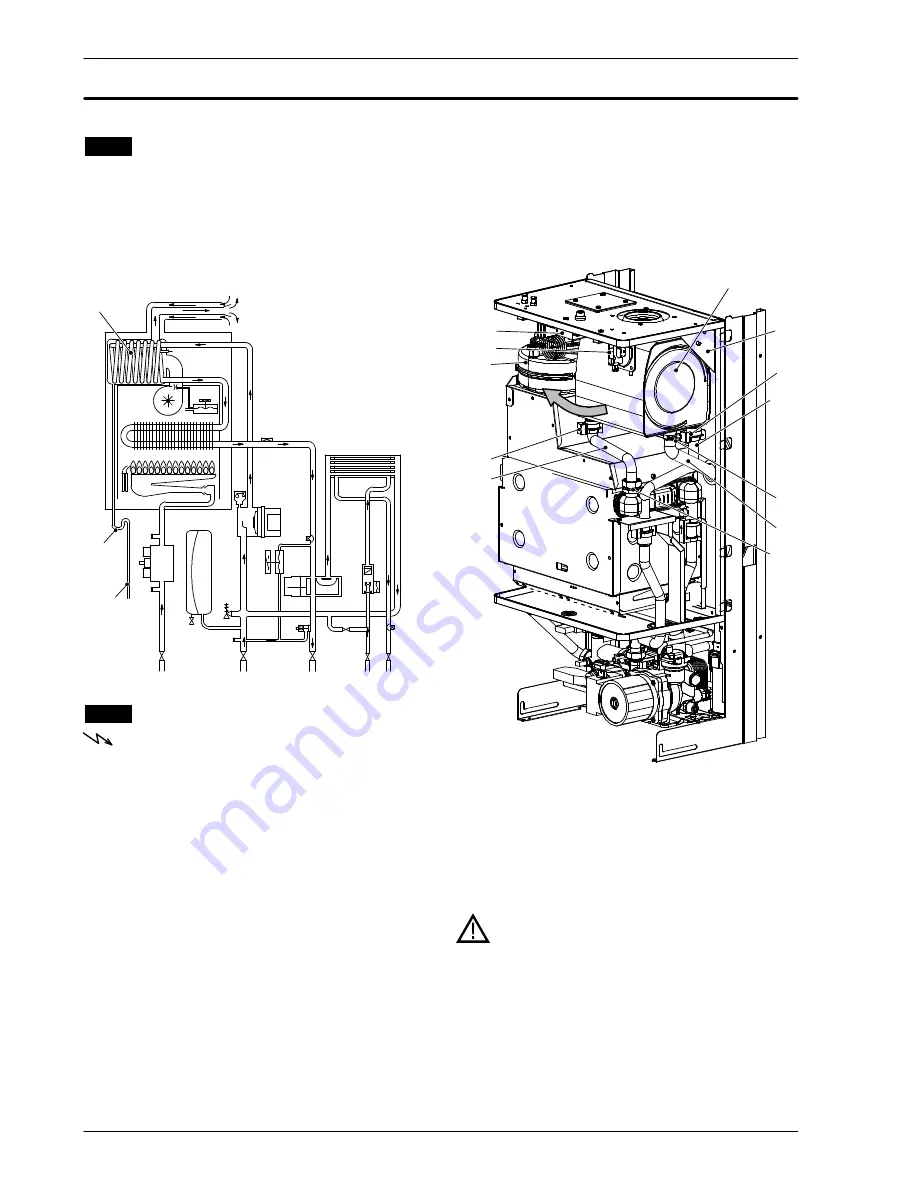
Condensing heat exchanger
6.1
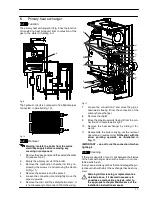
Function
The return water flows through the condensing heat ex-
changer
A
in Fig. 12 and Fig. 13.
By reducing the combustion products temperature, the
latent heat of the vapour is transferred to the water cir-
cuit, allowing an extra gain of useful heat.
The condensed vapour is then drained through the
condensate trap
B
and the draining pipe
C
.
A
B
C
Fig. 12
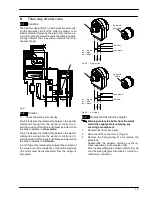
6.2
Removal
Warning: isolate the boiler from the mains
electricity supply before removing any
covering or component.
1
Remove the case panels and the sealed chamber
lid (see section 2).
2
Empty the primary circuit of the boiler.
3
Remove the fan
D
in Fig. 13 (see section 18.3)
and the air pressure switch
E
(see section 18.5).
4
Remove the flue thermostat
F
(see section 21.3)
5
Completely loosen the connection
G
and slightly
move the pipe
H
upwards.
6
Remove the clip
I
and move the pipe
J
down-
wards freeing it from the connection, then turn it
towards right.
7
Using pliers, remove the spring
K
moving it down-
wards and disconnect the rubber pipe
L
.
8
Remove the bracket
M
by unscrewing the screws
that hold it on the frame.
9
Rotate the exchanger as indicated by the arrow
and remove it towards the front of the boiler.
10
Remove the clip
N
and the pipe
H
.
D
D
E
F
G
I
K
L
M
A
J
N
H
Fig. 13
11
Reassemble the exchanger carrying out the re-
moval operations in reverse order.
After reassembling ensure that the fan--exchanger
and exchanger--elbow gaskets are correctly
mounted and ensure a good sealing.
Warning: After cleaning or replacement as
detailed above, if it deemed necessary to
undertake a combustion analysis, refer to
the appropriate chapter
Maintenance
of the
installation instructions manual.


