background image

42

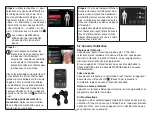
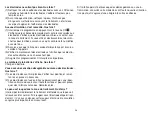
•  Utilisez les t/- pour sélectionner la langue de votre choix 

et confirmez en appuyant sur la touche OK  . Vous retournez 

alors automatiquement au menu de configuration.

Luminosité 

Vous pouvez régler la luminosité de l’écran de l’appareil de 

musculation.

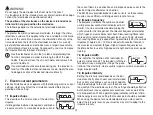
•  Pour modifier la luminosité de l’écran, 

l’appareil doit être allumé. Puis, utilisez 

les t/- pour sélectionner l’élé-

ment « Paramètres » et confirmez en 

appuyant sur la touche OK  .

•  Utilisez les t/- pour sélection-

ner l’élément « 2 Luminosité » et confir-

mez en appuyant sur la touche OK  .

•  Utilisez les t/- pour sélectionner la luminosité de votre 

choix et confirmez en appuyant sur la touche OK  . Vous retournez 

alors automatiquement au menu de configuration.

Son

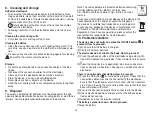
Vous pouvez activer ou désactiver les 

sons de l’appareil de musculation.

•  Pour activer ou désactiver les sons, 

l’appareil doit être allumé. Puis, utili-

sez les t/- pour sélectionner 

l’élément « Paramètres » et confirmez 

en appuyant sur la touche OK  .

•  Utilisez les t/- pour sélection-

ner l’élément « 3 Son ». Vous pouvez alors activer ou désactiver 

les sons à l’aide de la touche OK  . 

Vert = sons activés

Rouge = sons désactivés

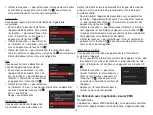
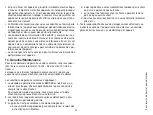
Réinitialiser l’appareil

Vous pouvez réinitialiser l’appareil de 

musculation sur ses paramètres par 

défaut. Il réinitialise alors les paramètres de langue, de luminosité 

et de son, ainsi que la durée de fonctionnement et la durée de 

stimulation réelle.

•  Pour réinitialiser l’appareil de musculation sur ses paramètres 

par défaut, l’appareil doit être allumé. Puis, utilisez les touches 

+/- pour sélectionner l’élément « Paramètres » et confirmez en 

appuyant sur la touche OK  .

•  Utilisez les t/- pour sélectionner l’élément « 4 Réinitia-

liser l’appareil » et confirmez en appuyant sur la touche OK  . 

Il vous est alors demandé si vous souhaitez vraiment réinitialiser 

votre appareil sur les paramètres par défaut.

•  Utilisez les t/- pour sélectionner « OUI » et confirmez en 

appuyant sur la touche OK  . Vous retournez alors automatique-

ment au menu de configuration.

Informations système

Vous pouvez consulter dans les paramètres les informations 

système de l’appareil. 

•  Pour consulter les informations système de l’appareil, celui-ci doit 

être allumé. Puis, utilisez les t/- pour sélectionner l’élé-

ment « Paramètres » et confirmez en appuyant sur la touche OK 

.

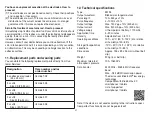
•  Utilisez les t/- pour sélec-

tionner l’élément « 5 Informations sys-

tème » et confirmez en appuyant sur 

la touche OK  . Vous pouvez alors 

consulter les informations système de 

l’appareil.

•  Appuyez sur la touche Retour pour re-

tourner au menu de configuration.

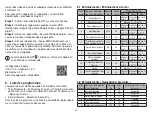
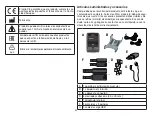
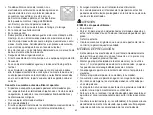
5.4 Utilisation avec l’application « beurer EMS 


HomeStudio

 »

L’application « beurer EMS HomeStudio » vous permet de contrôler 

facilement l’appareil depuis votre smartphone. L’appli contient éga-

Содержание EM 95

Страница 1: ...lation Mode d emploi 33 ES Aparato de estimulación muscular Instrucciones de uso 49 IT Apparecchio per la stimolazione muscolare Istruzioni per l uso 65 TR Kas stimülasyon cihazı Kullanım kılavuzu 81 RU Миостимулятор Инструкция по применению 96 PL Urządzenie do stymulacji mięśni Instrukcja obsługi 112 EM 95 Video Tutorial ...

Страница 2: ...eit 16 14 Garantie Service 16 Lesen Sie diese Gebrauchsanweisung aufmerksam durch bewahren Sie sie für den späteren Gebrauch auf machen Sie sie anderen Benutzern zugänglich und beachten Sie die Hinweise Für einen einfachere Anwendung des Muskelstimulationsge räts scannen Sie den Video Tutorial QR Code auf der Titelseite dieser GA mit ihrem Smartphone ab und schauen Sie sich das Video an Zeichenerk...

Страница 3: ...ieferumfang und Zubehör Überprüfen Sie das Set auf äußere Unversehrtheit der Kartonverpa ckung und auf die Vollständigkeit des Inhalts Vor dem Gebrauch ist sicherzustellen dass das Gerät und Zubehör keine sichtbaren Schä den aufweisen und jegliches Verpackungsmaterial entfernt wird Benutzen Sie es im Zweifelsfall nicht und wenden Sie sich an Ihren Händler oder an die angegebene Kundendienstadresse...

Страница 4: ... EMS geht in zwei Richtungen Zum einen kann eine gezielte Kräftigung der Muskulatur hervorgerufen werden aktivierende An wendung und zum anderen kann auch eine entspannende erholen de Wirkung relaxierende Anwendung erzielt werden Zur aktivierenden Anwendung gehören Muskeltraining zur Erhöhung der Ausdauerleistung und oder Muskeltraining zur Unterstützung der Kräftigung bestimmter Mus keln oder Mus...

Страница 5: ...ehandlung auftretenden Beschwerden Beständigen Hautreizungen aufgrund von langzeitiger Stimulation an der gleichen Elektrodenstelle ACHTUNG Verwenden Sie das EM 95 ausschließlich Am Menschen Für den Zweck für den es entwickelt wurde und auf die in dieser Gebrauchsanweisung angegebene Art und Weise Jeder unsach gemäße Gebrauch kann gefährlich sein Zur äußerlichen Anwendung Mit den mitgelieferten un...

Страница 6: ...ichtigt oder erhielten von ihr Anweisungen wie das Gerät zu benutzen ist Wenn die Klebefähigkeit der Klebeelektroden nachlässt ersetzen Sie diese bitte umgehend Benutzen Sie das Gerät erst wieder mit neuen Klebeelektroden Andernfalls könnte die ungleichmä ßige Haftung der Klebeelektroden zu Hautverletzungen führen Tauschen sie die Elektroden spätestens nach 20 Anwendungen gegen neue Elektroden aus...

Страница 7: ...aden Um eine möglichst lange Akku Lebensdauer zu erreichen laden Sie den Akku mindestens 2 Mal im Jahr vollständig auf 3 Gerätebeschreibung 1 2 3 4 5 6 7 8 9 10 11 1 EIN AUS OK Taste 7 Anschlussbuchse Kanal 1 grün 2 Zurück Taste 8 Anschlussbuchse Kanal 2 blau 3 Intensitätstaste Kanal 1 grün 9 USB Ladebuchse 4 Intensitätstaste Kanal 2 blau 10 Anschlussbuchse Kanal 3 rot 5 Intensitätstaste Kanal 3 r...

Страница 8: ...nwendung möglich 4 2 Gürtelclip befestigen Sie können das Muskelstimulationsgerät mit Hilfe des Gürtelclips an Ihrem Gürtel oder Hosenbund befestigen Um den Gürtelclip am Muskelstimulationsgerät zu befestigen drücken Sie den Gürtelclip auf die Rückseite des Muskelstimulati onsgeräts bis er hör und spürbar fest einrastet 5 Anwendung 5 1 Anwendung beginnen Schritt 1 Halten Sie die EIN AUS Tas te für...

Страница 9: ...Intensi tätslevel der verwendeten Kanäle an gezeigt Außerdem werden die verblei benden Sekunden eines Impulses oder einer Impulspause angezeigt Mit der Einstellung der Intensität durch die Intensitätstaste der verwendeten Ka näle startet das Programm automatisch Stellen Sie die gewünschte Intensität mit Hilfe der Intensitätstasten ein 5 2 Hinweise zur Anwendung Intensität einstellen Sie können die...

Страница 10: ... dürfen keine 2 Manschetten mit demselben Kanal verbunden werden Stellen Sie sicher dass die die Manschetten so anlegen dass beide goldenen Elektroden gut auf der Haut aufliegen Erholungspause Trainieren Sie die gleiche Körperpartie nicht öfters als 1mal am Tag Achten Sie darauf dass zwischen dem nächsten Training derselben Körperpartie mindestens 24 Stunden Pause liegen Wasserzufuhr Achten Sie da...

Страница 11: ...eschaltet Gerät zurücksetzen Sie können das Muskelstimulationsgerät auf die Werkseinstellung zurücksetzen Dabei werden sowohl die Einstellungen von Sprache Helligkeit und Sound als auch die Betriebsdauer und die tatsächliche Stimulationszeit zurückgesetzt Um das Muskelstimulationsgerät auf die Werkseinstellung zu rücksetzen wählen Sie am eingeschalteten Gerät mit einer der Tasten Einstellungen und...

Страница 12: ... Cool Down 8 Relax Wellbeing Workouts Bei allen Programmen haben Sie die Möglichkeit die Impulsintensi tät der Kanäle separat einzustellen 6 1 Fitness Power Workouts Progr Nr Sinnvolle Anwendungs bereiche Indikationen Frequenz Hz Laufzeit Min Schwierigkeitsgrad Anfänger Fortge schritten Experte 1 Warm Up 7 5 On 4 sec Off 4sec On 6 sec Off 2sec kontinu ierlich 2 Cool Down 100 10 On 1 sec Off 1sec 3...

Страница 13: ...n Kanals auf Null Platzieren Sie die Elektrode neu und stellen Sie die gewünschte Impulsin tensität erneut ein 7 Stromparameter Elektrostimulations Geräte arbeiten mit den folgenden Stromeinstel lungen die je nach Einstellung unterschiedliche Auswirkung auf die Stimulations wirkung haben 7 1 Impulsform Diese beschreibt die Zeitfunktion des Erreger stroms Dabei werden monophasische von biphasischen...

Страница 14: ...n keine chemischen Reiniger oder Scheuermittel Achten Sie darauf dass kein Wasser in das Gerät eindringt Aufbewahrung Knicken Sie die Anschlussleitungen und Elektroden nicht scharf ab Trennen Sie die Anschlussleitungen von den Elektroden ab Kleben Sie nach Gebrauch die Elektroden wieder zurück auf die Träger folie Lagern Sie das Gerät an einem kühlen belüfteten Ort Stellen Sie keine schweren Gegen...

Страница 15: ...en Sie diese daher Die Haut im Behandlungsbereich wird rot Was tun Behandlung sofort abbrechen und warten bis sich der Hautzustand normali siert hat Eine schnell abklingende Hautrötung unter der Elekt rode ist ungefährlich und lässt sich durch die örtlich angeregte stärke re Durchblutung erklären Bleibt die Hautreizung jedoch bestehen und kommt es evtl zu Juckreiz oder Entzündung ist vor weiterer ...

Страница 16: ...lter Form sollte vermieden wer den da dies eine fehlerhafte Betriebsweise zur Folge haben könnte Wenn eine Verwendung in der vorgeschriebenen Art dennoch not wendig ist sollten dieses Gerät und die anderen Geräte beobachtet werden um sich davon zu überzeugen dass sie ordnungsgemäß arbeiten Die Verwendung von anderem Zubehör als jenem welches der Her steller dieses Gerätes festgelegt oder bereitges...

Страница 17: ...genüber der Beurer GmbH Ulm Germany geltend zu machen Bitte wenden Sie sich im Falle von Reklamationen an unseren Service unter folgendem Kontakt Service Hotline Tel 49 0 731 39 89 144 E Mail kd beurer de www beurer com Fordern wir Sie zur Übersendung des defekten Produktes auf ist das Produkt an folgende Adresse zu senden Beurer GmbH Servicecenter Lessingstraße 10 b 89231 Neu Ulm Germany ...

Страница 18: ...tic compatibility 32 14 Warranty service 32 Read these instructions for use carefully and keep them for later use be sure to make them accessible to other users and observe the information they contain To find out how to use the muscle stimulation device easily scan the video tutorial QR code on the title page of these instructions for use with your smartphone and watch the video Signs and symbols...

Страница 19: ...y manner Delivery scope and accessories Check that the set packaging has not been tampered with and make sure that all contents are present Before use ensure that there is no visible damage to the device or accessories and that all packaging material has been removed If you have any doubts do not use the device and contact your retailer or the specified Customer Service address A B C D 2 x S 2 x M...

Страница 20: ...ted strengthening of the muscles activating application and the other is to achieve a relaxing restful effect relaxing application The activating application involves Muscle training to increase endurance and or Muscle training in order to support the strengthening of specific muscles or muscle groups and to achieve the desired changes to physical proportions The relaxing application involves Musc...

Страница 21: ...Failure to do so invalidates the warranty PRECAUTIONS Always pull gently on electrodes to remove them from the skin to prevent injuries in the unusual case of highly sensitive skin Hold the device away from sources of heat and do not use it in close proximity approx 1 m to shortwave or microwave devices as doing so can result in unpleasant current peaks Do not expose the device to direct sunlight ...

Страница 22: ... that the device functions effectively do not drop it or dismantle it Check the device for signs of wear and tear or damage If there are such signs of wear and tear or damage or if the device was used improperly it must be returned to the manufacturer or retail er before further use Switch the device off immediately if it is faulty or not working properly Never attempt to open and or repair the de...

Страница 23: ... Return button 8 Connection socket for channel 2 blue 3 Intensity button for channel 1 green 9 USB charging socket 4 Intensity button for channel 2 blue 10 Connection socket for channel 3 red 5 Intensity button for channel 3 red 11 Connection socket for channel 4 yellow 6 Intensity button for channel 4 yellow ...

Страница 24: ...d 4 2 Securing the belt clip You can secure the muscle stimulation device to your belt or waist band by using the belt clip To attach the muscle stimulation device to the belt clip press the belt clip to the back of the muscle stimulation device until you hear and feel it click into place 5 Use 5 1 Starting use Step 1 Press and hold the ON OFF button for around 3 seconds in or der to switch on the...

Страница 25: ...rrent intensity levels of the channels that you are using You will also be able to see how many seconds of a particular impulse or of a break between impulses remain The program will start automatically af ter you have selected the intensity level through the intensity button of the chan nels that you are using Use the intensity buttons to set the intensity you want 5 2 Notes on use Adjusting the ...

Страница 26: ...nel 2 plugs You must not con nect 2 cuffs to the same channel Make sure that you place the cuffs in such a way that both gold electrodes sit on the skin securely Recovery break Do not train the same part of the body more than once a day Make sure that you wait at least 24 hours before you train that part of the body again Water intake Make sure that you drink enough water before during and after t...

Страница 27: ...e muscle stimulation device to the default settings use the buttons to select Settings and confirm by pressing the OK button Use the buttons to select 4 Reset device and confirm by pressing the OK button You will then be asked whether you wish to reset the device to the default settings Use the buttons to select YES and confirm by pressing the OK button Next you will be taken back automatically to...

Страница 28: ...f 1sec 3 Six pack 60 4 20 On 5 sec Off 9sec On 8 sec Off 9sec On 8 sec Off 8sec Progr no Practical areas for application indications Frequency Hz Running time min Level of difficulty Beginners Advanced Expert 4 Healthy back 40 4 20 On 4 sec Off 10 sec On 6 sec Off 10 sec On 8 sec Off 10 sec 5 Healthy lower back 80 4 20 On 6 sec Off 10 sec On 8 sec Off 10 sec On 8 sec Off 8sec 6 Strong core 50 4 20...

Страница 29: ...n biphasic pulse currents the electrical impulse alternates its direction The EM 95 only provides biphasic pulse currents as these relieve muscles cause little muscle fatigue and are safe for use 7 2 Impulse frequency The frequency indicates the number of individ ual impulses per second and is displayed in Hz Hertz It can be calculated by determining the cyclic value for the time period The releva...

Страница 30: ...harmful substances Pb Battery contains lead Cd Battery contains cadmium Hg Battery contains mercury For environmental reasons do not dispose of the device in the household waste at the end of its useful life Dispose of the device at a suitable local collection or recycling point in your country Dispose of the device in accordance with EC Directive WEEE Waste Electrical and Electronic Equipment If ...

Страница 31: ...ber and or order number 8 x adhesive electrodes 45 x 45 mm Item 661 02 2 x cuffs Size XS 22 35 cm Item 662 03 2 x cuffs Size S 28 45 cm Item 662 04 2 x cuffs Size M 36 54 cm Item 662 07 2 x cuffs Size L 50 70 cm Item 662 08 12 Technical specifications Type EM 95 Output waveform Biphasic rectangular pulses Pulse length 100 350 µs 10 Pulse frequency 4 100 Hz 10 Output voltage Max 120 V pp 10 500 ohm...

Страница 32: ...livery Failure to comply with the above can impair the perfor mance of the device Failure to comply with the above can impair the performance of the device 14 Warranty service In case of a claim under the warranty please contact your local deal er or the local representation which is mentioned in the list service international In case of returning the unit please add a copy of your receipt and a s...

Страница 33: ...é électromagnétique 47 14 Garantie Maintenance 48 Lisez attentivement ce mode d emploi conservez le pour un usage ultérieur mettez le à disposition des autres utilisateurs et suivez les consignes qui y figurent Pour une utilisation plus simple de l appareil de musculation scannez le code QR sur la couverture du mode d emploi avec votre smartphone afin d accéder au tutoriel vidéo Symboles utilisés ...

Страница 34: ...t Livraison et accessoires Vérifiez si l emballage carton extérieur du kit est intact et si tous les éléments sont inclus Avant l utilisation assurez vous que l appareil et les accessoires ne présentent aucun dommage visible et que tout l emballage a bien été retiré En cas de doute ne l utilisez pas et adressez vous à votre revendeur ou au service client indiqué A B C D 2 x S 2 x M F E G A 1 appar...

Страница 35: ...oportions corporelles à l esthétique souhaitée L utilisation de la SME se fait de deux façons D une part elle peut susciter un renforcement ciblé de la musculature utilisation active tandis que d autre part elle peut produire un effet de dé tente et de récupération utilisation relaxante L utilisation active comprend Musculation pour augmenter l endurance et ou Musculation pour soutenir le renforce...

Страница 36: ... Troubles survenus suite au traitement par stimulation Irritations cutanées persistantes dues à une stimulation prolongée au niveau d électrodes placées au même endroit ATTENTION Utilisez uniquement l EM 95 Sur un être humain Aux fins pour lesquelles il a été conçu et de la manière indiquée dans ce mode d emploi Toute utilisation inappropriée peut être dangereuse À usage externe uniquement Avec le...

Страница 37: ...chant pas l utiliser par manque d expérience ou de connaissances Sauf dans le cas où ils sont surveillés par une personne responsable de leur sécurité ou s ils ont reçu de leur part les instructions né cessaires à une bonne utilisation de l appareil Si la capacité adhésive des électrodes autocollantes diminue remplacez les immédiatement Utilisez alors à nouveau l ap pareil avec les nouvelles élect...

Страница 38: ... dans ce mode d emploi Avant la première utilisation chargez complètement la batterie voir chapitre Charger la batterie Pour que la batterie ait une durée de vie maximale rechargez la complètement au moins 2 fois par an 3 Description de l appareil 1 2 3 4 5 6 7 8 9 10 11 1 Touche MARCHE ARRÊT OK 7 Prise femelle canal 1 vert 2 Touche Retour 8 Prise femelle canal 2 bleu 3 Touche d intensité canal 1 ...

Страница 39: ...dant qu il charge 4 2 Fixation du clip ceinture Vous pouvez attacher l appareil de musculation à votre ceinture ou à votre pantalon à l aide du clip ceinture Pour fixer le clip ceinture sur l appareil de musculation pressez le clip ceinture sur la partie arrière de l appareil de musculation jusqu à entendre et sentir un encliquettement 5 Utilisation 5 1 Commencer l utilisation Étape 1 pour allumer...

Страница 40: ...raînement ainsi que le niveau d intensité actuellement paramétré pour les canaux utilisés De plus il indique les secondes restantes dans une impulsion ou dans une pause d impulsion Le programme démarre automatique ment après avoir réglé l intensité avec la touche d intensité des canaux utilisés Réglez l intensité de votre choix à l aide des touches d intensité 5 2 Conseils d utilisation Réglage de...

Страница 41: ...al Lors de la disposition des brassards assurez vous que les deux électrodes dorées soient bien en contact avec la peau Pause repos N effectuez pas plus d un entraînement par jour sur la même partie du corps Respectez une pause au minimum de 24 heures pour ré péter un entraînement sur la même partie du corps Apport en eau Veillez à boire suffisamment d eau avant pendant et après l entraî nement Bu...

Страница 42: ...ise alors les paramètres de langue de luminosité et de son ainsi que la durée de fonctionnement et la durée de stimulation réelle Pour réinitialiser l appareil de musculation sur ses paramètres par défaut l appareil doit être allumé Puis utilisez les touches pour sélectionner l élément Paramètres et confirmez en appuyant sur la touche OK Utilisez les touches pour sélectionner l élément 4 Réinitia ...

Страница 43: ...N de prog Domaines d applica tion utiles indications Fréquence Hz Durée min Niveau de difficulté Débutant Avancé Expert 1 Échauffement 7 5 Marche 4 s Arrêt 4 s Marche 6 s Arrêt 2 s en conti nu 2 Retour au calme 100 10 Marche 1 s Arrêt 1 s 3 Zone abdominale 60 4 20 Marche 5 s Arrêt 9 s Marche 8 s Arrêt 9 s Marche 8 s Arrêt 8 s 4 Santé du dos 40 4 20 Marche 4 s Arrêt 10 s Marche 6 s Arrêt 10 s March...

Страница 44: ...ctriques Les appareils d électrostimulation fonctionnent avec les réglages électriques suivants qui ont un effet différent sur la stimulation en fonction du réglage 7 1 Forme d impulsion Elle décrit la fonction temporelle du courant d excitation Dans ce cadre on différencie les courants pul sés monophasés et biphasés Avec les courants pulsés monophasés le courant passe dans une direction pour les ...

Страница 45: ...nt savonneuse Pour le nettoyage n utilisez pas de détergent chimique ou abra sif Assurez vous que l eau ne s infiltre pas à l intérieur Stockage Ne pliez pas trop les cordons de raccordement ni les électrodes Débranchez les cordons de raccordement des électrodes Après utilisation collez de nouveau les électrodes sur leur film support Rangez l appareil dans un endroit frais et aéré Ne posez pas d o...

Страница 46: ...es électrodes et vérifiez que les électro des autocollantes ne se chevauchent pas 4 Augmentez progressivement l intensité des impulsions Le symbole de la batterie s affiche Que faire Chargez la batterie Vous avez une sensation désagréable au niveau des électrodes Que faire 1 Les électrodes sont mal placées Vérifiez leur position et remet tez les en place si nécessaire 2 Les électrodes sont usées E...

Страница 47: ...F avec une humidité de l air relative de 0 à 85 Dimensions env 136 x 89 x 26 mm sans clip ceinture Poids 200 g avec clip ceinture inclus Pression atmosphérique maximale admissible 700 1 060 hPa Transfert de données Bande de fréquence 2 400 2 483 5 MHz Puissance d émission 0 32 dBM max L appareil utilise la technologie Bluetooth Low Energy Compatible avec les smartphones ta blettes Bluetooth 4 0 Li...

Страница 48: ...mande de garantie veuillez contacter votre revendeur local ou la succursale locale cf la liste Service client à l interna tional Lorsque vous retournez l appareil assurez vous d y joindre une copie de votre preuve d achat et une brève description du défaut Les conditions de garantie suivantes s appliquent 1 La période de garantie des produits BEURER est de 3 ans ou si elle est plus longue elle est...

Страница 49: ...técnicos 63 13 Indicaciones relativas a la compatibilidad electromagnética 63 14 Garantía asistencia 64 Lea atentamente estas instrucciones de uso consérvelas para su futura utilización póngalas a disposición de otros usuarios y respete las indicaciones Para que el uso del aparato de estimulación muscular le resulte más fácil escanee el código QR del tutorial en vídeo en la pá gina de título de es...

Страница 50: ...os suministrados y accesorios Compruebe que el envoltorio del producto esté intacto y que su contenido esté completo Antes de utilizar el aparato deberá asegu rarse de que ni este ni los accesorios presentan daños visibles y de que se retira el material de embalaje correspondiente En caso de duda no lo use y póngase en contacto con su distribuidor o con la dirección de atención al cliente indicada...

Страница 51: ...namientos musculares convencionales con el fin de aumentar el rendimiento de los grupos de músculos y adaptar las proporciones corporales a los resultados estéticos de seados Con la utilización de la EMS se pueden buscar dos efectos Por un lado puede producir un fortalecimiento intencionado de la musculatura efecto activador y por otro también puede obtenerse un efecto calmante y reparador efecto ...

Страница 52: ... enfermedad cutánea En caso de diabetes Si sufre cualquier trastorno de la sensibilidad con reducción de la sensación de dolor como p ej trastornos metabólicos Si surgen molestias con el tratamiento de estimulación En caso de producirse irritaciones de la piel permanentes tras periodos de estimulación prolongados en la misma zona de colo cación de los electrodos ATENCIÓN El EM 95 solo puede utiliz...

Страница 53: ...j insensibilidad al dolor o mentales limitadas o con poca experiencia o conocimientos a no ser que los vigile una persona responsable de su seguridad o que esta persona les indique cómo se debe utilizar el aparato Cambie inmediatamente los electrodos adhesivos cuando dismi nuya su capacidad de adherencia No vuelva a utilizar el aparato hasta que no tenga electrodos adhesivos nuevos En caso con tra...

Страница 54: ...ante o las de estas instrucciones de uso Cargue completamente la batería antes de la primera puesta en funcionamiento véase el capítulo Carga de la batería Cargue completamente la batería al menos 2 veces al año para prolongar su vida útil el mayor tiempo posible 3 Descripción del aparato 1 2 3 4 5 6 7 8 9 10 11 1 Botón de encendido apagado OK 7 Toma de conexión canal 1 verde 2 Botón de retroceso ...

Страница 55: ...ip para el cinturón Puede sujetar el aparato de estimulación muscular a su cinturón o a la cintura del pantalón con ayuda del clip para el cinturón Para sujetar el clip para el cinturón en el aparato de estimulación muscular empuje el clip sobre la parte trasera del aparato de es timulación muscular hasta que oiga y note que encaja 5 Aplicación 5 1 Comienzo de la aplicación Paso 1 Mantenga pulsado...

Страница 56: ... brazaletes y las perneras tal como se muestra en la pantalla del aparato Conecte a continuación los cables con los electrodos y las tomas de conexión de la parte inferior del aparato Tenga en cuenta la caracterización en colores en la pantalla Pulse a continuación el botón OK para continuar Consejo sobre la colocación de los brazaletes tras humedecer la super ficie pase el brazo primero por ellos...

Страница 57: ... el volumen de suministro se incluyen 2 pares de brazaletes en los tamaños S y M Si los brazaletes no tienen el tamaño adecua do pueden solicitarse brazaletes de los tamaños XS y L véase la información en el capítulo Piezas de repuesto y de desgaste Tamaño del brazalete Apto para perímetro XS 22 35cm S 28 45cm M 36 54cm L 50 70cm Con la posición del brazalete puede focalizarse la zona muscular est...

Страница 58: ...nes 2 Luminosidad y confir me con el botón OK Seleccione con uno de los botones la luminosidad que desee y confirme con el botón OK A continuación volverá automática mente al menú de configuración Sonido El sonido de los botones del aparato de estimulación muscular se puede activar y desactivar Para activar o desactivar el sonido de los botones seleccione en el aparato encendido con uno de los bot...

Страница 59: ... El aparato de estimulación muscu lar está ahora conectado con el smartphone En la pantalla del aparato aparece el símbolo de Bluetooth cuando se establece una conexión Requisitos del sistema iOS 10 0 AndroidTM 5 0 Bluetooth 4 0 Lista de los aparatos compatibles 6 Visión general de los programas El aparato de estimulación muscular dispone de un total de 20 se siones de entrenamiento 12 sesiones de...

Страница 60: ...los electrodos en la parte delan tera de la caja torácica Colocar correctamente los electrodos es importante para obtener los resultados deseados con la aplicación de estimulación La colocación de los electrodos representada en el aparato sir ve como ayuda básica para colocar los electrodos A la hora de elegir la posición de los electrodos deben tenerse en cuenta los siguientes aspectos Distancia ...

Страница 61: ...e pene tración de la corriente pudiéndose afirmar en general que cuanto mayor es la masa muscular mayor debe ser el ancho del impulso 7 4 Intensidad del impulso El ajuste del grado de intensidad se rige indivi dualmente por la percepción subjetiva de cada usuario individual y viene determinado por una serie de magnitudes como el lugar de aplica ción la circulación cutánea el grosor de la piel y la...

Страница 62: ...de los electrodos con un paño húmedo sin pelusas Si los electrodos siguen sin fijarse a la piel deberá cambiarlos 2 Limpie la piel antes de cada aplicación pero prescinda de pro ductos como bálsamos o aceites Un afeitado puede contribuir a prolongar la vida útil de los electrodos No se aprecia estimulación alguna Qué hay que hacer 1 Interrumpa el programa pulsando el botón OK Compruebe si los cabl...

Страница 63: ...p para el cinturón Presión atmosférica máxima admisible 700 1060 hPa Transferencia de datos banda de frecuencias de 2400 a 2483 5 MHz Potencia de transmisión máx 0 32 dBM El aparato utiliza Bluetooth low energy technology Compatible con smartphones tablets Bluetooth 4 0 Lista de los smartphones tablets com patibles Nota No garantizamos el correcto funcionamiento de este aparato si se usa al margen...

Страница 64: ...íe el aparato adjunte una copia del recibo de com pra y una breve descripción del problema Se aplican las siguientes condiciones de garantía 1 El periodo de garantía para productos de BEURER es de 3 años o si es superior se aplica el periodo de garantía vigente en el país correspondiente a partir de la fecha de compra En caso de una reclamación de la garantía la fecha de compra deberá demostrarse ...

Страница 65: ... compatibilità elettromagnetica 79 14 Garanzia Assistenza 80 Leggere attentamente le presenti istruzioni per l uso conservarle per impieghi futuri renderle accessibili ad altri utenti e attenersi alle indicazioni Per un utilizzo più semplice dell apparecchio per la stimolazione muscolare eseguire con lo smartphone la scansione del codi ce QR del video tutorial sul frontespizio di queste istruzioni...

Страница 66: ...accessori Controllare l integrità esterna della confezione e del contenuto Pri ma dell uso assicurarsi che l apparecchio e gli accessori non pre sentino nessun danno palese e che il materiale di imballaggio sia stato rimosso In caso di dubbio non utilizzare l apparecchio e con sultare il proprio rivenditore o contattare l Assistenza clienti indicata A B C D 2 x S 2 x M F E G A 1 apparecchio per la...

Страница 67: ...ni esempi di azione attivante Allenamento muscolare per l incremento delle prestazioni di resi stenza e o Allenamento muscolare per il potenziamento di singoli muscoli o di gruppi muscolari per ottenere il cambiamento desiderato delle proporzioni fisiche Alcuni esempi di azione rilassante Rilassamento muscolare ai fini dello scioglimento di eventuali contratture Miglioramento in caso di affaticame...

Страница 68: ...zione prolungata sullo stesso punto ATTENZIONE Utilizzare l apparecchio EM 95 esclusivamente Su persone Per lo scopo per il quale è stato concepito e descritto nelle pre senti istruzioni per l uso Qualsiasi uso non conforme comporta un pericolo Per l utilizzo esterno Con gli accessori originali forniti in dotazione e ordinabili in segui to diversamente decade ogni diritto di garanzia PRECAUZIONI D...

Страница 69: ...capacità di adesione degli elettrodi adesivi si riduce sostituirli immediatamente Riutilizzare l apparecchio solo con elettrodi adesivi nuovi In caso contrario l adesione non uniforme degli elettrodi adesivi può causare lesioni cutanee Sostituire gli elettrodi con elettrodi nuovi dopo massimo 20 utilizzi Danni Se danneggiato non utilizzare l apparecchio e consultare il pro prio rivenditore o conta...

Страница 70: ...ia Per ottenere un ciclo di vita più lungo possibile caricare comple tamente la batteria ricaricabile almeno 2 volte all anno 3 Descrizione dell apparecchio 1 2 3 4 5 6 7 8 9 10 11 1 Pulsante ON OFF OK 7 Presa di collegamento canale 1 verde 2 Pulsante Indietro 8 Presa di collegamento canale 2 blu 3 Pulsante intensità canale 1 verde 9 Connettore di carica USB 4 Pulsante intensità canale 2 blu 10 Pr...

Страница 71: ... l apparecchio durante il caricamento 4 2 Fissaggio della clip per cintura Con la clip per cintura è possibile fissare l apparecchio per la stimo lazione muscolare alla cintura o al bordo dei pantaloni Per fissare la clip per cintura all apparecchio per la stimolazione muscolare premere la clip sul retro dell apparecchio fino a farla scattare in posizione 5 Impiego 5 1 Inizio dell utilizzo Fase 1 ...

Страница 72: ...intensità attual mente impostato per i canali utilizzati Vengono inoltre mostrati i secondi ri manenti di un impulso o di una pausa dell impulso Impostando l intensità attraverso i pul santi intensità dei canali utilizzati il programma si avvia automaticamente Regolare l intensità desiderata mediante i pulsanti intensità 5 2 Indicazioni di impiego Impostazione dell intensità È possibile impostare ...

Страница 73: ...so canale Accertarsi di applicare i manicotti in modo che gli elettrodi dorati siano ben a contatto con la pelle Pausa di riposo Non allenare la stessa parte del corpo più di 1 volta al giorno Ac certarsi che tra un allenamento e l altro della stessa parte del corpo trascorrano almeno 24 ore Apporto di acqua Bere un sufficiente quantitativo d acqua prima durante e dopo l al lenamento Prima di iniz...

Страница 74: ...e A questo punto con il pulsante OK è possibile attivare o disattivare il tono pulsanti Verde tono pulsanti attivo Rosso tono pulsanti disattivato Reset dell apparecchio È possibile riportare l apparecchio per la stimolazione muscolare alle impostazioni di fabbrica In questo caso le impostazioni di lingua luminosità e volume nonché la durata d esercizio e il tempo di stimolazione effettivo vengono...

Страница 75: ...olazione muscolare viene visualizzato un codi ce numerico a sei cifre Inserire il codice numerico a sei cifre nello smartphone L apparecchio per la stimolazione muscolare è ora collegato con lo smartphone Il simbolo del Bluetooth viene visualizzato sul display dell apparecchio quando è presente una connessione Requisiti del sistema iOS 10 0 AndroidTM 5 0 Bluetooth 4 0 Elenco dei dispositivi compat...

Страница 76: ... fra gli elettrodi Più grande è la distanza fra gli elettrodi maggiore è il volume tissu tale stimolato Ciò vale per l area e la profondità del volume tissu tale Una maggiore distanza fra gli elettrodi riduce però l intensità di stimolazione del tessuto Ciò significa che scegliendo la distanza maggiore fra gli elettrodi viene stimolato un volume tissutale mag giore ma con minore intensità Per aume...

Страница 77: ...one evitare qualsiasi impostazione che produce dolore In caso di utilizzo prolungato può essere necessario un aggiusta mento a seguito dei processi di adattamento nel punto di applica zione 8 Pulizia e conservazione Elettrodi adesivi Per garantire un aderenza degli elettroni applicati per il maggior tempo possibile pulirli attentamente con un panno umido privo di pelucchi o pulire il lato inferior...

Страница 78: ...rarsi che siano stati inumiditi con acqua 2 Accertarsi che la spina del cavo di alimentazione sia inserita sal damente nell apparecchio 3 Controllare il posizionamento degli elettrodi e assicurarsi che gli elettrodi adesivi non si sovrappongano 4 Aumentare progressivamente l intensità dell impulso Appare il simbolo della batteria Cosa fare Caricare la batteria ricaricabile Si percepisce una sensaz...

Страница 79: ...ibile garantire un funziona mento corretto Ci riserviamo il diritto di apportare modifiche tecniche al fine del mi glioramento e del continuo sviluppo del prodotto 13 Avvertenze sulla compatibilità elettromagnetica AVVERTENZA L apparecchio è idoneo per l utilizzo in qualsiasi ambiente riporta to nelle presenti istruzioni per l uso incluso l ambiente domestico In determinate circostanze in presenza...

Страница 80: ...3 anni oppure se più lunga fa fede la durata di garanzia valida dalla data di acquisto di ciascun paese In caso di rivendicazioni la data di acquisto deve essere dimo strata tramite una prova d acquisto o una fattura 2 La durata della garanzia non viene prolungata da riparazioni dell intero apparecchio o di parti di esso 3 La garanzia non ha validità per i danni derivanti da a Uso improprio ad es ...

Страница 81: ...hakkında bilgiler 94 14 Garanti servis 94 Lütfen bu kullanım kılavuzunu dikkatle okuyun ileride gerekebileceği için saklayın diğer kullanıcıların erişebilmesini sağlayın ve içindeki yönergelere uyun Bu kullanım kılavuzunun ilk sayfasındaki Video Tutorial QR ko dunu akıllı telefonunuzla tarayıp videoyu izleyerek kas stimüla syon cihazını daha kolay bir şekilde kullanabilirsiniz İşaretlerin açıklama...

Страница 82: ...slimat kapsamı ve aksesuarlar Seti kontrol ederek karton ambalajın dıştan hasar görmemiş ve içeriğin eksiksiz olduğundan emin olun Cihazı kullanmadan önce cihazda ve aksesuarlarında görünür hasarlar olmadığından ve tüm ambalaj malzemelerinin çıkarıldığından emin olun Şüpheli durumlar da kullanmayın ve satıcınıza veya belirtilen müşteri hizmetleri adre sine başvurun A B C D 2 x S 2 x M F E G A 1 x ...

Страница 83: ...llanılmaktadır EMS iki yönde uygulanır Bir yandan kasların isabetli olarak güçlendirilmesi sağlanır aktive edici uygulama ve diğer yandan da rahatlatıcı dinlendirici etki gevşetici uygulama elde edilebilir Aktive edici uygulama olarak şunlar sayılabilir Kondisyonun artırılması için kas egzersizi ve veya Vücut oranlarında istenen değişikliklerin elde edilebilmesi için be lirli kasların veya kas gru...

Страница 84: ...a uygun ve bu kullanım kılavuzunda belirtilen şekilde kullanın Usulüne uygun olmayan her türlü kullanım tehli keli olabilir Harici olarak kullanın Ayrıca sadece birlikte verilen ve sonradan sipariş edilebilen orijinal aksesuar parçaları ile kullanın aksi halde garanti hakkı ortadan kalkar KORUYUCU ÖNLEMLER Nadir durumlarda çok hassas olan ciltlerde meydana gelebilecek olan yaralanmaları önlemek iç...

Страница 85: ...r durumunda cihazı kullanmayın ve satıcınıza veya belirtilen müşteri hizmetleri adresine başvurun Cihazın işlevini yerine getirerek çalışmasını sağlamak için cihaz düşürülmemeli veya parçalarına ayrılmamalıdır Cihazı yıpranma veya hasar belirtileri bakımından kontrol edin Bu tür belirtiler olduğunda veya cihaz usulüne uygun olmayan bir şe kilde kullanılmış olduğunda yeniden kullanılmadan önce üret...

Страница 86: ...şarj kablosunu elektrik adaptörüne ve kas stimülasyon cihazına bağlayın 2 Ardından elektrik adaptörünü uygun bir prize takın 3 Alternatif olarak kas stimülasyon cihazını bilgisayarınızla dizüstü bilgisayarınızla da şarj edebilirsiniz Bunun için USB şarj kablosunu kas stimülasyon cihazına ve bilgisayarınızın dizüstü bilgisayarınızın USB bağlantı soketine takın Cihaz şarj edilirken uygulama yapılmas...

Страница 87: ...egzersizler Soğuma ve Daya nıklılık hariç için Başlangıç İleri ve Uzman zorluk derecelerinden birini seçebilirsiniz Onay tuşuna basarak onaylayın Zorluk derecelerindeki stimülasyon ve mola evrelerinin süresi birbirinden farklıdır Adım 5 Seçilen egzersiz için kol ve bacak manşetlerine ihtiyaç varsa kol ve bacak manşetlerindeki altın kontak yüzeylerini su ile nemlendirmeniz gerekir Yapışan elektrotl...

Страница 88: ... düğmeye basmazsanız veya egzersize başlamazsanız cihaz 5 dakika sonra kapanır Temas kaybı Egzersiz sırasında elektrotlar manşetler kablo çıkarsa elektrik devre sinde kesinti olur ve ilgili kanalın yoğunluğu otomatik olarak sıfırlanır Kanalın yoğunluk göstergesinde bir ünlem işareti yanıp söner ve ci hazdan bir sinyal sesi duyulur cihazın sesi açıksa Manşet Teslimat kapsamında S ve M boyutlu 2 man...

Страница 89: ...i dönersiniz Parlaklık Kas stimülasyon cihazının ekran parlaklığını değiştirebilirsiniz Ekran parlaklığını değiştirmek için cihaz açık durumdayken tuşlarını kullanarak Ayarlar bölümünü seçin ve onay tuşu ile onaylayın tuşlarını kullanarak 2 Parlaklık öğesini seçin ve onay tuşu ile onay layın tuşlarını kullanarak istediğiniz par laklığı seçin ve onay tuşu ile onaylayın Ardından otomatik olarak ayar...

Страница 90: ...ygulayın Adım 4 beurer EMS HomeStudio uygulaması kas stimülasyon cihazına bağlandığında kas stimülasyon cihazının ekranında altı basamaklı bir sayısal kod görünür Altı basamaklı bu sayısal kodu akıllı telefonunuza girin Kas stimülasyon cihazı akıllı telefonunuza bağlanmıştır Bağlantı mevcut olduğunda cihazın ekranıda Bluetooth işareti çıkar Sistem gereksinimleri iOS 10 0 AndroidTM 5 0 Bluetooth 4 ...

Страница 91: ...n geçerlidir Ancak elektrot mesafesi arttıkça dokunun stimülasyon kuvveti azalır yani büyük bir elektrot mesafesi seçildiğinde hacim daha büyüktür ancak stimülasyon daha zayıftır Stimülasyonu arttırmak için impuls yoğunluğu arttırılmalıdır Elektrotların ömrünü uzatmak için bunları yalnız temiz ve müm kün olduğunca kılsız ve yağsız cilt üzerinde kullanın Gerekirse uygulamadan önce cildi temizleyin ...

Страница 92: ...önce bağlantı kablolarını elektrotlardan ayırın Kullanımdan sonra elektrotları tekrar taşıyıcı folyoya yapıştırın Kol ve bacak manşetlerinin temizlenmesi Kol ve bacak manşetlerini sadece elde yıkayarak temizleyin Cihazın temizlenmesi Cihazı kullandıktan sonra yumuşak veya hafif nemli bir bez ile si lin Çok kirliyse bezi hafif sabunlu su ile nemlendirebilirsiniz Temizleme için kimyasal veya aşındır...

Страница 93: ...yım 1 Elektrotlar yanlış konumlandırılmış Elektrotların konumunu kont rol edin ve gerekirse yeniden konumlandırın 2 Elektrotlar eskimiş Eskiyen elektrotlar eşit ve tam yüzeyli bir akım dağıtımı sağlayamadığından ciltte tahrişlere neden olabilir Bu nedenle elektrotları değiştirin Uygulama bölgesinde ciltte kızarıklıklar oluyor Ne yapmalıyım Uygulamayı hemen durdurun ve cildin normale dönmesini bekl...

Страница 94: ...rı görülebilir veya ekran cihaz devre dışı kalabilir Bu cihaz başka cihazların hemen yanında veya başka cihazlarla üst üste koyularak kullanılmamalıdır aksi halde cihazın hatalı çalışması söz konusu olabilir Bahsedilen şekilde kullanım kesinlikle kaçınılmaz sa gerektiği gibi çalıştıklarından emin olmak için bu cihaz ve diğer cihazlar gözlemlenmelidir Bu cihazın üreticisinin belirttiği veya sağladı...

Страница 95: ...dakiler sonucu oluşan hasarlar için geçerli değildir a Usulüne uygun olmayan kullanım örn kullanım talimatlarına uyulmaması b Müşteri veya yetkisiz kişiler tarafından yapılan onarımlar c Üreticiden müşteriye nakliye veya servis merkezine nakliye sırasında oluşan hasarlar d Normal yıpranmaya uğrayan aksesuarlar manşet piller vb için garanti geçerli değildir 4 Cihaz hasar gördüğünde bir garanti tale...

Страница 96: ...ной совместимости 111 14 Гарантия сервисное обслуживание 111 Внимательно прочтите данную инструкцию по применению сохраняйте ее для последующего использования и предоставляйте другим пользователям возможность с ней ознакомиться а также всегда следуйте ее указаниям Для более простого использования миостимулятора отсканируйте с помощью Вашего смартфона QR код видеоруководства расположенный на титуль...

Страница 97: ...ды Комплект поставки и принадлежности Проверьте комплектность поставки и убедитесь в том что на кар тонной упаковке нет внешних повреждений Перед использовани ем убедитесь в том что прибор и его принадлежности не имеют видимых повреждений и удалите все упаковочные материалы При возникновении сомнений не используйте прибор и обрати тесь к продавцу или в сервисную службу по указанному адресу A B C D...

Страница 98: ...пре деленных групп мышц и добиться соответствия пропорций тела желаемым эстетическим параметрам EMS применяется с дву мя целями С одной стороны эта методика обеспечивает целе направленное укрепление мускулатуры применение с целью то низирующего воздействия а с другой стороны с ее помощью можно достичь дополнительного расслабляющего эффекта и снижения напряжения применение с целью релаксирующего во...

Страница 99: ...уйтесь с ле чащим врачом при наличии у Вас острых заболеваний в особенности гипертонических за болеваний нарушений свертываемости крови склонности к тромбоэмболическим заболеваниям или при подозре нии на эти заболевания а также при злокачественных новообразованиях любых заболеваний кожи диабета любых расстройств чувствительности с пониженным боле вым порогом например при нарушениях обмена веществ ...

Страница 100: ...оцедуру сидя или лежа чтобы в редких случаях наступления вагальной реакции внезапный обморок не подвергать себя опасности получе ния травм Если появится ощущение слабости немедлен но отключите прибор и положите ноги повыше примерно на 5 10 мин Не рекомендуется предварительная обработка кожи жирным кремом или мазью это сильно увеличит износ электродов и может привести к скачкам тока Настоящий прибо...

Страница 101: ...аккумуляторные батарей ки в огонь Не разбирайте не открывайте и не разбивайте аккумулятор ные батарейки Используйте только те зарядные устройства которые описаны в инструкции по применению Перед использованием аккумуляторные батарейки необходи мо правильно зарядить Для правильной зарядки необходимо всегда соблюдать указания изготовителя и указания приве денные в данной инструкции по применению Пер...

Страница 102: ...рибора невозможна 4 2 Закрепление поясного зажима Вы можете прикрепить миостимулятор к ремню или поясу с по мощью поясного зажима Для закрепления поясного зажима на миостимуляторе при жмите зажим к оборотной стороне прибора до щелчка 5 Применение 5 1 Начало использования Шаг 1 Нажмите кнопку ВКЛ ВЫКЛ и удерживайте ее нажатой в тече ние прибл 3 секунд для включения прибора Шаг 2 С помощью кнопок вы...

Страница 103: ...тавшееся время использования и актуальный уровень интенсив ности для используемого канала Кроме того на дисплее отображает ся оставшееся время импульса или паузы в секундах После настройки интенсивности с по мощью кнопки переключения уровня интенсивности каналов программа запустится автоматически Установите необходимый уровень интенсивности с помощью кнопок смены уровня ин тенсивности 5 2 Указания...

Страница 104: ...льно оставаться сухой Проденьте сужающуюся часть манжеты через застежку для плотного затягивания Каждая манжета оборудована отдельным каналом 2 штеке ра Запрещено подключать две манжеты к одному каналу Убедитесь в том что размещаете манжеты таким образом чтобы оба золотых электрода хорошо прилегали к коже Пауза для отдыха Проводите тренировки для одной и той же части тела не чаще 1 раза в день Сле...

Страница 105: ...иостимулятора Для включения или отключения звука выберите на прибо ре с помощью кнопок Настройки и подтвердите выбор кнопкой ОК С помощью кнопок выбери те 3 Звук Теперь Вы можете включить или отключить звук нажав на кнопку ОК Зеленый звук включен Красный звук отключен Возврат к заводским настройкам Вы можете выполнить сброс настроек миостимулятора до за водских При этом будут сброшены настройки яз...

Страница 106: ...м в нем Шаг 4 Как только приложение beurer EMS HomeStudio будет подключено к миостимулятору на дисплее прибора отобразит ся шестизначный цифровой код Введите этот шестизначный цифровой код в смартфон Миостимулятор подключен к Ваше му смартфону Значок Bluetooth отображается на дисплее прибора когда соединение установлено Требования к операционной системе iOS 10 0 AndroidTM 5 0 Bluetooth 4 0 Список ...

Страница 107: ...Непрерывно варианты ПРЕДУПРЕЖДЕНИЕ Запрещено использовать электроды на передней стенке груд ной клетки Правильное размещение электродов важно для успешного при менения стимуляции Вспомогательная информация на дисплее показывает как располагаются электроды При выборе положения электродов необходимо соблюдать сле дующие указания Расстояние между электродами Чем больше расстояние между электродами те...

Страница 108: ...ует большей ширины импульса 7 4 Интенсивность импульса Степень интенсивности настраивается инди видуально в соответствии с субъективными ощущениями пользователя и определяется различными величинами такими как зона применения кровоснабжение кожи толщина кожи и качество контактов электродов Практическая настройка может быть эффективной однако она не должна вызывать неприятных ощущений например боли ...

Страница 109: ...рибор не включается нажатием кнопки ВКЛ ВЫКЛ Что делать 1 Убедитесь в том что аккумулятор заряжен 2 Обратитесь в сервисную службу Электроды отсоединяются от тела Что делать 1 Протрите клейкую поверхность электродов влажной салфет кой без ворса Если адгезия электродов не восстановилась их необходимо заменить 2 Перед применением очистите кожу не используйте лосьон или масло для тела Удаление волос м...

Страница 110: ...ульса 4 100 Гц 10 Напряжение на выходе Макс 120 В pp 10 на 500 Ом Выходной ток Макс 240 мА pp 10 на 500 Ом Питающее напряжение Литий полимерный аккумулятор 1170 мА ч Время применения 5 20 минут Интенсивность Регулируется от 0 до 100 Условия эксплуатации 10 40 C 50 104 F при относи тельной влажности воздуха 30 85 Условия хранения транспортировки 10 50 C 14 122 F при от носительной влажности воздуха...

Страница 111: ... убедиться что они работают надлежащим образом Применение сторонних принадлежностей отличающихся от при лагаемых к данному прибору или не предоставляемых изгото вителем может привести к росту электромагнитных помех или ослаблению помехоустойчивости прибора и тем самым вызвать ошибки в работе Храните переносные коммуникационные приборы в том числе периферию например антенный кабель или внешние анте...

Страница 112: ...magnetycznej 126 14 Gwarancja serwis 126 Należy dokładnie przeczytać i zachować niniejszą instrukcję obsługi przechowywać ją w miejscu dostępnym dla innych użytkowników oraz przestrze gać podanych w niej wskazówek W celu ułatwienia użytkowania urządzenia do stymulacji mięśni należy zeskanować za pomocą smartfona znajdujący się na stronie tytułowej niniejszej instrukcji obsługi kod QR filmu z sa mo...

Страница 113: ...rawdzić pod kątem zewnętrznych uszkodzeń opa kowania kartonowego oraz kompletności zawartości Przed użyciem istotne jest upewnienie się że na urządzeniu i akcesoriach nie widać żadnych uszkodzeń a wszystkie części opakowania zostały usunię te W razie wątpliwości zaprzestać używania urządzenia i zwrócić się do dystrybutora lub napisać na podany adres działu obsługi klienta A B C D 2 x S 2 x M F E G...

Страница 114: ...ała do wymogów estetycz nych System EMS jest stosowany w dwojaki sposób Z jednej strony można za jego pomocą systematycznie wzmocnić siłę mięśni zastosowanie aktywne a z drugiej może także mieć działanie od prężające zastosowanie relaksacyjne Zastosowania aktywizujące Trening mięśni zwiększający wytrzymałość i lub Trening mięśni umożliwiający wzmocnienie określonych mięśni lub grup mięśniowych w c...

Страница 115: ...wa niu bólu np zaburzenia metabolizmu Dolegliwości występujące podczas terapii stymulacyjnej Trwałe podrażnienia skóry z powodu długotrwałej stymulacji w tym samym miejscu umieszczenia elektrody UWAGA Urządzenie EM 95 stosować wyłącznie U ludzi W celu zgodnym z przeznaczeniem oraz w sposób opisany w ni niejszej instrukcji obsługi Każde niewłaściwe użycie może być niebezpieczne Do użytku zewnętrzne...

Страница 116: ...a Gdy zmniejsza się przyczepność elektrod samoprzylepnych należy je niezwłocznie wymienić Z urządzenia można korzystać ponownie dopiero po założeniu nowych elektrod W przeciwnym razie nieregularny rozkład przyczepności elektrod samoprzylep nych mógłby doprowadzić do obrażeń skóry Elektrody należy wymienić na nowe po maksymalnie 20 zabiegach Uszkodzenie W przypadku uszkodzeń nie należy używać urząd...

Страница 117: ... ży go całkowicie naładować co najmniej 2 razy w roku 3 Opis urządzenia 1 2 3 4 5 6 7 8 9 10 11 1 Przycisk włączania wyłączania OK 7 Gniazdo przyłączeniowe kanału 1 zielone 2 Przycisk powrotu 8 Gniazdo przyłączeniowe kanału 2 niebieskie 3 Przycisk regulacji intensywności kanału 1 zielony 9 Gniazdo USB do ładowania 4 Przycisk regulacji intensywności kanału 2 niebieski 10 Gniazdo przyłączeniowe kana...

Страница 118: ...rzystać 4 2 Zamocowanie zaczepu na pasek Urządzenie do stymulacji mięśni można przymocować do paska lub do paska spodni za pomocą dołączonego zaczepu do paska Aby przymocować zacisk paska do urządzenia do stymulacji mięśni dociśnij zacisk paska do tylnej części urządzenia do stymulacji mięśni aż zatrzaśnie się w sposób widoczny i słyszalny 5 Zastosowanie 5 1 Rozpoczęcie użytkowania Krok 1 Przytrzy...

Страница 119: ...ietlane na wyświetlaczu urządzenia Wyświe tlane są również pozostałe sekundy im pulsu lub pauzy między impulsami Program uruchamia się automatycznie po ustawieniu intensywności za pomocą przycisku regulacji intensywności uży wanych kanałów Ustaw odpowiednią intensywność za pomocą przycisków regulacji intensywności 5 2 Wskazówki dotyczące użytkowania Regulacja intensywności Poziom intensywności moż...

Страница 120: ...wione tak aby obie złote elektro dy dobrze przylegały do skóry Faza odpoczynku Nie trenuj tej samej części ciała częściej niż raz dziennie i upewnij się że przed kolejnym treningiem tej samej części ciała występuje co najmniej 24 godzinna przerwa Dostarczanie wody Zadbaj o to aby przed w trakcie i po treningu pić wystarczającą ilość wody Przed rozpoczęciem treningu wypij co najmniej jedną szklankę...

Страница 121: ... opcję Ustawie nia na włączonym urządzeniu i potwierdź przyciskiem OK Wybierz za pomocą przycisków opcję 4 resetowanie urzą dzenia i potwierdź przyciskiem OK Pojawi się zapytanie czy przywrócić ustawienia fabryczne urządzenia Wybierz Tak za pomocą przycisków i potwierdź przyciskiem OK Nastąpi automatyczny powrót do menu ustawień Informacje systemu W ustawieniach systemu można wyświetlić informacje...

Страница 122: ... Power Nr pro gr Wskazane obszary zastosowań Często tliwość Hz Czas trwania min Stopień trudności Początku jący Zaawanso wany Ekspert 1 Rozgrzewka 7 5 Wł 4 sek Wył 4sek Wł 6 sek Wył 2sek ciągły 2 Cool Down 100 10 Wł 1 sek Wył 1sek 3 Sześciopak 60 4 20 Wł 5 sek Wył 9sek Wł 8 sek Wył 9sek Wł 8 sek Wył 8sek 4 Zdrowe plecy 40 4 20 Wł 4 sek Wył 10 sek Wł 6 sek Wył 10 sek Wł 8 sek Wył 10 sek 5 Zabieg na...

Страница 123: ...ożna w razie potrzeby umyć skórę wodą i usunąć włosy Jeśli w trakcie używania elektroda poluzuje się intensywność impulsów odpowiedniego kanału zmniejszy się automatycznie do zera Elektrodę należy ponownie umieścić na skórze i usta wić wybraną intensywność impulsów 7 Parametry prądowe Urządzenia do elektrostymulacji pracują przy następujących usta wieniach prądowych które w zależności od nastawien...

Страница 124: ...ie ręcznie Czyszczenie urządzenia Urządzenie należy czyścić po użyciu miękką lekko zwilżoną ście reczką W przypadku silniejszego zabrudzenia ściereczkę można również zwilżyć wodą z mydłem Do czyszczenia nie używać środków chemicznych ani środków o działaniu ścierającym Nie wolno dopuścić aby woda dostała się do wnętrza urządze nia Przechowywanie Nie zginaj przewodów i elektrod zbyt mocno Odłącz ka...

Страница 125: ...cie przy elektrodach Co należy zrobić 1 Elektrody są źle umieszczone Sprawdź umieszczenie elektrod i w razie potrzeby ponownie je naklej 2 Elektrody są zużyte Może to prowadzić do podrażnień skóry ponieważ nie gwarantują one równomiernego rozłożenia prądu na całej powierzchni Należy je w takim przypadku wymienić na nowe Skóra w miejscu zabiegu ulega zaczerwienieniu Co należy zrobić Należy natychmi...

Страница 126: ...m Przy zakłóceniach elektromagnetycznych w pewnych warunkach urządzenie może być użytkowane tylko w ograniczonym zakresie Wskutek tego mogą wystąpić np komunikaty o błędach lub awaria wyświetlacza urządzenia Należy unikać korzystania z tego urządzenia bezpośrednio obok innych urządzeń lub z innymi urządzeniami w formie stosu ponie waż mogłoby to skutkować nieprawidłowym działaniem Jeśli użyt kowan...

Страница 127: ...ja nie obowiązuje w przypadku uszkodzeń powstałych w następujących okolicznościach a Z powodu niewłaściwego użytkowania np nieprzestrzegania instrukcji obsługi b W wyniku napraw lub modyfikacji wykonanych przez klienta lub osoby nieupoważnione c Podczas transportu od producenta do klienta lub podczas transportu do Servicecenter d Ponadto nie obejmuje akcesoriów dostarczonych z urządze niem które u...

Страница 128: ...he Apple logo are trademarks of Apple Inc registered in the U S and other countries App Store is a service mark of Apple Inc registered in the U S and other countries Google Play and the Google Play logo are trademarks of Google LLC Android is a trademark of Google LLC Beurer GmbH Söflinger Straße 218 89077 Ulm Germany www beurer com www beurer gesundheitsratgeber com www beurer healthguide com 66...

Отзывы: