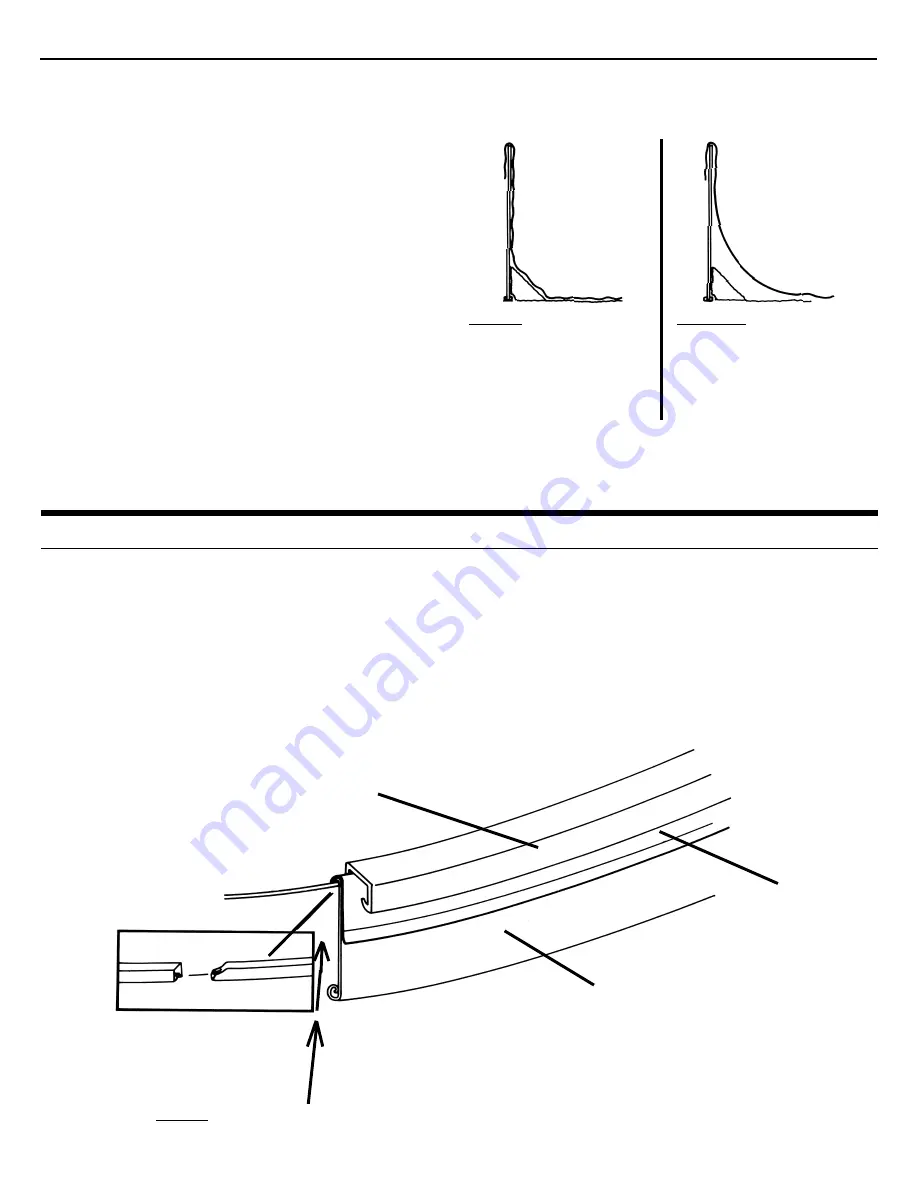
When the liner is completely adjusted and the plastic coping is secured, the next step is to install the inner stabilizer rails.
First, divide the straight inner stabilizer rails in half for each straight side of the pool. Starting at the wall bolts, push the first sta-
bilizer rail over the coping so it fits snugly. Be sure to leave one end of the inner stabilizer rail slightly raised so that the next sta-
bilizer can interlock as shown below. As they are progressively installed along the straight side of the pool, note that the tapered
end of the stabilizer easily telescopes into the un-tapered end of the following stabilizer. The tapered end should be inserted
approximately 1" into the adjacent stabilizer. This allows room for adjustment either in or out. In this way, the last stabilizer may
be fitted into place by adjusting the other stabilizers as needed. As you get to the curved side, use the longer curved inner stabi-
lizer rails, and return to the straight inner stabilizers for the other straight side.
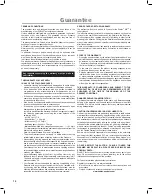
CORRECT
NO AIR SPACE BETWEEN LINER
AND POOL - SLACK ON SIDES.
INCORRECT!
DO NOT LEAVE A GAP BETWEEN
LINER AND COVE. THIS WILL
CAUSE DOWNWARD PRESSURE
ON THE LINER. CORRECT THIS
CONDITION IF IT OCCURS.
INNER
STABILIZER RAIL
LINER
PLASTIC
COPING
*ROLL LINER UP INWARD TO HIDE EXCESS UNDERNEATH TOP RAIL. (ROLLING INWARD WILL PREVENT WATER FROM COLLECT-
ING IN FLAP.) DO NOT TRIM EXCESS - THIS MAY CAUSE LINER TO PULL IN!
STEP 14: LINER ADJUSTMENT
STEP 15: INNER STABILIZER INSTALLATION
Once the liner is held securely in place by coping, tem-
porarily pull wrinkles in the floor towards the sidewall evenly,
leaving the wrinkles at the cove. When the liner is correctly
positioned, there must be no air space between the liner and
the ground or sidewall. Remove wrinkles at the cove by
adjusting the amount of material over the wall. Do not pull
too tight - leave the slack on the sides. When a liner is prop-
erly installed, there is no downward pressure on the liner.
The liner will pull in if the wall vinyl does not have some
slack when installing the pool.
Start filling the pool. When the water is no more than one
inch deep, check for levelness. If the water runs to one side,
pull back the liner and make the ground level. When level,
continue to fill and adjust the liner. Do not cut the skimmer
and the skimmer return holes in the liner until fully adjusted
and pool is
1
/
3
filled.