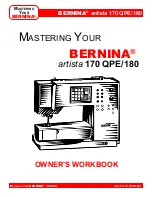
M
ASTERING
Y
OUR
BERNINA
®
1/10/02
artista
170 QPE/180
/4
BERNINA
®
artista
170 QPE/180
M
ASTERING
Y
OUR
BERNINA
®
SECTION A
Care and Feeding of Your Machine
Machine Set Up
Owner’s manual pg.____
• Cover/Storage of foot control, FHS bar, etc.
• Accessory storage – how box slides on & opens
• Attach foot control; note storage of cords
• Power switch – Owner’s manual pg____
• Light - on/off function (in setup) – Owner’s
manual pg____
• Extension table + sliding guide
• Presser foot lifter
-
acts as a “third hand”
-
extra 2mm of presser foot lift
-
drops feed dog to give extra space between
presser foot and feed dog
-
speeds sewing by 20%
-
alternate size available for use with a sewing
machine cabinet
Presser Feet
Owner’s manual pgs.____
• Importance of using the correct foot
• On-screen indicator
• Overview of included presser feet
Feed Dog
Owner’s manual pg. ____
Threads
Owner’s manual pg. ____
• Types of thread
• Uses for each type of thread
Needles
Owner’s manual pg.____
Bobbins
Owner’s manual pg.____
• Removing the bobbin case
• Winding a bobbin
• Use bobbin thread cutter
• Quick start bobbin – use thread cutter located in
the bobbin area
• Clip the thread close to the case before
removing the bobbin
Threading the Upper Thread
Owner’s manual pg.____
• Spool pins and discs – Owner’s manual pg.____
-
vertical spool pin for stacked and decorative
threads
-
horizontal spool pin for crosswound threads
- use disc closest to diameter of the spool
• Optional supplementary thread guide
• Optional BERNINA
®
thread stand
• Thread machine with the presser foot
up
until
ready to thread the needle
Threading the Needle
• Needle threader – Owner’s manual pg.____
• Side thread cutter – Owner’s manual pg.____
• After the needle is threaded, put the thread
under the presser foot
• Lower the presser foot
• Insert the thread into the cutter; it is cut to the
proper length to begin sewing
Needle Stop Adjustment
• With the foot control – Owner’s manual pg.___
• With the Needle Stop Up/Down function –
Owner’s manual pg.___
Needle Positions
Owner’s manual pg. ____
• Eleven positions
Practical/Decorative Stitches
Owner’s manual pgs.____
• Stitches programmed in the machine
• Stitches available from CPS software
• Uses for the stitches – Owner’s manual pgs.____
• How to select stitches – Owner’s manual pgs.____
- touch screen
- scroll arrows
- selection by stitch number
- external buttons for stitch groups


