15
OPERATION
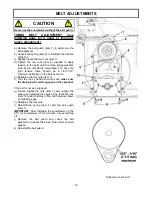
V-Belt:
a) Remove the belt guard (item 1)
b) Remove the 7/16 x 5 1/2’’ hex bolt (item 2) from
the clutch support.
c) Disconnect the wire from electric clutch.
d) Remove the gas tank from the support (Put on
the ground to avoid any spills).
e) Turn the snowblower face down (engine on top).
f) Remove the six nuts (item 3) and bolts from the
reduction plate (item 4).
g) Remove the reduction plate.
h) Unhook the spring (item 5) from the slot on the
tension arm (item 6) and remove the tension arm.
i) Replace
the
belt.
j)
Re-install parts by repeating steps backwards.
BELT REPLACEMENT
Timing Belt:
a) Remove the gas tank from the support. (Put on
the ground to avoid any spills).
b) Turn the snowblower face down (engine on top).
c) Loosen slightly the four nuts (item 7) and the two
nuts (item 8) needed to apply tension to the belt.
d) Remove the six nuts (item 3) and bolts from the
reduction plate (item 4)
e) Remove the reduction plate
f) Unhook the spring (item 5) from the slot on the
tension arm (item 6) and remove the tension arm.
g) Remove
the
V-belt.
h) Replace the timing belt.
IMPORTANT:
Make sure the notches of the belt are well
inserted into the those of the pulley. See belt
adjustment section.
i)
Re-install parts by repeating steps backwards.
j) Make sure to replace and realign the V-belt on
the V-pulley.
k) Make sure the spring is well installed in the slot
on the tension arm.
BELT REPLACEMENT:
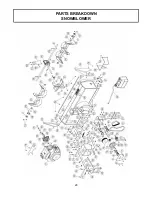
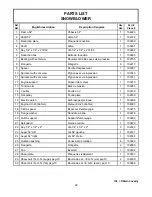
For belt part numbers, refer to snowblower parts breakdown section for parts identification
Snowblower must be detached & disconnected from the A.T.V. to replace belts.
CAUTION
Never use the snowblower without the belt guard.
Содержание 700360-6
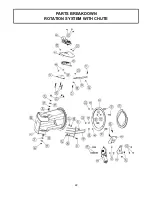
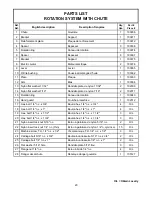
Страница 24: ...22 PARTS BREAKDOWN ROTATION SYSTEM WITH CHUTE ...
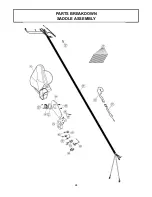
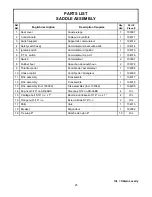
Страница 26: ...24 PARTS BREAKDOWN SADDLE ASSEMBLY ...
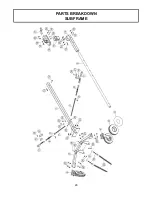
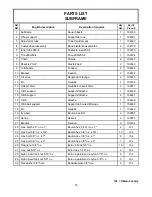
Страница 28: ...26 PARTS BREAKDOWN SUBFRAME ...
Страница 30: ...28 PARTS BREAKDOWN SNOWBLOWER ...

