background image

46

1) IRI.KPAD

1.1) DESCRIPCIÓN

Botonera digital inalámbrica programable. Permite controlar automatismos para 

cancelas y similares, sin que sea necesario realizar ningún cableado.

IRI.KPAD está alimentado por 1 batería de 3V 1/2 AA y transmite el comando a un 

transmisor por radiofrecuencia y de igual manera. Sus características principales son:

• Retro-iluminación con LED.

• Compatible con todos los modelos de receptor radio Benincà con frecuencia de 

funcionamiento de 433.92MHz.

• Tipo de codificación: código programable, rolling-code y ARC (advanced rolling-

code).

• Composición del código con entre 1 y 9 dígitos.

• Número de teclas de 0 a 9 más tecla # o 

 de confirmación.

• Posibilidad de configurar contraseña de acceso, códigos en orden decreciente, 

eliminación de códigos individuales.

• Posibilidad de habilitar la tecla # para la repetición del código.

• Indicación de batería descargada y zumbador para indicaciones sonoras.

1.2) DATOS TÉCNICOS

Alimentación 

1 batería de litio (Li) de 3V 1/2AA 850 mAh CR-2

Alcance en campo abierto

100m

Frecuencia de funcionamiento

433,92 MHz

Temperatura de funcionamiento -20°C / +50°C
Número de códigos memorizables 254
Grado de protección

IP55

Dimensiones

ver Fig.1

1.3) INSTALACIÓN EN PARED (FIG.1) 

ATENCIÓN: Puesto que en las varias fases de programación es necesario acceder a 

la receptora radio de la automatización, se aconseja fijar la botonera a la pared sólo 

después de haber efectuado la programación de todas las funciones.

El grado de protección IP55 permite su uso también en paredes expuestas a la intem-

perie. Sin embargo es mejor, en lo posible, efectuar el montaje en una pared protegida. 

En todo caso es terminantemente indispensable poner la junta G entre la 

pared y la caja. (FIG.2-3)

1.  El tornillo H es un tornillo antirrobo TORX de 3,5. Se suministra en dotación la  


llave correspondiente.

2.  Aplicar en la pared el fondo de la caja utilizando los dos tacos T y los dos tornillos 

Содержание IRI.KPAD

Страница 1: ...IRI KPAD UNIONE NAZIONALE COSTRUTTORI AUTOMATISMI PER CANCELLI PORTE SERRANDE ED AFFINI L8543209 01 2019 rev 3 ...

Страница 2: ...tare il PINAmministratore precedentemente memorizzato seguito da 3 2 beep e due lampeggi del LED centrale verde segnalano l avvenuta trasmissione radio del PIN IMPORTANTE Questa procedura memorizza un codice numerico da inviare al radio ricevitore Successivamente è necessario memorizzare questo codice numerico nel radio ricevitore seguendo le indicazioni riportate sulle specifiche istruzioni Si co...

Страница 3: ...iously stored Administrator PIN followed by 9 2 beeps and two flashes of the green central LED signal the successful radio transmission of the PIN IMPORTANT This procedure stores a numerical code to be sent to the radio receiver Subsequently it is necessary to memorize this numerical code in the radio receiver following the indications in the specific instructions We recommend that you personalize...

Страница 4: ... 8 Geben Sie den vorher gespeicherten Administrator PIN ein gefolgt von 9 2 Pieptöne und zweimaliges Blinken der zentralen grünen LED signalisieren die erfolgte Funkübertragung des PIN WICHTIG DieserVorgangspeicherteinennumerischenCodezumSendenandenFunkempfänger Nachfolgend ist es notwendig diesen numerischen Code im Funkempfänger zu spei chern indemSiedieaufdenspezifischenAnleitungenaufgeführtenA...

Страница 5: ...Administrateur précédemment motorisé suivi de 9 2 bips et deux clignotements de la LED centrale verte signa lent la transmission radio advenue du code IMPORTANT Cette procédure mémorise un code numérique à envoyer à la radio de réception Il faut ensuite mémoriser ce code numérique la radio de réception en suivant les indications reportées dans les instructions spécifiques On conseille de personnal...

Страница 6: ...ee el PIN Administrador previamente memorizado seguido de 9 2 pitidos y dos parpadeos del LED central verde señalan que el PIN se ha transmitido por radio IMPORTANTE Este procedimiento memoriza un código numérico que debe enviarse al receptor radio Acontinuaciónesnecesariomemorizarestecódigonuméricoenelreceptorradio siguiendo las indicaciones que figuran en las correspondientes instrucciones Se ac...

Страница 7: ...owolnego przycisku 8 Wprowadzić wcześniej zapisany w pamięci PIN Administratora z symbolem na końcu 9 2 sygnały dźwiękowe i dwa błyśnięcia centralnie usytuowanej zielonej diody LED zasygnalizują pomyślnie zakończoną transmisję radiową kodu PIN WAŻNE Opisana procedura umożliwia zapisanie kodu numerycznego który ma być przesłany do radioodbiornika Następnie należy zapisać ten kod numeryczny w radioo...

Страница 8: ...8 5 3 1 7 9 6 4 2 8 0 ENTER LED 133 mm 29 mm 85 mm 1 50 70 Ø5 V T H ...

Страница 9: ...9 2 G ...

Страница 10: ...10 3 G ...

Страница 11: ...11 4 3V 1 2AA Y 3 5x10mm TORX 5 6 ...

Страница 12: ...850 mAh CR 2 Portata in aria libera 100m Frequenza funzionamento 433 92 MHz Temperatura funzionamento 20 C 50 C Numero codici memorizzabili 254 Grado di protezione IP55 Dimensioni vedi fig 1 1 3 INSTALLAZIONE A PARETE FIG 1 ATTENZIONE Poiché nelle varie fasi di programmazione è necessario accedere alla ricevente radio dell automazione è consigliabile fissare la pulsantiera alla parete solo dopo av...

Страница 13: ...nda dell utilizzo N Attivazioni giorno Durata Batteria prevista Attivazioni della durata di circa 10s Temperatura media 25 C 100 300 7 anni 3 anni 2 PROGRAMMAZIONE Prima di procedere alla programmazione del dispositivo è necessario conoscere alcuni aspetti del principio di funzionamento Leggere con attenzione tutte le istruzioni prima di procedere con la programmazione 2 1 PASSWORD DI ACCESSO La p...

Страница 14: ...modifiche premere o attendere 20 secondi tempo time out Un eventuale errore di programmazione viene segnalato con un beep prolungato dopodiché IRI KPAD esce dalla fase di programmazione DESCRIZIONE DEI MENU MENU 1 PERSONALIZZAZIONE PASSWORD DI ACCESSO Dopo aver digitato il tasto 1 si entra nella fase di personalizzazione della password segnalato da 2 beep seguiti da una pausa Digitare una prima vo...

Страница 15: ...Funzioni Avanzate MENU 4 CANCELLAZIONE PIN Dopo aver digitato il tasto 4 si entra nella fase di cancellazione del codice da rimuovere segnalato da 2 beep seguiti da una pausa Digitare il PIN che si desidera eliminare e premere Il dispositivo conferma con 3 beep seguiti da pausa MENU 5 Vedi paragrafo Funzioni Avanzate MENU 6 CONFIGURAZIONE FUNZIONAMENTO Per mezzo di questo menu è possibile 1 Attiva...

Страница 16: ...e conferma Disabilita prima pressione riattivazione codice Premere 4 4 beep poi Premere 0 2 beep come conferma 5 Abilita blocco 3 min dopo 5 codici errati Premere 5 4 beep poi Premere 1 2 beep come conferma Disabilita blocco 3 min dopo 5 codici errati Premere 5 4 beep poi Premere 0 2 beep come conferma MENU 7 FUNZIONAMENTO COME INTERRUTTORE DI PROSSIMITÀ Attivando questa funzione la pulsantiera in...

Страница 17: ...utomazioni configurate con funzionamento ciclico Passo Passo es APRE STOP CHIUDE STOP APRE Trascorsi 20 secondi il sistema esce dalla modalità ripetizione e sarà necessario digitare nuovamente un codice valido La confgurazione di fabbrica prevede che questa funzione sia disabilitata Dopo aver digitato il tasto 9 il sistema emette 2 beep seguiti da una pausa e si pone in attesa Digitare 1 se si vuo...

Страница 18: ... un PIN Utente per ogni inquilino del condominio ed associarli tutti al medesimo PIN Amministratore Il vantaggio è che l associazione tra la tastiera e ricevitore va fatta solo per il PIN Amministratore quindi solo una volta ed inoltre si può decidere se disabilitare singoli PIN Utente per bloccare l accesso di specifici utenti oppure se aggiungerne di nuovi in caso di nuovi utenti sempre senza ac...

Страница 19: ...uperato il quale il codice si disattiva automaticamente Dopo aver digitato il tasto 5 si entra nella fase di specifica del contatore a scalare segnalato da 2 beep seguiti da una pausa Digitare il PIN Utente a cui si vuole associare un contatore a scalare e premere Se il codice e effettivamente presente il dispositivo emette 3 beep seguiti da una pausa e passa alla fase successiva in cui si specifi...

Страница 20: ...Ah CR 2 Range without obstacles 100m Operating frequency 433 92 MHz Operating temperature 20 C 50 C Number of storable codes 254 Protection level IP55 Overall dimensions see Fig 1 1 3 WALL INSTALLATION FIG 1 WARNING As the various programming phases require an access to the radio receiver of the system it is advisable to fix the keypad to wall only after programming all functions The IP55 protecti...

Страница 21: ...es according to their use N Activations per day Battery life expected Activations lasting about 10s Average temperature 25 C 100 300 7 years 3 years 2 PROGRAMMING Before proceeding to the programming of the system some aspects of the operating principles must be highlighted Before programming carefully read all instructions 2 1 ACCESS PASSWORD The programming of the device is protected by an acces...

Страница 22: ...t making any changes press or wait for 20 seconds time out time A possible programming error is indicated with a long beep IRI KPAD then exits the programming phase MENUS DESCRIPTION MENU 1 TO CUSTOMIZE THE ACCESS PASSWORD After typing key 1 the customization of the password phase is entered indicated by 2 beeps followed by an interval Type in the new password 6 digit and press IRI KPAD confirms t...

Страница 23: ...ered indicated by 2 beeps followed by an interval Type in the PIN to be erased and press Three beeps followed by an interval confirm the operation MENU 5 See paragraph on Advanced Functions MENU 6 OPERATION CONFIGURATION Through the Menu the following is possible 1 Activate or deactivate the buzzer 2 Switch the back light on and off 3 Enable or disable keypad activation by pressing the asterisk ke...

Страница 24: ...eeps confirm Disable 3 min block after 5 wrong codes Press 5 4 beeps then pres 0 2 beeps confirm MENU 7 OPERATION AS PROXIMITY SWITCH By activating this function the keypad sends a radio control also when the system is activated first touch This might be useful for example to activate a courtesy light in the keypad area Around 2 seconds are needed for this function at every activation of the devic...

Страница 25: ...ion mode and a new valid code shall be typed in again In the factory configuration this function is disabled After typing key 9 two beeps followed by an interval are heard The system enters a wait state Type in 1 if the function is to be activated Type in 0 if the function is to be deactivated Then three beeps are heard followed by an interval The device activates or deactivates the function and e...

Страница 26: ...to the same Administrator PIN The advantage is that the association between the keypad and the receiver should be made only for the Administrator PIN therefore only once and furthermore you can decide whether to disable individual User PINs to block the access of specific users or to add new ones in the case of new users always without accessing the receiver On the last page of this manual is a ta...

Страница 27: ...nction can only be used with User PIN and allows to assign a defined number of transmissions of the code after which the code is deactivated automatically Type in the User PIN code to which a scalar counter should be matched Then press If the User PIN is actually present three beeps followed by an interval are heard The following phase is entered in which the counter value is specified Digit a num...

Страница 28: ...den Meldung der Batterieentladung und Summer für die akustischen Signale 1 2 TECHNISCHE DATEN Speisung 1 Lithium Batterie zu 3V 1 2AA Li 850 mAh CR 2 Tragweite 100m Betriebsfrequenz 433 92 MHz Betriebstemperatur 20 C 50 C Anzahl der programmierbaren Codes 254 Schutzklasse IP55 Maße siehe Abb 1 1 3 WANDMONTAGE ABB 1 ACHTUNG Da der Funkempfänger der Automatik während des Programmierung sablaufs frei...

Страница 29: ...geliefert An der Rückseite befindet sich das Batteriefach das durch einen Deckel mit zwei Y förmigen Schrauben Abb 4 geschlossen ist Immer beide Batterie mit ein neuen Batterie 3V 1 2 AA ersetzen und auf die richtige Polenverbindung achten 1 5 LEBENSDAUER DER BATTERIE Die Lebensdauer der Batterie ist von der Häufigkeit abhängig mit der das Gerät von den Benutzern gebraucht wird In der nachfolgende...

Страница 30: ...rweiterte Funktion 4 Löschen des PIN 5 Einfügen Abwärtszähler erweiterte Funktion 6 Menü Betriebskonfiguration 7 Menü Betrieb als Näherungsschalter 8 Menü zur Überprüfung der Kodierungsart eines gespeicherten PIN 9 Menü Aktivierung der Taste für die Wiederholung der Codes Die gewünschte Menütaste drücken BEMERKUNGEN Aktivieren Sie die Tastatur durch Drücken einer beliebigen Taste Nach 10 Sekunden ...

Страница 31: ... EMPFÄNGER SPEICHERN Nachdem die Programmierung der PIN erfolgt ist ist es je nach Bedarf erforderlich sie im Empfänger zu speichern Zu dem Zeitpunkt in dem der Empfänger auf einen zu speichernden Code zu warten beginnt ist der PIN gefolgt von einzugeben IRI KPAD wird den im Empfänger zu speichernden Code senden Es können auch mehrere Empfänger mit unterschiedlichen Codierungstypen verwendet werde...

Страница 32: ...ene Passwort lautet 654321 und kann nicht geändert werden Taste 6 drücken Das Gerät erzeugt 2 Pieptöne 654321 eingeben eingeben Das Gerät erzeugt 3 Pieptöne gefolgt von einer Pause und wartet auf eine der Reihenfolgen im Menü 6 wie folgt Funktion Folge 1 wenn das akustische Signal aktiviert werden soll Presse 1 4 Pieptöne Presse 1 2 Pieptöne als Bestätigung wenn das akustische Signal deaktiviert w...

Страница 33: ...erät 3 Pieptöne gefolgt von einer Pause und wartet dann auf die Eingabe des Codetyps der bei der Aktivierung des IRI KPAD gesendet werden soll 1 2 Pieptöne eingeben wenn der Rolling Code gewünscht wird 2 2 Pieptöne eingeben wenn der Advanced Rolling Code ARC gewünscht wird 3 2 Pieptöne eingeben wenn der feste Code gewünscht wird Hinweis Wenn nur ein Empfänger verwendet wird muss die Art der Kodier...

Страница 34: ...setzen Sie die Batterie und warten Gerät Initialisierung 2 beep 3 Das Passwort 1234567890 eingeben und die Taste drücken um den Speicher zurück zu stellen 4 Der Summer erzeugt ein intermittierendes Signal das den Löschvorgang bestätigt Durch die Rückstellung wird das Gerät wieder auf die werkseitigen Einstellung geschaltet und alle Codes und persönlichen Einstellungen werden gelöscht SCHNELLSPEICH...

Страница 35: ...also nur einmal erfolgen muss und Sie auch entscheiden können ob Sie die einzelnen Benutzer PIN deaktivieren wollen um den Zugriff bestimmter Benutzer zu sperren oder ob Sie bei neuen Benutzern neue hinzufügen wollen und zwar ohne auf den Empfänger zuzugreifen Auf der letzten Seite der vorliegenden Anleitung ist eine Tabelle aufgeführt die als Modell zur Realisierung einer Gedächtnishilfe der verw...

Страница 36: ...i de transmissions du code une fois que celui ci est dépassé le code se désactive automatiquement Den Benutzer PIN eingeben dem das rücklaufende Zählwerk zugeteilt werden soll und die Taste drücken Wenn der Code im Gerät vorhanden ist wird der Vorgang durch 3 Pieptöne gefolgt von einer Pause bestätigt Danach muss der Wert des Zählwerks eingegeben werden Eine Nummer zwischen 1 und 999 eingeben und ...

Страница 37: ...onores 1 2 DONNÉES TECHNIQUES DONNÉES TECHNIQUES Alimentation 1 batterie de 3V 1 2AA au lithium Li 850 mAh CR 2 Portée à l air libre 100m Fréquence de fonctionnement 433 92 MHz Température de fonctionnement 20 C 50 C Nombre de codes mémorisables 254 Degré de protection IP55 Dimensions voir Fig 1 1 3 INSTALLATION AU MUR FIG 1 ATTENTION Car lors des différentes phases de programmation il faut accéde...

Страница 38: ...sation du dispositif de la part des usagers Le tableau ci dessous indique plus ou moins la durée des batteries selon la fréquence d utilisation N Activations jour Durée Batterie prévue Activations de la durée d environ 10 s Température moyenne 25 C 100 300 7 années 3 années 2 PROGRAMMATION Avant de commencer la programmation du dispositif il faut connaître quelques aspects du principe de fonctionn...

Страница 39: ...omme indiqué dans le point précédent Si l on désire sortir d un menu de programmation sans apporter aucune modifi cation appuyer sur ou attendre 20 seconds temps de timeout Un bip prolongé signale une éventuelle erreur de programmation après quoi IRI KPAD sort de la phase de programmation DESCRIPTION DES MENUS MENU 1 PERSONNALISATION DU MOT DE PASSE D ACCÈS Après avoir appuyé sur la touche 1 on en...

Страница 40: ...rents récepteurs utilisés de leurs fonctions et des relatifs code IRI KPAD associés à ceux ci MENU 3 Voir paragraphe Fonctions Avancées MENU 4 EFFACEMENT CODE Après avoir appuyé sur la touche 4 on entre dans la phase d effacement du code à éliminer signalée par 2 bips suivis par une pause Saisir le PIN que l on désire éliminer et appuyer sur Le dispositif donne confir mation avec 3 bips suivis par...

Страница 41: ... 1 2 bips que la confirmation Si l on veut désactiver le rétroéclairage Appuyez sur 2 4 bips Appuyez sur 0 2 bips que la confirmation 3 Active la réactivation avec touche astérisque Active la réactivation avec touche astérisque Désactive la réactivation avec touche tous les boutons Désactive la réactivation avec touche tous les boutons 4 Active avant pression réactiv ation code Appuyer sur 3 4 bip...

Страница 42: ...YPE DE CODIFICATION Permet de vérifier quel type de codification radio envoie un code mémorisé déterminé Après avoir appuyé sur la touche 8 le système émet 2 bips suivis par une pause et se met en attente du code Saisir le code à vérifier suivi par Si le code est mémorisé IRI KPAD répond avec 1 2 ou 3 bips 1 bip Rolling code 2 bips Advanced rolling code ARC 3 bips Code fixe MENU 9 ACTIVATION RÉPÉT...

Страница 43: ... en maintenant le bouton enfoncé le buzzer émet un signal 1 bip long pause bip bref 4 Taper le code administrateur à mémoriser suivi de 5 Le buzzer émet 3 bips pour confirmer la mémorisation 4 FONCTIONS AVANCÉES On décrit ci dessous quelques fonctionnements avancés du dispositif CODE UTILISATEUR Par Code Utilisateur on entend un code connecté un Code Administrateur déjà existant dans le clavier et...

Страница 44: ...ent Codes Administrateur ou Code Utilisateur MENU 3 SAISIE DU CODE UTILISATEUR Après avoir appuyé sur la touche 3 on entre dans la phase de saisi du code utilisateur signalée par 2 bips suivis par un pause Le code utilisateur peut être composé de 1 à 9 chiffres Saisir le code administrateur suivi par auquel l on désire associer le code utilisateur qui sera saisi par la suite Si le code administrat...

Страница 45: ...e des différentes composantes métaux matières plastiques câbles électriques etc il est préférable de contacter votre installateur ou une entreprise spécialisé et agrée Le certificat de conformité le plus récent et complet est disponible en consultant le site www beninca com ou peut être demandé à Automatismi Benincà S p A Sandrigo VI Italie ...

Страница 46: ... batería descargada y zumbador para indicaciones sonoras 1 2 DATOS TÉCNICOS Alimentación 1 batería de litio Li de 3V 1 2AA 850 mAh CR 2 Alcance en campo abierto 100m Frecuencia de funcionamiento 433 92 MHz Temperatura de funcionamiento 20 C 50 C Número de códigos memorizables 254 Grado de protección IP55 Dimensiones ver Fig 1 1 3 INSTALACIÓN EN PARED FIG 1 ATENCIÓN Puesto que en las varias fases d...

Страница 47: ...por 1una 3V 1 2 AA nueva respetando las polaridades 1 5 DURACIÓN DE LA BATERÍA La duración de lla batería depende de la frecuencia de uso del aparato por parte de los usuarios en la tabla siguiente se indican unas duraciones aproximadas según el uso N Activaciones día Duración prevista de la Batería Activaciones de unos 10 s de duración Temperatura media 25 C 100 300 7 años 3 años 2 PROGRAMACIÓN A...

Страница 48: ...abilitación de la tecla para repetición de código Presionar la tecla del menú que se desea NOTE El teclado se activa pulsando cualquier tecla El tiempo de autoapagado es de 10 segundos seguidamente será necesario reactivar el sistema como indicado en el punto precedente Si se desea salir de un menú de programación sin aportar modificaciones presionar o esperar 20 segundos tiempo de time out Un eve...

Страница 49: ... caso de receptoras multicanal es posible asociar distintos códigos con los distintos canales En el caso de instalaciones particularmente complejas se aconseja realizar y guardar cuidadosamente un esquema de las varias receptoras utilizadas de sus funciones y de los correspondientes códigos IRI KPAD asociados MENU 3 Consulte el apartado Funciones avanzadas MENU 4 BORRADO DEL CÓDIGO Después de habe...

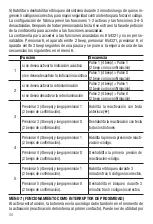
Страница 50: ...etroiluminación Pulse 2 4 beep Pulse 1 2 beep como confirmación si se desea desactivar la retroiluminación Pulse 2 4 beep Pulse 0 2 beep como confirmación 3 Presionar 3 4 beeps y luego presionar 1 2 beeps de confirmación Habilita la reactivación con tecla asterisco Presionar 3 4 beeps y luego presionar 0 2 beeps de confirmación Deshabilita la reactivación con tecla todos los botones 4 Presionar 4 ...

Страница 51: ...mite comprobar qué tipo de codificación radio envía un determinado código memorizado Después de haber presionado la tecla 8 el sistema emite 2 beep seguidos de una pausa y se pone a la espera del código Teclear el código a comprobar seguido de Si el código está memorizado el IRI KPAD contesta con 1 2 ó 3 beep 1 beep Rolling code 2 beep Advanced rolling code ARC 3 beep Código fijo MENU 9 ACTIVACIÓN...

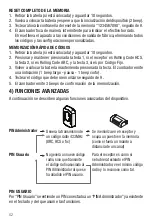
Страница 52: ... a colocar la batería manteniendo presionada la tecla El zumbador emite una indicación 1 beep largo pausa 1 beep corto 4 Teclear el código que debe memorizarse seguido de 5 El zumbador emite 3 beeps de confirmación de la memorización 4 FUNCIONES AVANZADAS A continuación se describen algunas funciones avanzadas del dispositivo PIN USUARIO Por PIN Usuario se entiende un PIN conectado a un PINAdminis...

Страница 53: ...digos que pueden ser PIN Administrador o PIN Usuario MENU 3 INSERIMENTO PIN USUARIO Después de haber presionado la tecla 3 se entra en la fase de ingreso del PIN Usuario indicado por 2 beep seguidos de una pausa El código Hijo se puede componer de entre 1 y 9 dígitos Teclear el PIN Administrador seguido de con el cual se desea asociar el PIN Usuario que se ingresará sucesivamente Si el PIN Adminis...

Страница 54: ... el producto es necesario ajustarse a las disposiciones legislativas vigentes en ese momento para lo que respecta a la eliminación selectiva y al reciclaje de los varios componentes metales plásticos cables eléctricos etc le aconsejamos que contacte con su instalador o con una empresa especializada y autorizada para ello El certificado de conformidad más reciente y completo está disponible consult...

Страница 55: ...ania kodu Sygnalizacja wyczerpanej baterii i brzęczyk do sygnalizacji dźwiękowej 1 2 DANE TECHICZNE Zasilanie 1 bateria 3V 1 2AA litowe Li 850 mAh CR 2 Zasięg na wolnej przestrzeni 100m Częstotliwość robocza 433 92 MHz Temperatura robocza 20 C 50 C Liczba kodów które mogą być zapisane 254 Stopień ochrony IP55 Wymiary zob Rys 1 1 3 MONTAŻ NAŚCIENNY RYS 1 UWAGA Ponieważ podczas kolejnych faz program...

Страница 56: ...rubą antywłamaniową TORX o rozmiarze 3 5 Rys 5 Do wyposażenia dołączono specjalny klucz Z tyłu jest obecna pokrywka baterii umocowana za pomocą dwóch śrub Y przed stawionych na Rysunku 4 Zawsze należy wymienić baterię na nową baterią 3V 1 2 AA przestrzegając biegunowości 1 5 TRWAŁOŚĆ BATERIA Trwałość bateriiazależy od częstotliwości użycia urządzenia w poniższej tabeli przedstawiono orientacyjny o...

Страница 57: ...enie kodu PIN Użytkownika funkcja zaawansowana 4 Kasowanie kodu PIN 5 Wprowadzenie licznika zliczającego wstecz funkcja zaawansowana 6 Menu konfiguracji funkcjonowania 7 Menu konfiguracji funkcjonowania czujnika zbliżeniowego 8 Menu kontroli typu kodowania zapisanego kodu PIN 9 Menu aktywacji przycisku do powtarzania kodu Nacisnąć przycisk żądanego menu UWAGI Aktywuj klawiatury przez naciśnięcie d...

Страница 58: ... odbiorników ARC Nacisnąć 3 dla odbiorników Kod Stały ZAPISYWANIE KODÓW W ODBIORNIKU Po zaprogramowaniu stosownie do potrzeb kodów PIN należy je zapisać w od biorniku W chwili gdy odbiornik ustawi się w trybie oczekiwania na kod który ma być zapisany należy wprowadzić kod PIN z symbolem na końcu Następnie IRI KPAD wyśle kod do zapisania w odbiorniku Można użyć więcej niż jednego odbiornika również...

Страница 59: ...ło umożliwiające dostęp do funkcji zaawansowanych to 654321 i nie może być zmienione Nacisnąć 6 urządzenie wydaje 2 sygnały beep wpisać 654321 wpisać urządzenie wydaje 3 sygnały beep po których następuje przerwa a urządzenie przechodzi do stanu oczekiwania na jedną z sekwencji następująco w menu 6 Funkcja Sekwencja 1 jeżeli chce się uaktywnić sygnalizator dźwiękowy Naciśnij przycisk 1 4 beep Naciś...

Страница 60: ...kundy w chwili każdego przebudzenia Podczas tego okresu nie jest możliwe wpisanie kodów dostępowych Po naciśnięciu klawisza 7 wchodzi się do fazy aktywacji funkcji sygnalizowanej 2 sygnałami beep po których następuje przerwa Ustawienie fabryczne przewiduje że funkcja jest wyłączona Nacisnąć 1 jeżeli chce się uruchomić funkcję Nacisnąć 0 jeżeli chce się wyłączyć funkcję Jeżeli naciśnie się 1 urządz...

Страница 61: ...ygnały beep po których następuje przerwa włącza lub wyłącza funkcję i opuszcza tryb programowania CAŁKOWITE RESETOWANIE PAMIĘCI 1 Wyjąć baterię jeśli jest włożona i zaczekać 10 s 2 Wymień baterię i poczekaj na inicjalizację urządzenia 2 beep 3 Wpisać hasło służące do resetowania pamięci 1234567890 a następnie nacisnąć 4 Brzęczyk brzęczy w trybie przerywanym sygnalizując skasowanie pamięci Skasowan...

Страница 62: ...tylko jeden raz ponadto można zdecydować czy zdezaktywować pojedyncze kody PIN Użytkownika aby zablokować dostęp określonym użytkownikom lub dodać nowe dla nowych użytkowników bez konieczności ingerencji w odbiorniku Na ostatniej stronie poniższej instrukcji zamieszczono tabelę którą można posłużyć się do przygotowania pomocnego odniesienia dla używanych kodów zalecanego w przypadku bardziej skomp...

Страница 63: ...zi się do fazy określania malejącego licznika sygnalizowanej 2 sygnałami beep po których następuje przerwa Wpisać kod podrzędny do którego chce się przypisać malejący licznik i nacisnąć Jeżeli kod jest rzeczywiście obecny urządzenie wydaje 3 sygnały beep po których następuje przerwa i przechodzi do kolejnej fazy w której określa się wartość licznika Wpisać numer od 1 do 999 i nacisnąć Potwierdzeni...

Страница 64: ...AUTOMATISMI BENINCÀ SpA Via Capitello 45 36066 Sandrigo VI ITALY Tel 0444 751030 r a Fax 0444 759728 www beninca com sales beninca it ...

Отзывы: