19
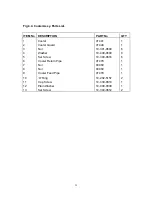
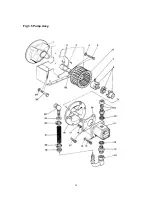
3.5.7. - ENGINE - Refer to Fig 3.5.
a)
Remove the Fan as described in 3.5.6..
b)
Remove the 4 off bolts (Item 23) securing the engine to the Tank, remember to support the
weight of the Engine Spacer (Item 1).
c)
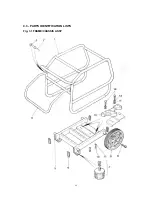
Remove the 4 off Set Screws (Item 14 Fig 3.1) to release the Engine from the Chassis.
d)
The Engine can now be lifted clear of the Tank/Chassis.
NOTE
:- If an engine replacement is necessary the Shaft Extension fitted to the Engine shaft must be
taken off by removing the Retaining Bolt (Item 4). The Shaft Extension can then be slid off the engine
shaft once the Grub Screws (Item 2) have been unscrewed.
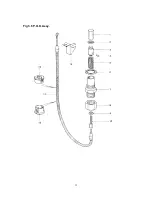
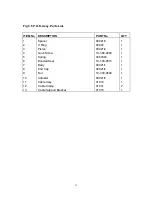
3.5.8. - POWER ON DEMAND SYSTEM - Refer to Fig 3.6.
NOTE -
The P.O.D. Cylinder and cable assy are designed as a cartridge which can be disassembled
completely without disturbing any other part of the Power Pack.
a)
Slacken the P.O.D. Retaining Nut (Item 8) and unscrew fully.
b)
Pull down the Nut/Cable to extract the Spring (Item 5) and Piston (Item 3) for examination.
NOTE
- To connect a new Cable the piston can be withdrawn sufficiently to reveal the Grub Screw
(Item 4) which clamps the cable to the piston allowing access without extracting the 'U' Ring (Item 2)
from the body.
c)
The P.O.D. Body (Item 7) can be unscrewed from the Valve Block for examination if desired.
d)
The Cable can only be removed from the Tank by removal of the Clamps (Item 12). These
clamps are plastic and cannot be removed without damage. Replace the clamps upon
reassembly.
NOTE -
Reassembly is the reverse of the above procedure. However, care should be taken when
fitting the Piston Seal (Item 2) into the bore of the body (Item 7). Standard cable length allows for the
cable to be pushed fully home into the piston before clamping by the grub screw (Item 4).
When unit is fully reassembled adjuster (item 10) can be adjusted as follows:-
Adjustment
a)
Start engine with cable slack and check flow and pressure as per section 3.4.
b)
Off load the machine by operating the By-pass lever.
c)
Adjust the cable tightness by using the adjuster (item 10) until the engine speed drops to
1800-2200 rpm.
d)
lock off adjuster and check that engine reaches high speed when system pressure is raised
e)
Repeat if settings are not as specified.
Содержание Major 30-140
Страница 22: ...22 4 3 PARTS IDENTIFICATION LISTS Fig 3 1 FRAME CHASSIS ASSY ...
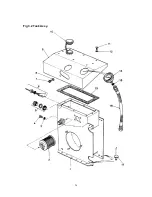
Страница 24: ...24 Fig 3 2 Tank Assy ...
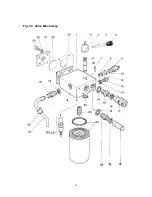
Страница 26: ...26 Fig 3 3 Valve Block Assy ...
Страница 28: ...28 Fig 3 4 Cooler Assy ...
Страница 30: ...30 Fig 3 5 Pump Assy ...
Страница 32: ...32 Fig 3 6 P O D Assy ...
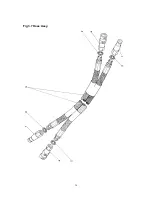
Страница 34: ...34 Fig 3 7 Hose Assy ...


