background image

50 

2. Networks

PC Functions

 Press 

MENU/OK

 and 

916

. Enter the IP ad-

dress (for example 192.168.001.×××—the first three 
sets of numbers are the IP range, these values must 
match the IP address on your PC. The last three 
digits determine are the individual IP address of the 
machine. You can enter any number between 

000


and 

255

. However, this number must be unique 

within the network; it may not be used on any oth-
er PC or network component. Confirm with 

OK

.

b

  In a network with a gateway or router, the subnet 

mask indicates whether the respective data packets 
are addressed to an internal recipient in the network 
or whether they should be sent to a recipient out-
side of the network. You can find the subnet mask 
in the network settings of your PC. Press 

MENU/

OK

 and 

917

. Enter the subnet mask (for ex-

ample 255.255.255.000). Confirm with 

OK

.

Entering the Host Name

Your multifunction machine will log onto the network 
with the host name. Entry of a name is optional; if you 
do not change the factory settings, the machine will log 
on as 

Crystal

. Press 

MENU/OK

 and 

918

. En-

ter any host name and confirm with 

OK

.

²

All entries must match the settings on the PC 
and on all other connected PCs or the ac-

cess point (gateway, router). The radio channel, 
the network name (SSID), the WEP key and the 
subnet mask must be the same; the IP address must 
be within the same IP range, but must be unique 
within the network. You can find the necessary 
information in the network settings of your PC.

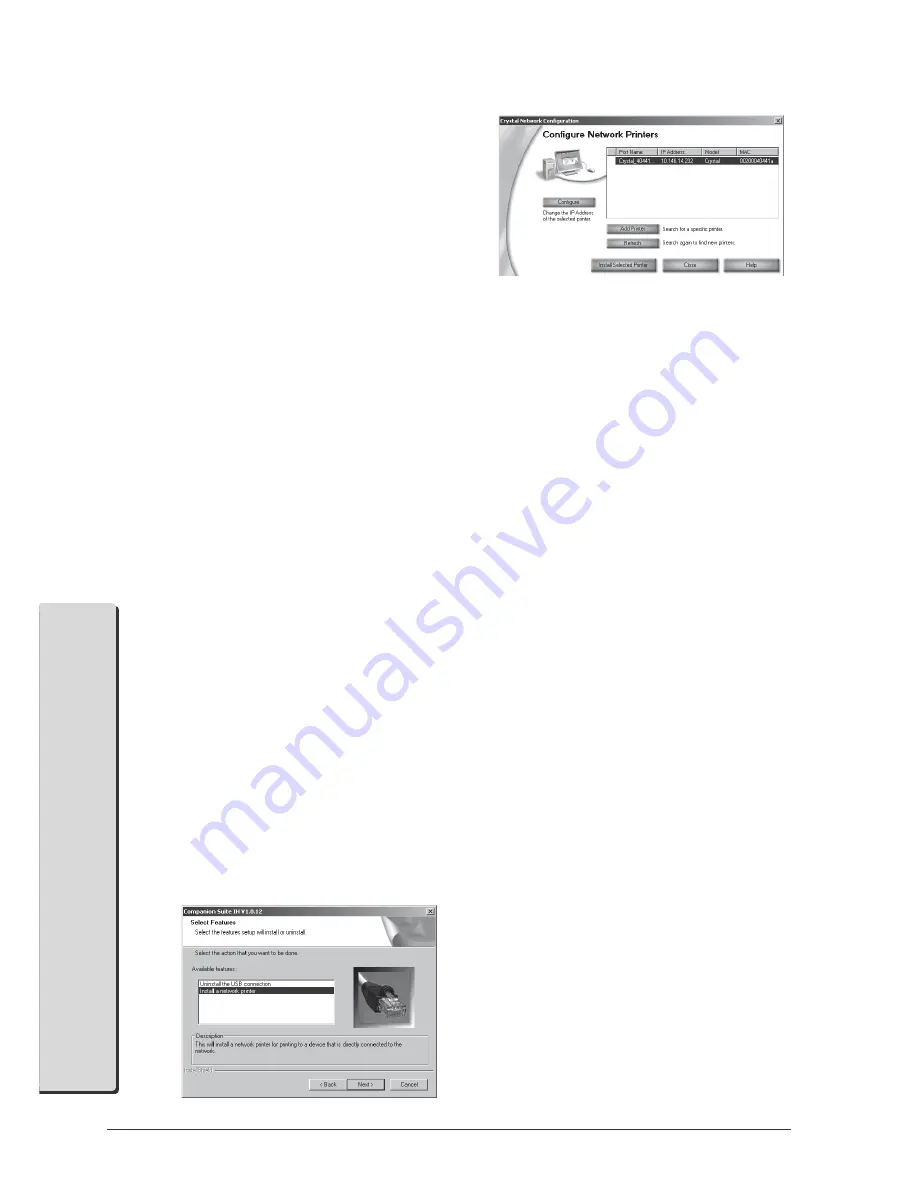
Installing Printer Drivers

After you have configured your multifunction ma-
chine, you must install Companion Suite IH with the 
required printer drivers. If you have not yet installed 
the software, select custom installation of Companion 
Suite IH (see Installing Individual Applications (Cus-
tom Install)). During the installation, select Network 
printing as the connection type.

If you have already installed Companion Suite IH, you 
can start the setup process again from the installation 
CD and select Modify. You can also click on Start > 
Programs > Companion Suite > Companion Suite 
IH > Add or Remove a Device.

Select Install a network printer and confirm with 
Next.

Select Crystal Printer and click on Install the Se-
lected Printer.

Printing a Network Report

You can print an overview of all network settings. Press 

MENU/OK

 and 

95

. The network report is printed 

out.

Restoring the Factory Settings

You can restore the factory settings with the function 
919.

1

 Press 

MENU/OK

 and 

919

.

2

 Use 

/

 to select 

are you sure: yes

, and con-

firm with 

OK

. All WLAN settings are reset to the 

factory settings.

Содержание Belgafax 710

Страница 1: ...qMF 0 Mabl _Zq lahpl rhn pah bl Zeebg Zg Zeehpl rhn mh l g Zg k bo LFL f llZ l G mh dghp fhk Z hnm e Z hf l LfZkm L kob l8 Zee 1 1 mhee _k h mh hg h_ hnk e Z hf lZe l hnme ml Lnk_ mh ppp e Z hf l kob...

Страница 2: ......

Страница 3: ...echnology Two free ink cartridges are provid ed with your machine black and colour Install these and you can immediately try out the many features of your multifunction machine Have fun About this Use...

Страница 4: ...rties as a result of accident misuse or abuse of this product or un authorized modi cations repairs or alterations to this prod uct or failure to strictly comply with Belgacom operating and maintenanc...

Страница 5: ...s 28 Editing Entries and Groups 28 Deleting Entries and Groups 28 Searching for Entries 28 Using theTelephone Book 28 Printing theTelephone Book 29 Chain Dialling Combining Numbers 29 7 Fax Switch 30...

Страница 6: ...r touch the power plug power connection or the telephone socket with wet hands Should the multifunction machine fall serious ma chine damage and or personal injuries particularly in the case of small...

Страница 7: ...vision problems occur consult a physi cian immediately Do not perform any alterations on the original ink cartridges this can damage the printing heads Take the ink cartridges out of the machine durin...

Страница 8: ...ut tray output Paper tray Front paper guide with tab Slot for Plug n Print card Side paper guide Power cord connection USB port for the PC EXT socket Connection for external devices telephones answeri...

Страница 9: ...ns move the cursor on the display enter numbers C Clear entries return to last menu function U M S Switch timer U on o switch between modes S day and M night m Access telephone book functions Broadcas...

Страница 10: ...Cover In addition to the letters special characters are also available To enter upper case letters Press the button and simultaneously the respective letter button to enter upper case letters To enter...

Страница 11: ...e from the power supply pull the power plug out of the socket see the chapter Safety Instructions 2 Insert the printout tray into the slot provided in the paper output until reaching the stop 3 Pull t...

Страница 12: ...ur multifunction machine in or der to achieve the best possible printing quality and durability If you use other types of paper it is possible that the paper could be drawn in incorrectly or the ink c...

Страница 13: ...e transparencies that are intended for use with inkjet printers Loading Documents Do not place any documents on the scanner that are wet or to which correction uid has been applied Make sure that the...

Страница 14: ...red display language 3 Press OK twice EnteringTelephone Number and Name If you would like your telephone number and name to appear on outgoing messages as a sender identi cation header enter your send...

Страница 15: ...artridges For instructions on changing car tridges or inserting a photo cartridge please consult the chapter Troubleshooting When rst setting up your machine only use the ink cartridges included in th...

Страница 16: ...a specialised dealer Connection to the Multifunction Machine You can connect additional devices directly to your multifunction machine Insert the telephone cord of the additional device into the EXT s...

Страница 17: ...82 Use to select the language and con rm with OK ISDN Connection Your multifunction machine is not an ISDN device group 4 it is an analogue device group 3 For this reason it cannot be operated directl...

Страница 18: ...telephone call during your absence the symbol I will appear on the display Your multifunction machine saves the last ten calls in the redial list You can use the redial list for entering telephone num...

Страница 19: ...re also cor rected underexposed images are brightened or parts of the image with extremely di erent contrasts are brought into balance The red eye reduction retouches red eyes in ash photographs Activ...

Страница 20: ...g for copying However the printing quality may appear worse Con rm with OK NORMAL For documents with small print or draw ings This setting is the best option for most copying needs Con rm with OK QUAL...

Страница 21: ...e changed by pressing MENU OK and 252 2 Use to select the format of the loaded docu ment Con rm with OK Return to the last menu entry with C return to the starting mode with X Setting the Zoom Paramet...

Страница 22: ...10 15 102 152 4 6 With Infrared you can transfer up to 24 image les to the multifunction machine The data will be lost in the event of a power failure For the special requirements of printing high qu...

Страница 23: ...t your digital camera to your multifunction machine only once all pend ing print orders are completed and the machine is in the starting mode With function 85 you can load the memory contents of your...

Страница 24: ...A 6 EXIT Index Printout With the index function your multifunction machine prints thumbnail views of the digital photos and assigns each image a unique index number that can be used to quickly and eas...

Страница 25: ...y with C You may terminate the print job with X The page is ejected PictBridge Directly Printing Files Your multifunction machine meets the PictBridge stand ard With PictBridge the digital camera dire...

Страница 26: ...e display asking you to insert a memory card If the data transfer does not function it may be that your memory card is write protected Reanalysing Image Files If you make changes after the data transf...

Страница 27: ...ting A4 can be changed by pressing MENU OK and 241 2 Use to select the desired paper format and con rm with OK 10 15 cm Return to the last menu entry with C return to the starting mode with X button S...

Страница 28: ...ocess until all members of the group have been added End the selection with the Y button or the m button If you would like to delete an entry load it with and press OK again the entry is removed from...

Страница 29: ...Combining Numbers You can freely combine telephone book entries manu ally entered numbers and numbers from the redial list before starting the dialling operation For example if you have saved the tel...

Страница 30: ...select the desired volume Con rm with OK 5 Select function 62 M night by pressing MENU OK and 62 Repeat steps 2 to 4 Return to the last menu entry with C return to the starting mode with X If you cann...

Страница 31: ...on an external telephone and the multifunction machine continues to ring or attempts to receive faxes you can disconnect the multifunction machine from the line and accept the call by pressing on the...

Страница 32: ...ect NEXT PAGE Press OK 5 If you would like to interrupt the fax transmission and return to the starting mode press X twice If the subscriber is busy your multifunction machine will call the number aga...

Страница 33: ...n to your machine is active incoming faxes will be received on the PC 3 Con rm with OK If no symbol appears on the display the standard reso lution is selected for black and white documents with out s...

Страница 34: ...Printing Faxes Press MENU OK and 341 Enter the lockout code and press OK The received faxes are printed out and deleted from the Message Memory Polling Faxes Time delayed Fax Polling Using this functi...

Страница 35: ...cho protection is activated Display Information Con gure which information should be shown on the display during transmission 1 Press MENU OK and 276 2 Use to select one of the following options speed...

Страница 36: ...If you have entered an incorrect number or letter you can cor rect the mistake with and C Press OK after com pleting the text entry You can print out the SMS message before send ing Press one of the t...

Страница 37: ...f frequent use SMS Provider All the numbers that you need for sending and receiving SMS messages are stored in your multifunction machine at the factory If you would like to switch to a di er ent tele...

Страница 38: ...one whenever an SMS message has arrived You have the option of turning this function o 1 Press MENU OK and 57 2 Use to select OFF and con rm with OK New SMS messages will be received without a noti ca...

Страница 39: ...ton Changing Cartridges The display will inform you when a cartridge is low and must be replaced If one of the ink cartridges is empty your machine will stop printing even if ink still remains in the...

Страница 40: ...has once been activated with the enclosed Plug n Print card will be recog nised by your machine even if you remove the cartridge temporarily You do not need to update the cartridge again when you rei...

Страница 41: ...o the starting mode with X Printing the Journal The journal contains a list of the last 30 message trans missions fax SMS messages The journal is either printed out automatically after 30 transmission...

Страница 42: ...deactivated Cleaning and Care Your multifunction machine is designed for low main tenance operation and requires very little care Discon nect the machine from the power supply before cleaning If the p...

Страница 43: ...play shows the current rmware version of your machine If you have entered the incorrect code you can cancel the entry with ARE YOU SURE NO Deactivating the Button Sounds Every button press is accompan...

Страница 44: ...f the installation program does not start locate your CD ROM drive in Windows Explorer and double click on the program Setup exe The start window Companion Suite IH appears on your screen PC Requireme...

Страница 45: ...e installation CD out of the CD ROM drive after Windows has restarted and the installation is completed You can also restart the PC at a later time to allow you to continue working with other open pro...

Страница 46: ...a wireless network see Installing Individual Ap plications 9 Your multifunction machine is detected as a new peripheral device and registered The icons for the applications One Touch and MF Monitor a...

Страница 47: ...in the start window on the button View user guides to learn about the functions of Paper Port If you do not yet have the program Acro bat Reader on your PC install it from the installation CD in order...

Страница 48: ...etwork via a wireless connection With the USB cable you can connect your multifunction machine to a PC that is connected to a network Other PCs on this network can then access the multifunction machin...

Страница 49: ...s transmitted encrypted shared The multifunction machine authen ticates itself on the access point gateway router with the entered WEP key and data is transmitted encrypted both The authentication mod...

Страница 50: ...ted PCs or the ac cess point gateway router The radio channel the network name SSID the WEP key and the subnetmaskmustbethesame theIPaddressmust be within the same IP range but must be unique within t...

Страница 51: ...ion Director By pressing the right mouse button you can change the colour and shape of the selection window Telephone Book The Address book application loads the telephone book of your multifunction m...

Страница 52: ...ur PC or load entries into your machine The le import and export must take place with the le format EAB 1 Click in the menu bar on File Export to copy the telephone book entries of your multifunction...

Страница 53: ...a fax Receiving Faxes Please note that you must activate PC fax re ception on your multifunction machine with function 38 see section Machine Functions Fax Setting Advanced Reception Options When a n...

Страница 54: ...s mission select the SMS message and click in the toolbar on Stop If you would like to save your SMS message as a template click on Press to cancel the current function After the transmission the mach...

Страница 55: ...p you can select the desired paper format and the orientation of the paper Under Print Layout you can con gure the layout set tings and de ne the order of the individual pages in the printout You can...

Страница 56: ...h the pro gram Paper Port Click on the desired symbol The scan is started and transferred to the selected application 2 You can also con gure special settings for these applications and change the sta...

Страница 57: ...e with the scanning process After the scanning is nished the document appears in the main window of Paper Port You can save the scan or edit it in a graphics program e g Photo Impression or the OCR so...

Страница 58: ...Firmware file to load select the saved rmware le Then click on Start upload to transfer the current rmware le to the multifunction machine Check whether the message Bootloader Writing appears on the d...

Страница 59: ...the program set tings for Photo Impression Select Remove and click on Next In the next window con rm the removal of Photo Impression with Finish If you would like to cancel the uninstall proc ess cli...

Страница 60: ...so restart the PC at a later time to allow you to continue working with other open programs or save unsaved data Uninstalling via the Start Menu You can also uninstall Companion Suite IH without using...

Страница 61: ...ocuments Dialling Pause Long distance num bers or telephone numbers with sub addresses extensions sometimes re quire the insertion of a dialling pause to prevent the dialling from occurring too quickl...

Страница 62: ...anged in the network through this access point In an ad hoc network the devices communicate with each other directly without an access point Outside Line Access Code The outside line access code is th...

Страница 63: ...ne number suppres sion see Identi cation Presentation CNG Calling Signal see CNG Tone DCF Design Rule for Camera File Sys tem DHCP Dynamic Host Con guration Protocol dpi Dots per Inch see Resolution D...

Страница 64: ...nctions On the multifunction machine press MENU OK and 29 You will receive a printout of the menu functions o ered by your machine An extra page informs you about the current settings 1 Phonebook 11 A...

Страница 65: ...Picture Card Digital camera connection USB host 1 1 USB port USB 2 0 Full Speed Supported standards DPOF PictBridge Printer Type bubble inkjet colour Warm up time scanner max 1 second Resolution max...

Страница 66: ...shall not cover damage of any kind that does not predate the sale any damage faults or defects attributable to the Customer or to causes unrelated to the Equipment lightning power surges humidity acci...

Страница 67: ...tibility Elektromagnetische Vertr glichkeit Compatibilit lectromagn tique Elektromagnetische compatibiliteit EN 55022 1998 A1 2000 A2 2003 class B EN 55024 1998 A1 2001 A2 2003 EN 61000 3 2 2000 EN 61...

Страница 68: ...68 Appendix...

Страница 69: ...Appendix 69 Appendix...

Страница 70: ...70 Appendix...

Страница 71: ......

Страница 72: ...resources for its production It may content hazardous substances for the health and the environment In order to avoid the dissemination of those substances in our environment and to diminish the pres...

Отзывы: