background image


5/EN 


Please read these instructions before installation 

or using your appliance! 

 
Dear Customer, 
We would like you to obtain best performance with your product that has been manufactured in 
modern facilities and passed through strict quality control procedures. 
Therefore, we advise you to read through this user manual carefully before using your product and 
keep it for future reference. If you hand over the product to someone else, deliver the user manual as 
well. 
The user manual will help you use the product in a fast and safe way. 


IMPORTANT:


Save these instructions for the local electrical inspectors use. 


IMPORTANT: 

This product can only be used in the rooms which incorporates a properly 

adjusted and functioning Carbon Monoxide sensor. Make sure the Carbon 

Monoxide sensor works properly and its maintenance done frequently. Carbon 

Monoxide sensor should be installed maximum 6.5 feet away from the prod-

uct. 

 
The instructions will help you to operate the appliance quickly and safely. 

• 

Upon delivery, please check that the appliance is not damaged. If you note any transport damage, 
please contact your point of sale immediately and do not connect and operate the appliance! 

• 

Before you connect and start using the appliance, please read this manual and all enclosed doc-
uments. Please note in particular the safety instructions. 

• 

Keep all documents so that you can refer to the information again later on. 
Please keep your receipt for any repairs which may be required under warranty. 

• 

When you pass on the appliance to another person, please provide all documents including 
original date of purchasing. Warranty is not valid if the product is sold second hand. 

• 

If you should decide not to use this appliance any longer (or decide to substitute an older model), 
before disposing of it, it is recommended that it be made inoperative in an appropriate manner in 
accordance to health and environmental protection regulations, ensuring in particular that all po-
tentially hazardous parts be made harmless, especially in relation to children who could play with 
old appliances. Remove the door and the warming drawer before disposal to prevent entrapment. 


Содержание SLER30530SS

Страница 1: ...nge 285 6000 19 R AA 18 05 2016 SLER30530SS EN Installer should leave these instructions with appliance Consumer should read these instructions before using the appliance and should retain them for future reference IMPORTANT ...

Страница 2: ...User Manual SLER 30530 SS ...

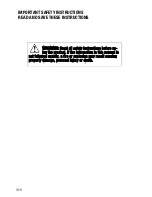
Страница 3: ...S READ AND SAVE THESE INSTRUCTIONS WARNING Read all safety instructions before us ing the product If the information in this manual is not followed exactly a fire or explosion may result causing property damage personal injury or death ...

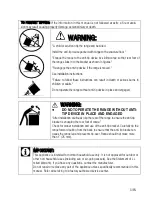
Страница 4: ... and engaged WARNING DO NOT OPERATE THE RANGE WITHOUT ANTI TIP DEVICE IN PLACE AND ENGAGED After installation cautiously grip the rear of the range to ensure the anti tip bracket is engaging the rear foot of range Check for proper installation and use of the anti tip bracket Carefully tip the range forward pulling from the back to ensure that the anti tip bracket en gages the range leg and prevent...

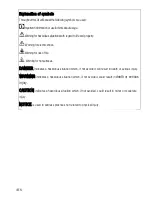
Страница 5: ... shock Warning for risk of fire Warning for hot surfaces DANGER indicates a hazardous situation which if not avoided will result in death or serious injury WARNING indicates a hazardous situation which if not avoided could result in death or serious injury CAUTION indicates a hazardous situation which if not avoided could result in minor or moderate injury NOTICE is used to address practices not r...

Страница 6: ... quickly and safely Upon delivery please check that the appliance is not damaged If you note any transport damage please contact your point of sale immediately and do not connect and operate the appliance Before you connect and start using the appliance please read this manual and all enclosed doc uments Please note in particular the safety instructions Keep all documents so that you can refer to ...

Страница 7: ... General information about cooking 28 Using the hobs 28 5 How to operate the oven 31 General information on baking roasting and broiling 31 How to use the gas oven 31 Cooking times table Error Bookmark not defined How to operate the broil Error Bookmark not defined 6 Maintenance and care 45 General information 45 Cleaning the burner plate 45 Cleaning the control panel 45 Cleaning the oven 45 Remov...

Страница 8: ...ended in the ma nual All other servicing should be referred to a qualified techni cian CAUTION Use proper pan size this appliance is equipped with one or more surface units of different size Select utensils having flat bottoms large enough to cover the surface unit heating element The use of undersized utensils will expose a portion of the heating element to direct contact and may result in igni t...

Страница 9: ...d know ledge if they have been given supervision or instruction con cerning use of the appliance in a safe way and understand the ha zards involved Children shall not play with the appliance Cleaning and user maintenance shall not be made by children without supervision WARNING The appliance and its accessible parts become hot during use Care should be taken to avoid touching heating elements Chil...

Страница 10: ...ky clothes Your body accidentally can turn the knobs please make sure that your body do not touch to knobs not for use WARNING Never cover the top of grates with any kind of cover Use only cooking utensils with recommended diameters Make sure ventilation and oven fume outlets shown below are not closed Otherwise fire hazard can occur Do not heat closed food contain ers and glass jars Pressure that...

Страница 11: ...he sides be come hot during use CAUTION Do not store or use flammable materials in an oven or near the cook top in cluding paper plastic pot hold ers linens wall coverings cur tains drapes and gasoline or other flammable vapors and liq uids WARNING Do not touch heating elements or interior surfaces of oven Heating elements may be hot even though they are dark in color In terior surfaces of an oven...

Страница 12: ... and or in the warm ing drawer WARNING Keep appliance area clear and free from com bustible materials gasoline and other flammable vapors WARNING Do not use wa ter on grease fires Never pick up a flaming pan Turn the con trols off Smother a flaming pan on a surface unit by covering the pan completely with a well fitting lid or a fire blanket cookie sheet or flat tray Use a multi purpose dry chemic...

Страница 13: ...door and frame Do not route the main cable over the hot cooking sec tion Otherwise cable insulation may melt and cause fire as a re sult of short circuit WARNING Use this ap pliance for its intended purpose as described in this owner s ma nual The manufacturer declines all liability for injury to persons or damage to property caused by incorrect or improper use of the appliance CAUTION Always use ...

Страница 14: ...esult of short circuit Check all controls on the ap pliance are switched off after use IMPORTANT Call the au thorized service for installation of the appliance to be used After this procedure guarantee period will be started Safety for children WARNING Stepping leaning or sitting on the door or drawers of this range can result in serious injuries and also cause damage to the range Do not allow chi...

Страница 15: ...ov ing the fuse or switching off the circuit breaker Ensure that the fuse rating is correct Do not operate the appliance barefooted Never touch the appliance with wet hands or feet Intended use WARNING Use this ap pliance only for its intended use as described n this manual NEVER use this appliance as a space heater to heat or warm a room Doing so may result in carbon monoxide poisoning and overhe...

Страница 16: ...portation Do not carry out cleaning or maintenance oper ations on the appliance without having pre viously disconnected it from the electric power supply NOTICE Do not place other items on the top of the appliance The appliance must be transported upright Store the appliance s original box and transport the appliance in its original carton Follow the guidance marks that are printed on the carton I...

Страница 17: ...ing or moving the appliance The appliance must be placed directly on the floor It must not be placed onto a base or a pedestal To align the appliance with the worktop adjust the feet turning right or left hand as required Hidden surfaces may have sharp edges Use caution when reaching behind or under appliance Do not use the oven or warming drawer if equipped for storage NOTICE Material damage Do n...

Страница 18: ...17 EN ...

Страница 19: ... notes to the installer Read manual before installing the range Observe all governing codes and ordinances Be sure to leave these instructions with the consumer Be sure your range is installed and grounded properly by a qualified installer or service techni cian IMPORTANT Before installing the range in an area covered with linoleum or any other synthetic floor covering make sure the floor covering...

Страница 20: ...19 EN ...

Страница 21: ...sure dimension A of the product indicated in Picture 2 according the height of counter Decide the hole on bracket 1 to which the bracket 2 will be secured Complete the installation by tightening parts 3 and 4 3 Position the appliance on its place after completing the installation 4 Check whether the appliance is locked with bracket by gently lifting it up from rear side to front side ...

Страница 22: ...onnect anti tip bracket to anti tip hole at the back of the range Reconnect the anti tip bracket if the range is moved Failure to follow these instructions can result in death or serious burns to children and adults WARNING Electrical shock hazard Use extreme caution when drilling holes into the wall or floor There may be concealed electrical wires located behind the wall or under the floor Identi...

Страница 23: ...er the cabinet and run 120 240 or 120 208 Volt AC wire from the main circuit panel DO NOT connect the wire to the circuit panel at this time Electrical requirements This appliance must be supplied with the proper voltage and frequency and connected to an individ ual properly grounded branch circuit protected by a circuit breaker or fuse A circuit breaker or fuse is required by your appliance The c...

Страница 24: ...hen installed where it is not permitted to ground through the neutral a 4 conductor cord must be used or cable assembly See manufacturer s in structions The main supply data must correspond to the data specified on the rating plate of the appliance The rating plate is either seen when the door is opened 3 4 wire electrical wall receptacle types recommended mounting orientation on wall Figure A ill...

Страница 25: ...he range chassis and to an adequate ground source 3 4 wire permanent wire connections 3 wire permanent connection follow steps in 2 and 5 below 4 wire permanent connection follow all steps below Before wiring the range review the suggested power source location drawings in Figure 2 If connecting to a 4 wire electrical system 1 Follow the manufacturer s Installation In structions supplied with the ...

Страница 26: ...on 1 Terminal block 2 Power cord conduit plate 3 Washer 4 Nut 5 Screw BK Black WH White RD Red GR Green 3 wire connection 1 Terminal block 2 Power cord conduit plate 3 Washer 4 Nut 5 Screw BK Black WH White RD Red GR Green ...

Страница 27: ...se flat base saucepans while cooking on electrical cookers Pots with an even and thick bottom provide better thermal conduction You can save up 1 3 of electricity Pots and pans should match the size of plates The bottom of the pot or pan should not be smaller than the plate Keep plates and pan bottoms clean dirt will reduce the heat transmission between plate and pan bottoms In case of longer cook...

Страница 28: ...e normal Ensure that the room is well ventilated to remove the smoke and smell Avoid directly inhaling the smoke and the smell that emits Heat up the product for about 30 minutes and then switch it off Thus any production residues or layers will be burnt off and removed WARNING Hot surfaces cause burns Product may be hot when it is in use Never touch the hot burners inner sections of the oven heat...

Страница 29: ...e heating element When transferring pans from one heating element to another always lift the pans do not slide them This appliance is equipped with one or more surface units of different size Select uten sils having flat bottoms large enough to cover the surface unit heating element The use of undersized utensils will expose a por tion of the heating element to direct contact and may result in ign...

Страница 30: ...x bottoms Use pot and pans with smooth bottoms They ensure a good heat transfer If the pan is too small energy is wasted DANGER Tipping of pan Make sure that the handles of cookware do not stick out over the edge of the appliance to avoid them being knocked over by accident This also makes it more difficult for children to reach the cooking pans Ensure handles of pans cannot accidentally be caught...

Страница 31: ...ng power turn the burner plate control knobs to the corresponding level Cooking level 1 2 3 Warning Stewing simmering cooking roasting WARNING When preparing flaming foods under a hood turn the fan on WARNING If power is lost to an electric cook top while a surface unit is ON the surface unit will turn back on as soon as power is restored In the event of power loss failure to turn all surface unit...

Страница 32: ...s better distributed all over the roast and does not run out when the meat is cut Fish in a fire resistant dish should be placed on the rack at the medium or lower level Tips for broiling Broiling is ideal for cooking meat fish and poultry and will achieve a nice brown surface without it drying out to much Flat pieces meat skewers and sausages are particularly suited for broiling as are vegetables...

Страница 33: ...e glass door Placing the wire shelf fully to the rear of the oven will reduce the broil coverage It is important to position the wire shelf on side rack correctly The wire shelf must be placed so that it will fit into the opening of the wire shelf as illu strated in the figure Settings Temperature Unit 1 Symbol of internal temperature 2 Display of active clock 3 Display of set temperature 4 Clear ...

Страница 34: ...justs with numeric keypad You can change set temperature after starting cook If you want to change set temperature after starting cook touch same function and change set temperature Broil Convection Broil Warm Keep and Warming Drawer functions temperature can adjustwith pressing1 Low 2 Mid and 3 High in the numeric keypad Function Table Function table indicates the functions that can be used in th...

Страница 35: ...erminated automatically once the adjusted food central temperature is at tained CAUTION Use of probes other than the one provided with this product may result in damage to the probe or oven control CAUTION Use the handles of the probe and plug when inserting and removing them from the food and outlet CAUTION To avoid damaging your probe do not use tongs to pull on the cable when removing it CAUTIO...

Страница 36: ...a single rack with the pans are positioned in the middle of the oven Bake foods with 1 25mm to 1 5 38mm space between pans and oven walls When using the Bake mode preheat the oven for best results Baking time will vary with the size shape and material of the pan used Convection Bake Only bottom heat is on The heat comes from bottom and is circulated throughout the oven by the convection fan The co...

Страница 37: ...id roast ing tray or broiler tray under the meat or poultry The pan catches grease spills WARNING You can use a lid or roasting bags in this mode Follow manufacturer s directions for the roasting bag Convection Roast Top and bottom heat are on The heat comes from top and bottom and is circulated throughout the oven by the convection fan The convection roast mode can be used for meat poultry and la...

Страница 38: ...ing the Self Cleaning cycle Always move birds and pets to another closed and well ventilated room Keep the kitchen well ventilated during the Self Cleaning cycle also for your health 3 If there is a fire in the oven during self clean turn the oven off and wait for the fire to go out Do not force the door open Introduction of fresh air at self clean temperatures may led to a burst of flame from the...

Страница 39: ...he drawer They may ignite WARNING Do not leave paper products plastics canned food or combustible materials in the drawer They may ignite WARNING Fire risk Do not store flammable material in the oven and or in the warming drawer Bread Proof Only bottom heat is on The bread proof mode can be used leavening of the bread and pizza dough or other yeast dough Use a bowl or a pan with lid or cover Proof...

Страница 40: ...e drawer These surfaces may be hot enough to cause burns Recommendations Temperature Food type Low Soft rolls chips empty dinner plates Medium Casseroles pizza vegetables eggs pastries biscuits hard rolls gravies High Roasts poultry hamburgers bacon potatoes baked CAUTION Put the cooked food in heat safe serving dish on the rack in the warming drawer Remove serving spoons etc before placing dishes...

Страница 41: ... and will maintain this temperature until the end of the cooking time you selected IMPORTANT All segments of the inner oven temperature symbol 1 will turn on when the oven reaches the set temperature 7 After the cooking is completed the oven will give an audible warning 8 To stop the alarm signal just touch any key Switch on fully automatic operation In this operation mode you can adjust cooking t...

Страница 42: ...ter function If Booster appears on the display it means it is enabled If not it means it is disabled Using the key lock You can prevent oven from being intervened with by activating the key lock function IMPORTANT Key lock can be enabled only when the oven is in Standby position and operating mode Activating the key lock Key lock is activated by pressing 0 Key Lock key amongst the numbers on the r...

Страница 43: ...osed 4 Function and Temperature knobs 4 1 Every time the door is opened function and temperature knobs that are not turned will be lit blue for 30 seconds The same applies when the door is closed 4 2 If function knob is turned it will be lit red permanently When the function knob is turned off it will be lit blue for 30 seconds and then turn off 4 3 Temperature knob will be lit red when it is turn...

Страница 44: ... Racks Rack Position Time min Pan Size Type Explanation Sponge Cake Bake 350 Single 3 20 30 8 or 9 round The cakes are positioned in the middle of the oven Bake foods with 1 25mm to 1 5 38mm space between pans and oven walls Sponge Cake Convec tion Bake 325 Multiple 3 5 20 30 8 or 9 round The cakes are positioned with the top rack cakes towards the back of the oven and the lower rack cakes towards...

Страница 45: ...o the heating element Hamburger frozen 0 3 0 5 thick 6 patties Broil High Single 4 Side 1 7 10 Side 2 2 4 Broiler tray Place broiler tray centrally located with respect to the heating element Leavening Bread Proof 100 Single 3 30 40 Bowl or pan with cover It is suggested to perform preheating for all foods cooking It is suggested to perform 5 6 minutes preheating for all foods broiling For preheat...

Страница 46: ...sult in shattering of the glass WARNING Do not use steam cleaners to clean the ap pliance as this may cause an electric shock Cleaning the burner plate Ceramic hobs Always rinse off fully with a clean cloth wrung out in clean water as residue could damage the ceramic glass surface next time the hob is used In no case should crusts be scratched off with serrated edge knives steel wool or the like R...

Страница 47: ...operating the self clean cycle Wipe grease and food soils from the oven Exces sive amount of grease may ignite leading to smoke damage to your home WARNING Do not clean the door gasket Fiberglass gasket is highly sensitive and can get dam aged easily In case of a damage on the oven door gasket replace with the new one from the authorized service WARNING Before operating the self clean cycle remove...

Страница 48: ...ving the door Failure to do so could result in electrical shock or burns The oven door is heavy and parts of it are fragile Use both hands to remove the oven door The door front is glass Handle carefully to avoid breakage Grasp only the sides of the oven door Do not grasp the handle as it may swing in your hand and cause damage or injury Failure to grasp the oven door firmly and properly could res...

Страница 49: ... oven lights can be illuminated with lamp button The lights are switched on when the door is opened or when the oven is in a cooking cycle The oven lights are not illuminated during self clean Each light assembly consist of a remova ble lens a light bulb as well as a light socket housing that is fixed in place Light bulb re placement is considered to be a routine mainten ance item The oven lights ...

Страница 50: ... 4 Handle 5 Front door 6 Foot 7 Lower part 1 Signal lamp hob 2 Single circuit cooking plate Rear Left 3 Dual circuit cooking plate Front Left 4 Central Single circuit cooking plate 5 Digital Timer 6 Single circuit cooking plate Front Right 7 Single circuit cooking plate Rear Right ...

Страница 51: ...t Single circuit cooking plate Size 9 12 inches Power 1800 3000 W Rear right Single circuit cooking plate Size 6 inches Power 1500 W Main oven Multifunction oven Inside illumination Bake 2240 W Broil 3320 W Convection Roast 3670 W Warming Drawer 340 W Baking Drawer 680 W Technical specifications may be changed without prior notice to improve the quality of the product Figures in this manual are sc...

Страница 52: ...g the rack in the lowest position A Accessories supplied can vary depending on the product model Not every accessory described in the user manual may exist on your product 1 User manual 2 Oven tray Used for pastries frozen foods and big roasts 3 Wire Shelf Used for roasting and for placing the food to be baked roasted or cooked in casserole dishes to the desired rack 4 Broiler tray It is placed on...

Страница 53: ...there is power Check the fuses in the fuse box If necessary replace or reset the fuses Oven does not heat Function and or Temperature are not set Set the function and the temperature with the Function and or Temperature knob key In models equipped with a timer the timer is not adjusted Adjust the time In products with microwave oven timer controls only microwave oven Power is cut Check if there is...

Страница 54: ...me A A Front MDF Nylon bag A A 18x40 Wooden support Remove upper frame and rear and front MDFs 2 Remove cut out styrofoams and blue tapes 3 Remove nylon bag on the product 4 Remove styrofoams of the front door 5 Remove grill styrofoams and shrink packaging 6 ...

Страница 55: ...54 EN 7 Remove protective styrofoams on rear side 8 Remove screws 9 Remove this metal support 10 ...

Страница 56: ...55 EN 10 WARRANTY STATEMENT FOR BEKO ELECTRIC AND GAS RANGES ...

Страница 57: ......

Страница 58: ...Envelope III 57 EN ...

Страница 59: ...Envelope IV 58 EN ...

Отзывы: