background image

51

Navigation mode

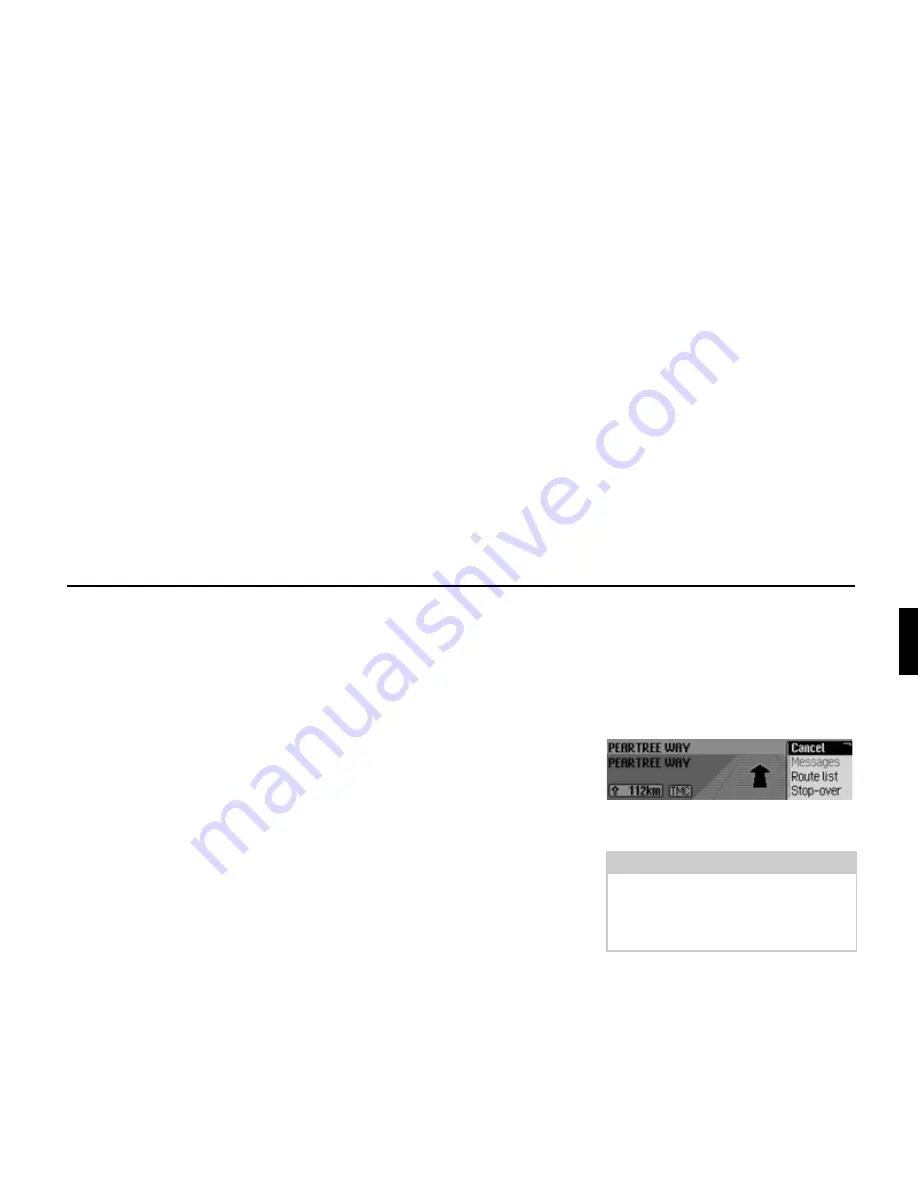
Cancel

You can abort the current route guid-
ance. See “Cancelling route guidance”
on page 51.

Messages

You can display/listen to a list of
traffic announcements relevant to the
route. See “Traffic announcements”
on page 52.

Route list

You can display the route planned by
the Cascade. See “Route list” on
page 52.

Stop-over

You can enter another destination as a
stopover during active navigation. See
“Stopover” on page 52.

Block

You can block a section of the route
still to be travelled. See “Blocking a
route” on page 54.

Route opt.

You can modify the route options dur-
ing navigation. See “Modifying route
options” on page 54.

Announce

You can switch navigation announce-
ments off and then back on again. See
“Switching navigation announcements
on/off” on page 55.

Cancelling route guidance

You can use this function to cancel route
guidance before reaching the actual des-
tination.

!

In the Options menu, select the 

Cancel

entry.

!

Select 

Yes

 (cancel navigation) or 

No

(continue with navigation).

Note:

If no operator inputs are made, the
menu will automatically disappear after
a few seconds and navigation will con-
tinue.

2068

Содержание CASCADE PRO

Страница 1: ...GB DK S Operation Guide Betjeningsvejledning Bruksanvisning...

Страница 2: ...Removing memory card 26 Selecting navigation 26 Calling up the Navigation main menu 27 Entering a destination 28 Selecting a country 28 Entering a destination town 29 Selecting destination via postco...

Страница 3: ...er function 68 Switching the filter function on off 68 Filtering stations 69 Filtering stations 69 Cancel filtering 69 Programme type 70 Switching the programme type function on off 70 Selecting the p...

Страница 4: ...umber 100 Number is busy 100 Dialling a number from the address book 101 Call lists 102 Calling a number from the list 103 Retrieving information about the entry 103 Deleting a call list 103 Emergency...

Страница 5: ...ving an entry in the address book 142 Protecting an entry 143 Deleting an entry 143 Deleting a list 143 Changing Beckerclub address 144 WAP main menu 144 Opening WAP main menu 144 Favourites 145 Openi...

Страница 6: ...Calling up the system settings 185 Audio 186 GAL speed dependent volume 186 Setting microphone sensitivity 186 Settings for left hand right hand drive vehicles 186 Volume for acoustic signals 187 Disp...

Страница 7: ...e new destination a main destination or a stopover 225 Commands for telephone mail and WAP mode 225 Commands for the PIN input menu 225 Commands for telephone fast access mode 226 Commands in the Fast...

Страница 8: ...a provided by the navigation system Due to continual changes in traffic routing or deviations in the data it may occur that imprecise or erroneous information is given Therefore actual road signs and...

Страница 9: ...n authorised service garage We assume no liability for any impairment of the vehicle s electronics This device is only intended for installation in the area provided for this purpose by the vehicle ma...

Страница 10: ...n 6 Select telephone 7 Select address book 8 CD eject button 9 Status button 10 Right hand rotary control push button Press Confirm Turn Scroll through lists and menus 11 Back button 12 Release slide...

Страница 11: ...ddress book fast access function Main menu The main menu for each operating mode provides access to the various functions and possible settings for that mode The Radio main menu is shown here by way o...

Страница 12: ...in the status display Press the rotary control push button The Options menu appears You can access the major functions for the active operating mode directly in the Options menu Some of the possible s...

Страница 13: ...he character set for the available characters by selecting various symbols Switch to lowercase Switch to uppercase Switch to numbers Switch to special characters Switch to lowercase international Swit...

Страница 14: ...mber Press the rotary control push button Enter the remaining digits of the code number in the same way Once you have entered all 5 digits of the code number correctly the Cascade will come on automat...

Страница 15: ...cally switch itself back on Note Entering an incorrect code number three times will disable the unit for approx 1 hour The time remaining until another attempt can be made to enter the code number is...

Страница 16: ...l panel has been removed Inserting the cover Remove the control panel as described in Removing Inserting the control panel on page 15 Insert the plastic insert into the gap with the hole at the top an...

Страница 17: ...pprox 5 seconds shutdown can be aborted by pressing one of the buttons on the Cascade or by switching the ignition back on The Cascade then switches itself back on and plays back the last source selec...

Страница 18: ...udio sources Calling up the sound settings Press or until the sound settings appear or Select Sound in the radio or Audio main menu Radio main menu Page 64 Audio main menu Page 86 Turn the rotary cont...

Страница 19: ...y control push button The cursor jumps to the first frequency band Turn the rotary control push button to select the frequency band to be changed Confirm your selection by pressing the rotary control...

Страница 20: ...ter clockwise The tone centre moves to the right left Fader setting Turn the rotary control push button clockwise counter clockwise The tone centre moves forwards back wards Switching Loudness on off...

Страница 21: ...he threshold frequencies for the front loudspeakers the rear loudspeakers and the subwoofer Select Crossover in the sound settings You may now select Front loudspeakers Rear loudspeakers or Subwoofer...

Страница 22: ...setting is reset to zero Balance fader to centre setting Loudness to off Becker surround to off Subwoofer to off Crossover front and rear loudspeakers to off subwoofer to 100 Hz Compression to off Se...

Страница 23: ...e function as follows Press the rotary control push button again and hold it down for at least 2 seconds Change the volume by turning the rotary control push button Press or Select another station or...

Страница 24: ...he regional and unclassified roads or access roads and the town centres are included One way streets pedestrian zones turn bans and other traffic regulations are taken into account as far as possible...

Страница 25: ...ject button located above and to the left of the slot out wards Reinsert the cover as described in In serting Removing the cover on page 16 Reinsert the control panel as described in Removing Insertin...

Страница 26: ...f the maximum of 8 receiv able satellites are being received In fast access mode you can select and navigate to the last destinations entered the destinations you have stored in fast access mode For m...

Страница 27: ...inations on the Beckerclub homepage can be called up See Beckerclub on page 46 Point of Interest external Takes you to the menu for selecting an external point of interest In other words you can selec...

Страница 28: ...ding menu appears or the required action is initiated Selecting a country If your destination is located in a different country GREA BRI AIN in the example display you must first select the required c...

Страница 29: ...In the data entry menu select the symbol or Press the rotary control push button and hold it down for at least 2 seconds If the complete town name has already been entered or completed automatically...

Страница 30: ...sh button to select the numbers and letters one after the other Accept entry In the data entry menu select the symbol or Press the rotary control push button and hold it down for at least 2 seconds If...

Страница 31: ...he name of the road closest to the previous entry is displayed The Cas cade offers only the possible remaining letters for selection If no other entries are available the Cascade completes the road na...

Страница 32: ...yed The Cas cade offers only the possible remaining letters for selection If no other entries are available the Cascade completes the centre name automatically Accept entry In the data entry menu sele...

Страница 33: ...push button to select the required junction Entering destination via geo coordinates You can also enter a destination as geo coordinates In the Enter Destination menu select Geo co ordinates Confirm...

Страница 34: ...tions menu appears Notes By selecting you can specify the direction of the geographical lati tude N north and S south By selecting you can specify the direction of the geographical lon gitude E east a...

Страница 35: ...n use these entries for example to exclude ferries or motorways from the route calculation The Cascade will then attempt to calculate a route which does not contain any motor ways or ferries Saving De...

Страница 36: ...ction using the voice control You may Start navigation directly to these desti nations You can start navigation to a POI in the local area Protect the entries in fast access i e the entry will not be...

Страница 37: ...ed Press the rotary control push button until a menu appears Select the Protect entry entry Switch protection on or off by pressing the rotary control push button Protected entries are identified by t...

Страница 38: ...rs Turn the rotary control push button and then press the rotary control push button to select the Save in address book entry Turn the rotary control push button to select one of the following options...

Страница 39: ...e Save entry A confirmation that the entry has been saved appears Press the rotary control push button Adding data to entries Select the Amend entry entry Turn the rotary control push button and then...

Страница 40: ...tination will be started immediately Point of interest You can select a POI as a main destina tion or a stopover POIs include petrol stations airports or hospitals for example In the Navigation main m...

Страница 41: ...country You can select a POI for the selected country from a range of national POI categories In vicinity of destination You can select a POI in the vicinity of the destination In place You can selec...

Страница 42: ...ing the rotary control push button Turn the rotary control push button and then press the rotary control push button to select the country in which you are looking for a national POI Turn the rotary c...

Страница 43: ...push button Select the desired country as described under Selecting a country on page 28 Select the required town as described under Entering a destination town on page 29 or Select the required post...

Страница 44: ...t is initiated Information about points of interest You can call up additional information about many POIs e g a brief description or a telephone number You can then also call this number directly To...

Страница 45: ...ry control push button to select one of the following op tions In vicinity of location or In vicinity of destination Confirm your selection by pressing the rotary control push button In vicinity of lo...

Страница 46: ...Navigation main menu select the Beckerclub entry Confirm your selection by pressing the rotary control push button The destinations menu is displayed The destinations loaded to date and Up date desti...

Страница 47: ...ou wish to edit Press the rotary control push button until a menu appears Then select from Save in address book Delete entry or Delete list Save in address book The destination is saved to the address...

Страница 48: ...tom left of the display Turn the rotary control push button to select the various displays in the status display Display with current time Display with estimated journey time remaining Display with di...

Страница 49: ...ght This display shows you the exit you should take on the roundabout Please follow the direction arrows This display tells you that you are cur rently on a non digitised road i e car park garage mult...

Страница 50: ...call up the Options menu in the navigation status screen Press the rotary control push button The Options menu appears on the right hand side Turn the rotary control push button to select one of the...

Страница 51: ...on of the route still to be travelled See Blocking a route on page 54 Route opt You can modify the route options dur ing navigation See Modifying route options on page 54 Announce You can switch navig...

Страница 52: ...f the roads to the destination appears The distance to be travelled along each road appears after its name Turn the rotary control push button to scroll through the list Press to exit the route list S...

Страница 53: ...over as described in Naviga tion fast access on page 36 Once the stopover has been selected the route is recalculated and route guidance started to the stopover Deleting a stopover If you have entered...

Страница 54: ...e removed again In the Options menu select the Block entry Select Yes delete block or No retain block Modifying route options You can modify the route options during navigation In the Options menu sel...

Страница 55: ...d destination road To the left underneath the destination town the average speed thus far Above the image of the car the distance still to be travelled and the anticipated time of arrival To the left...

Страница 56: ...current position The current position was saved in fast access mode Displaying traffic announcements Press Turn the rotary control push button clockwise until MC appears on the top right of the displa...

Страница 57: ...nouncements are displayed for the route Dynamic route guidance with TMC What is dynamic route guidance Dynamic route guidance is used to cal culate the route taking current traffic announcements into...

Страница 58: ...ute to the des tination New route is shown on the display There is also the voice announcement The route is being recalculated due to cur rent traffic announcements Your navigation system can receive...

Страница 59: ...ary control push button The announcement appears in full To listen to the announcement select the Read out entry or Turn the rotary control push button to scroll through the traffic announce ment A ty...

Страница 60: ...tomatically once the route has been calculated recalculated Show speed limits If the function is on the system will inform you of the maximum permissi ble speed limit for the route along which you are...

Страница 61: ...ntrol push button to switch the announcement of the time of arrival on or off Displaying speed limits If the function is on the system will in form you of the maximum permissible speed limit for the r...

Страница 62: ...pressing the rotary control push button You may now select Sports car Car Van or Set freely Sports car This setting indicates to the Cascade that you tend to drive rather quickly An earlier ETA is cal...

Страница 63: ...ng The available range is between 50 and 200 A value of 100 indicates the Car set ting A later ETA will be calculated if a higher percentage value is selected Turn the rotary control push button to se...

Страница 64: ...ice entries Regionalisation Reception optimisation or Adaptive bandwidth control Confirm your selection by pressing the rotary control push button The required function is called up Waveband Accesses...

Страница 65: ...ear in the list in alpha betical order The waveband set is indicated by the symbol in the status display FM by quality If an FM station was selected previ ously it will remain selected or if an AM sta...

Страница 66: ...ly or FM by quality Stations can be selected using the station list in two ways Selection in status display Turn the rotary control push button clockwise or counter clockwise or In the status display...

Страница 67: ...deactivate the function The station currently being scanned is set and the scan function is aborted Notes If the selected entry is a station chain this is indicated by a small triangle on the right ha...

Страница 68: ...st In the Radio main menu select Filter The Filter menu appears Turn the rotary control push button to select one of the following options Filter Reset or the stations and station chains which can cur...

Страница 69: ...which appears select the station to be filtered Press the rotary control push button until a menu appears Select the Filter station entry or To filter the station currently playing press the rotary c...

Страница 70: ...he FM station lists The programme type of the selected station also appears on the right of the status display Selecting the programme type In the Programme Type menu select the entry for the required...

Страница 71: ...ontrol push button to activate the function The radio text for the current FM station is displayed Deactivating radio text In the status display press the rotary control push button Select the Radio t...

Страница 72: ...ng you to confirm whether or not all voice entries should actually be deleted Select Yes to delete the voice entries or No to continue without deletion Dialogue for saving If the function is active wh...

Страница 73: ...areas station A has a neighbouring station B in its immediate vicinity In the Radio main menu select the Adaptive bandwidth control entry Turn the rotary control push button to switch the function on...

Страница 74: ...witch the function on or off Manual TP station selection In the TP menu select the station on which you wish to listen to traffic news Turn the rotary control push button to activate the station as th...

Страница 75: ...raffic announcement Press the rotary control push button or Press Traffic announcements are cancelled AM mode AM mode combines the two wavebands AM and Short wave Possible settings for AM stations A n...

Страница 76: ...can entry Press the rotary control push button to activate the function The stations which can be received are scanned briefly in descending ascending frequency order Aborting the scan function In the...

Страница 77: ...band select the station to be stored Press the rotary control push button until a menu appears Select the Save station entry or In the status display press the rotary control push button The Options m...

Страница 78: ...o be stored is to be stored Press the rotary control push button until a menu appears Select the Save current station here entry The station is now stored in the station memory Depending on the settin...

Страница 79: ...om the station memory Naming stations You can assign a user defined name of up to 8 characters in length to a stored station Turn the rotary control push button to select the station to be named Press...

Страница 80: ...the rotary control push button until a menu appears Select the Delete voice entry entry A prompt appears for you to confirm if the voice entry should really be deleted Select Yes to delete the voice...

Страница 81: ...rectories for selection The following description assumes that you are in the status display Press The media fast access function appears If a track is currently being played the directory or the CD i...

Страница 82: ...l names if available of the individual entries in fast access mode For a directory the number of tracks and total playback time are also dis played Once the last track on a CD in a direc tory has been...

Страница 83: ...u In the media status display press the rotary control push button The Options menu appears Turn the rotary control push button to select Playmode and press the rotary control push button Notes You ca...

Страница 84: ...Mode menu Press the rotary control push button to switch the function on or off Scan If the function is activated all tracks in the current directory or on the current CD are played back for approx 10...

Страница 85: ...tton to switch the function on or off Directory mix Activate the function to play all tracks on the various directories one after the other in random sequence Turn the rotary control push button to se...

Страница 86: ...wice in succession or Press You are now in media fast access mode Select the Media menu entry The Media main menu appears Switching detailed track display on off If detailed track display is activated...

Страница 87: ...t not be used Inserting Ejecting CDs Insertion Insert the disc into the CD slot with the printed side up The unit pulls in the CD automatically and begins to play the disc from the first track Ejectin...

Страница 88: ...circuit A temperature protection circuit in the Cascade protects the laser diode from excessive heat If this protection circuit is triggered a warning message will appear and a signal tone will sound...

Страница 89: ...haracters The MP3 formats MPEG1 and MPEG2 Layer3 are supported by the unit Fixed and variable bit rates of 8 320 kbps and scan rates of 16 48 kHz are supported for files with variable bit rate only wi...

Страница 90: ...ed in Inserting Removing the cover on page 16 Insert the micro drive CF memory card into the visible slot on the right hand side Push the micro drive CF memory card carefully into the slot This pushes...

Страница 91: ...ving the cover on page 16 Press the eject button located to the top left of the slot The micro drive CF memory card is pushed forwards out of the slot Pull the micro drive CF memory card out of the sl...

Страница 92: ...C memory card has not changed since it was last in serted playback begins with the last track played Removing SD MMC memory card Remove the control panel as described in Removing Inserting the control...

Страница 93: ...that can be saved on a memory card micro drive or CD this storage medium quickly be comes confusing You can make it less confusing using playlists In a playlist you can combine for exam ple all the d...

Страница 94: ...D mode on page 87 apply to CD changer mode Notes on compact discs CD on page 87 Notes on CD R and CD RWs on page 88 Operational readiness of CD changer If a CD changer is connected to the Cas cade it...

Страница 95: ...its AUX mode You can call up units connected exter nally to the Cascade as described in Media fast access functions on page 81 However AUX mode must be activated as described in External device on pag...

Страница 96: ...phone only For functions and settings that are only available with a built in phone this is indicated by internal phone only For functions that are only available for a connection via SIM Access this...

Страница 97: ...ts of the SIM card must be on the right and the slanted corner of the card must be at the bottom Push the SIM card carefully into the slot The SIM card locks noticeably into place Reinsert the cover a...

Страница 98: ...access func tions are displayed In fast access mode the last 20 numbers or names which have been dialled an swered or rejected will be displayed in chronological order Further information on fast acc...

Страница 99: ...le phone number See Dialling number on page 100 Call from address book You can select a telephone number from the address book See Dialling a number from the address book on page 101 Call lists You ca...

Страница 100: ...d by displaying the following message Press the rotary control push button to abort the call If the person called answers the tele phone the Cascade switches to the status display for active telephone...

Страница 101: ...isplay Turn the rotary control push button and then press the rotary control push button to select the desired number The connection will be established Note Some mobile phones mobile phone only are s...

Страница 102: ...ed calls Confirm your selection by pressing the rotary control push button The desired list is called up Missed calls In this list you will find calls which you missed or which you rejected Dialled nu...

Страница 103: ...he list Deleting a call list You can delete the entire call list Select Delete list in the call list to be de leted Select Yes delete or No do not de lete If you select Yes the call list will be de le...

Страница 104: ...election by pressing the rotary control push button The desired function is called up Call diversion internal phone and SIM Access only With this function you can divert calls to your mailbox or to an...

Страница 105: ...telephone number depending on the settings Call up the Settings menu Select the Call diversion entry The Call Divert menu appears Turn the rotary control push button to select one of the following op...

Страница 106: ...ws the current sta tus of the call divert function After selecting On the phone number is displayed provided a call divert number has already been entered Select from Use Another number and Cancel By...

Страница 107: ...set the number to which calls are to be diverted if you have switched off your phone or if your phone currently has no reception Here you have the same options as for Divert all calls Switch off all d...

Страница 108: ...call the number again for 16 minutes at intervals of 2 minutes Select the Auto re dial entry Press the rotary control push button to switch the function on or off Auto call answering option If the Au...

Страница 109: ...utton to switch the function on After a short time if possible a network is selected automatically by Cascade Selecting a network manually If manual network selection is active you can select one of t...

Страница 110: ...scade You can also change your PIN Call up the Settings menu Select the PIN settings entry The PIN Settings menu appears Turn the rotary control push button to select one of the following op tions Set...

Страница 111: ...new PIN again Select the symbol to confirm If the previous entries were correct PIN changed is displayed The PIN has then been changed Automatic call answering mobile phone only When the Auto call an...

Страница 112: ...tatus display A telephone symbol will be displayed in the centre left and if available the name of the caller the person you are calling If the name is not available the number will be displayed If th...

Страница 113: ...oming call will be started automatically 5018 Notes Selecting Mute deactivates the signal tone and the previously active source radio or media will be reactivated However the call will be indicated un...

Страница 114: ...ng You are currently conducting a call or a conference call In the status display press the rotary control push button The Options menu appears Then select either Stop or Dial When selecting Stop the...

Страница 115: ...hold By pressing or select the call conference call on hold or Turn the rotary control push button to select the call conference call on hold Options menu must not be ac tivated Press the rotary contr...

Страница 116: ...r ence entry The new call is added to the conference call on hold The conference call is then re activated Private call You want to talk to one of the confer ence call participants without the other p...

Страница 117: ...s Select the Hang up entry The conference call is then ended Any call on hold is still kept on hold Options menu The Options menu can be displayed dur ing an active call call on hold or a con ference...

Страница 118: ...rnal phone and SIM Access only By selecting Stop in the Options menu you can place an active call or an active conference call into a queue You can then make another call or have a conver sation in yo...

Страница 119: ...l So called DTMF dialling tones can be transmitted For example these tones are required to retrieve information from an answering machine Open the Options menu Select the In band sig entry Enter the r...

Страница 120: ...e entire fast access list Save an entry from the fast access list to the address book or to the SIM card in ternal phone and SIM Access only Press The telephone fast access function ap pears Notes Wit...

Страница 121: ...Protect entry entry Switch protection on or off by pressing the rotary control push button Protected entries are identified by the symbol Deleting an entry Call up the telephone fast access func tion...

Страница 122: ...til a menu appears Turn the rotary control push button and then press the rotary control push button to select the Save in address book entry Turn the rotary control push button to select one of the f...

Страница 123: ...he rotary control push button and hold for at least 2 seconds The address book entry appears Turn the rotary control push button and then press the rotary control push button to select the Save entry...

Страница 124: ...ess func tion Select the entry to be saved Press the rotary control push button until a menu appears Turn the rotary control push button and then press the rotary control push button to select the Sav...

Страница 125: ...SMS is displayed immediately and you can then read it Proceed as described in Options for SMS read aloud on page 127 If more than one SMS has been received the SMS fast access function is opened Pleas...

Страница 126: ...sender s details the name if available otherwise the number Turn the rotary control push button to scroll through the message 5102 5103 5104 Notes Read SIM card may be displayed until the data of the...

Страница 127: ...d this back to the sender In the SMS Options menu select the Reply entry You can then enter and send the mes sage as described below However the phone number is not requested when you send the message...

Страница 128: ...ter editing it you can press When the next prompt appears select Yes to save the edited text or No if you do not want to save the changes Deleting all SMS You can use this to delete all the SMS messag...

Страница 129: ...MS input menu appears Turn the rotary control push button and then press the rotary control push button to select the letters and characters for the message one after the other Select the symbol from...

Страница 130: ...the telephone fast access list and send the SMS to this number After selecting Enter number the input menu for the telephone number is dis played Turn the rotary control push button and then press th...

Страница 131: ...SMS messages that failed to send Received SMS messages that have been edited and then saved You can send edit or delete these SMS messages Open the SMS main menu Select Saved SMS The list with the sa...

Страница 132: ...l be displayed When the prompt appears select Yes to delete the SMS or No to retain it Editing After selecting Edit or after selecting the text of the SMS the following message is displayed You can no...

Страница 133: ...available otherwise the number will be displayed Turn the rotary control push button to choose the SMS text Delete Edit or Delete all SMS Confirm your selection by pressing the rotary control push bu...

Страница 134: ...ead out the new SMS will automatically be activated when an SMS is received SMS centre number Here you can enter or change the phone number for the SMS centre Announcing new SMS Select the Announce ne...

Страница 135: ...tre number entry in the Mail settings The input menu for the SMS centre number appears Turn the rotary control push button and then press the rotary control push button to select the digits in the des...

Страница 136: ...scribed in Opening WAP ad dress directly on page 141 After a short time the Becker logo is displayed The WAP page for the selected address is then displayed if this is possible You can see that a conn...

Страница 137: ...rst two menu items depend on the WAP page In other words the program mer of the WAP page has specified the functions that are to be displayed here The entries may therefore differ from page to page If...

Страница 138: ...t a connection has been termi nated from the fact that there are no lines above and below the symbol Favourites Using this function you can save the cur rent page to the list of favourites or open a p...

Страница 139: ...n the Browser menu select the History entry The History list is displayed You can then select one of the entries in the History list by turning and then pressing the rotary control push button The sys...

Страница 140: ...maximum number of entries is reached The oldest unprotected entry will be deleted Delete individual fast access entries Delete the entire fast access list Change or restore the address for the Becker...

Страница 141: ...to the Favourites Open the WAP fast access function In the Fast Access menu which ap pears select the required WAP ad dress entry Press the rotary control push button until a menu appears Turn the ro...

Страница 142: ...ch ap pears select the WAP address entry to be saved Press the rotary control push button until a menu appears Turn the rotary control push button and then press the rotary control push button to sele...

Страница 143: ...button and then press the rotary control push button to select the Delete entry entry The entry is deleted from the fast access list Deleting a list Open the WAP fast access function Press the rotary...

Страница 144: ...lowing op tions Change URL or Restore URL Confirm your selection by pressing the rotary control push button Change URL You can change the preset URL using this option After making a change select the...

Страница 145: ...s You can save up to 50 entries to the Fa vourites If you have already saved 50 favourites the oldest entry is removed from the list when you save another fa vourite Opening list of favourites Open th...

Страница 146: ...he URL for the favourite are displayed Select the name or the URL to edit it In this case an input menu will be dis played Make the changes you wish After making a change select the symbol from the in...

Страница 147: ...various access profiles Press the rotary control push button to activate the required profile Loading access profile You can load preconfigured access pro files from the Beckerclub page Open the list...

Страница 148: ...e relevant points Please refer to the in structions on entering data in Data entry menus on page 13 Confirm your entry by selecting the symbol Once you have entered all the neces sary data select the...

Страница 149: ...ry The input menu appears Enter the information Password Here you can enter the password Select the Password entry The input menu appears Enter the information Proxy IP address Here you can enter the...

Страница 150: ...n Proxy password Here you can enter the proxy password Select the Proxy password entry The input menu appears Enter the information Home page Here you can enter the provider s home page Select the Hom...

Страница 151: ...le you can adapt the profile entries as described in Cre ating access profile on page 148 Select the Delete profile entry to delete the profile When the prompt appears select Yes to delete the access...

Страница 152: ...ction of a digital sever based log book Via the BeckerClub you can add to the collected data to produce a com plete logbook You can call up and print out this information at any time via the BeckerClu...

Страница 153: ...ways That is the first step to successfully finding and reacquiring your vehicle You can visit the BeckerClub at http www beckerclub com You can use the BeckerClub card which is also included in the s...

Страница 154: ...s book appear here Calling up the Address Book main menu In the Address book main menu you can create new entries search for entries export the address book or data from the SIM card delete the addres...

Страница 155: ...the rotary control push button to select one of the following options Mobile tel Business tel Private tel Street house number Postcode town Country Business e mail Private e mail and WWW wap Confirm...

Страница 156: ...he New entry navigable entry Enter a surname and first name as described in Creating an entry on page 155 The data entry menu for the address appears The last country selected appears as the country b...

Страница 157: ...quired information Once you have entered all the informa tion you must save the entry Select the Save entry Confirm your selection by pressing the rotary control push button If under Automatic dialogu...

Страница 158: ...ame auto matically Accept entry In the data entry menu select the symbol or Press the rotary control push button and hold it down for at least 2 seconds If the complete name location has already been...

Страница 159: ...hange data You can modify the data entered for an entry See Modifying an entry on page 160 Save on SIM card Is only displayed if an address book entry has been selected You can save an address book en...

Страница 160: ...the Edit Entries menu select the Change data entry Modify the required data as described in Creating an entry on page 155 Once you have entered all the informa tion you must save the entry Select the...

Страница 161: ...ich you wish to record a voice entry Select the Edit entry Select the Create voice entry entry The recording procedure starts Delete Find the address book entry for which you wish to delete a voice en...

Страница 162: ...t the device to which the address book is to be transferred Press the rotary control push button The Cascade tries to establish a connec tion to the required device If authentication is required you w...

Страница 163: ...e 173 Press the rotary control push button to abort the transfer No data will be transferred The address book entry has been sent Press the rotary control push button Importing an address book entry A...

Страница 164: ...2 will also be activated Further connection requests will be accepted without a query If you have allowed the connection by means of Yes or Always the address data will be sent Adresse wird bertragen...

Страница 165: ...d on the SIM card Importing SIM card entries You can import a SIM card entry and save it as an address book entry Find the SIM card entry that you wish to save as an address book entry Select the Edit...

Страница 166: ...y for which you wish to start route guidance Select the name or a part of the address Press the rotary control push button Route guidance to the destination will be initiated Calling an address book e...

Страница 167: ...of the following options Read out all entries Delete all entries and Dialogue for saving Confirm your selection or switch the function on off by pressing the rotary control push button Read out all e...

Страница 168: ...he address book entry to be protected Press the rotary control push button until a menu appears Select the Protect entry entry Switch protection on or off by pressing the rotary control push button Pr...

Страница 169: ...control push button and then press the rotary control push button to select the Delete list entry When the prompt appears select Yes to delete the list or No to retain it If you select Yes the list wi...

Страница 170: ...es of connection profiles Hands free profile For the connection via the hands free profile the Cascade serves as a hands free system for the mobile phone SIM Access profile For the connection via the...

Страница 171: ...bol in front of the name of the devices Connected device marked with the symbol Devices with Standard status marked with the symbol Coupled devices indicated by the symbol for hands free and by the sy...

Страница 172: ...control push button and hold until the following menu appears Select the Name device entry Enter the desired name For this purpose proceed as described in Data entry menus auf Seite 13 The changed nam...

Страница 173: ...elect the device to be connected from the device list Press the rotary control push button Note The connected device is not deleted 7060 Note It is not yet clear whether connection is possible in both...

Страница 174: ...enticated If it was not possible to establish a connection the Cascade will notify you of this on the display Note The device to be connected is addressed by Cascade and signals which profiles are sup...

Страница 175: ...cted to the Cascade The external device has not been connected to the Cascade before Notes You do not need to remember the dis played 16 digit number The number is always generated anew The displayed...

Страница 176: ...one can be heard and the following message appears Press the rotary control push button A connection has now been established to the external device The external device has not been connected to the C...

Страница 177: ...e external device is allowed The function described in Always allow connection auf Seite 172 will also be activated Further connection requests will be accepted without a query If the connection to th...

Страница 178: ...luetooth menu entry Turn the rotary control push button to select between Bluetooth active Search for devices Device visible for others and Device name Confirm your selection by pressing the rotary co...

Страница 179: ...sh button to cancel the search If you do not cancel the search it will continue to run If other devices are found further messages will be displayed concerning those devices The devices found are disp...

Страница 180: ...ice mode settings Press Turn the rotary control push button counter clockwise until Voice operation appears at the top right of the display This display provides information about the number of free v...

Страница 181: ...e display text language Navi speaker indicates the current set ting for the navigation announcement speaker SDS indicates the current setting for the voice dialogue system speaker S indicates the curr...

Страница 182: ...e required volume Automatic dialogue You can specify which events should trigger automatic voice dialogue Auto matic dialogues are automatic queries from the Cascade after particular events for exampl...

Страница 183: ...nctions Signal prior to voice input Once the function has been activated in addition to being highlighted on the Cascade a beep tone sounds to indicate that the unit is ready for a voice command Confi...

Страница 184: ...on your Cascade to meet your require ments in the system settings The following possible settings are available For Audio Setting for speed dependent increase in volume with Speed dependent volume Wit...

Страница 185: ...e scrolled when the rotary control push button is turned You can use Clock to configure the GMT time sent by the satellite in terms of its format and the current time zone The time only needs to be se...

Страница 186: ...le if the other party finds you too quiet or too loud Select Audio in the system settings Select Micro sensitivity Turn the rotary control push button to select the required value Settings for left h...

Страница 187: ...e rotary control push button to switch the function on or off Digital level You can adapt the volume level of digital audio sources CD and all MP3 sources to analogue audio sources radio Select Audio...

Страница 188: ...Turn the rotary control push button to select the required value Display colour You can use this function to set the dis play colour using predefined colour pal ettes Select Display in the system sett...

Страница 189: ...akes place automatically The night design is automatically activated under dim outside light conditions External device You can specify whether an iPod an AUX source or an external hands free unit is...

Страница 190: ...Settings are not reset In the following prompt select Yes to reset the settings or No to continue without a reset A reset is performed if Yes is selected The Cascade switches itself off briefly and th...

Страница 191: ...You will now receive the message that all existing data will be overwritten Select Yes to continue loading the data or No to cancel Loading of the data starts when Yes is selected The following displa...

Страница 192: ...e time also ensures that anticipated times of arrival are announced displayed correctly Select Clock in the system settings The Clock Settings menu appears The current time setting appears on the righ...

Страница 193: ...oftware update starts when Yes is selected A progress indicator informs you of the progress of the installation The following message appears once the update has been completed successfully Press the...

Страница 194: ...rol system to store voice entries for stations address book entries and or navigation destinations These voice entries are a component of the various commands and are represented in the operation guid...

Страница 195: ...g conversations between other passen gers going on at the same time Ambient noise increases the faster the vehicle is travelling You should therefore speak more loudly at higher speeds Do not enter vo...

Страница 196: ...on the setting in Voice entries on page 196 for radio mode and in Voice entries on page 167 for the address book when storing a station or address book entry at the end of the process voice mode will...

Страница 197: ...voice output Extended PTT If you have activated Extended PTT Push To Talk voice recognition will also be activated every time one of the buttons on the unit is pressed e g Automatic dialogues Here you...

Страница 198: ...the basis of quality Press the rotary control push button You will hear a signal tone Say the command Open radio menu The radio menu appears Radio menu You will hear a signal tone Say the command Wav...

Страница 199: ...tone Say the command Enter destina tion The destination input menu appears Would you like to retain GLASGOW or another town You will hear a signal tone Say the command No The data entry menu for the...

Страница 200: ...ease spell the first letters of the road You will hear a signal tone Spell out the first few letters of Lexington Street L E X I N G T O N The road selection list appears Please select the line number...

Страница 201: ...hone number appears Speak the telephone number 0 7 2 4 1 3 4 5 6 7 8 07241345678 The input menu for the telephone number spoken appears You will hear a signal tone Speak the command Dial The number wi...

Страница 202: ...ancel or End or Press the rotary control push button Navigation in lists If a list containing a number of pages appears on the display you can navigate this list by using voice commands Scroll forward...

Страница 203: ...media mode Say the command Media Alternative commands Media player on CD player on CD changer on or Media changer on You can call up navigation mode Say the command Navigation or Navi You can call up...

Страница 204: ...the command Mute on Alternative commands Mute radio Mute media or Mute audio Switch off the mute function Say the command Mute off Alternative commands Unmute radio Unmute media or Unmute audio Comman...

Страница 205: ...e command Traffic pro gramme off Alternative commands Traffic info off Deactivate traffic programme Reset traffic pro gramme Deactivate traffic info or Reset traffic info Filter current station page 6...

Страница 206: ...radio menu or Open menu Call up Waveband menu page 65 Say the command Waveband Alternative commands Open waveband menu or Open station list menu Call up Programme Type menu page 70 Say the command Pr...

Страница 207: ...are available in the Edit Station menu for the wave band station memory Set station to be edited as TP station page 74 Say the command Set as traffic programme or Set station as traffic programme Stor...

Страница 208: ...info Open traffic info menu or Open traffic programme menu Call up Voice Entries menu page 80 Say the command Voice entries or Open voice entries Switch regionalisation on off page 71 Switch on Say t...

Страница 209: ...mmands Activate FM alphabetically Acti vate very high frequency alphabet ically Activate VHF alphabeti cally Select FM alphabetically Select very high frequenc alpha betically or Select VHF alphabeti...

Страница 210: ...n or Activate filter Switch off Say the command Filter off or Deactivate filter Switch filter for a specific station on off Switch on Say the command Station number 1 X filter on or Activate station n...

Страница 211: ...nfo sta tion automatically Select a TP station manually Say the command Station number 1 X Alternative commands Set traffic programme number 1 X or Set station number 1 X Call up TP volume setting Say...

Страница 212: ...optimi sation menu Set stereo Say the command Always stereo or Select always stereo Set mono Say the command Always mono or Select always mono Commands for media mode If media mode has been set as th...

Страница 213: ...or Play CD number 1 X Switch on mute function page 22 Say the command Mute on Alternative commands Mute CD Mute media or Mute audio Switch off mute function page 22 Say the command Mute off Alternativ...

Страница 214: ...or Re set Selecting next playlist only if play lists are available Speak the command Next playlist Selecting previous playlist only if playlists are available Speak the command Previous playlist Selec...

Страница 215: ...ix on or Activate direc tory mix Switching on repeat folder Speak the command Repeat direc tory Commands for media fast access In media fast access mode the following commands are available Calling up...

Страница 216: ...r only if playlists are avail able Speak the command Playlist number 1 X or Playlist number 1 X Selecting next folder only for MP3 media Speak the command Next directo ry Selecting previous folder onl...

Страница 217: ...on normal playback sequence Say the command Normal order or Play tracks in normal order Only if CD changer is an active media source Switch on track mix random play function page 85 Say the command CD...

Страница 218: ...Switch off Say the command Instructions off Alternative commands Deactivate instructions or Deactivate voice Repeat direction Say the command Instructions or Repeat instructions Correction option for...

Страница 219: ...ve current position page 56 Say the command Save current position or Save position Switch TP on off page 74 Switch on Say the command Traffic pro gramme on Alternative commands Traffic info on Activat...

Страница 220: ...oice entry Say the command Navigate to des tination Alternative commands Navigate to destination Navigate to entry Navigate to destination or Navigate to address Start navigation to a fast access dest...

Страница 221: ...elete entire list page 38 Say the command Delete list or Delete entire list Commands for the Navigation main menu In the Navigation main menu the following commands are available Call up the navigatio...

Страница 222: ...ter suburb or Enter centre Enter destination road page 31 Say the command Street or Enter street Enter junction page 33 Say the command Intersection or Enter street intersection Enter house number pag...

Страница 223: ...untry Selecting a POI in a specific town page 43 Speak the command Enter town or Special destination in a town Selecting a POI in the destination area page 43 Speak the command Special desti nation in...

Страница 224: ...ch avoid toll on off Switch on Say the command Avoid toll or Avoid toll on Switch off Say the command Avoid toll off or Deactivate avoid toll Switch avoid ferries on off Switch on Say the command Avoi...

Страница 225: ...the command Main destina tion or Enter main destination Set as stopover Say the command Stop over or Enter stop over Commands for telephone mail and WAP mode Commands for the PIN input menu In the PI...

Страница 226: ...ings Alternative commands Open settings or Open telephone set tings Switch the telephone off page 112 Speak the command Switch off tel ephone Connect a phone Speak the command Connect tele phone Call...

Страница 227: ...l telephone number 1 X Call entry number 1 X or Call entry 1 X Edit a phone number in the fast access list Speak the command Edit tele phone number 1 X Alternative commands Edit telephone number 1 X E...

Страница 228: ...number page 95 Speak the command Dial number or Enter telephone number Selecting a telephone number from the address book page 96 Speak the command Call from address book or Call number from the addr...

Страница 229: ...Select missed calls Calling up the calls list with the dialled calls Speak the command Dialled numbers or Select dialled numbers Calling up the calls list with the an swered calls Speak the command Ac...

Страница 230: ...ive commands Call telephone number 1 X Call entry number 1 X or Call entry 1 X Editing a fast access telephone number Speak the command Edit tele phone number 1 X Alternative commands Edit telephone n...

Страница 231: ...tomatic call answering on off page 111 only for the hands free profile Switching on Speak the command Automatic call answering on Alternative commands On automatic call answering or Activate automatic...

Страница 232: ...ok main menu page 154 Say the command Address book menu Alternative commands Open address book menu or Open menu Create a new address book entry which can also be used by the navigation system page 15...

Страница 233: ...or Navigate to destination Starting a call to a fast access entry Speak the command Call entry number 1 X Alternative commands Call entry number 1 X or Call address number 1 X Starting a call to a mo...

Страница 234: ...e to entry number 1 X or Navigate to address number 1 X Edit an entry Call up the Edit menu page 159 Say the command Edit entry number 1 X Alternative commands Change entry number 1 X or Change addres...

Страница 235: ...Save the entry to the SIM card page 165 Speak the command Save on sim card or Save entry on sim card Import a SIM card entry into the address book page 165 Speak the command Import from sim card Dele...

Страница 236: ...e Speak the command SMS mobile Send an SMS to the number saved under private Speak the command SMS private Start a call Speak the command Call Alternative commands Call entry or call address Start a c...

Страница 237: ...or entry or Search for address Call up the Search Criterion menu page 159 Say the command Search crite rion or Set search criterion Set search criterion to name page 159 Say the command Search by name...

Страница 238: ...or Activate dia logue for voice entries Switch off Say the command Dialogue for voice entries off or Deactivate dia logue for voice entries Read out assigned voice entries page 161 Say the command Rea...

Страница 239: ...ick and type 2 5 mm thick Code number Secret number that must be entered to activate the unit Crossover An adjustable dividing network which divides the frequency ranges before the output stage DTMF D...

Страница 240: ...playlists supported by the unit MP3 Special process for compressing audio data e g music Off road Warning from the navigation system if you are in an area not covered by the digital road map PIN Pers...

Страница 241: ...sion of inaudible information on the VHF band SD Memory Card Secure Digital Memory Card A Secure Digital Memory Card is a permanently rewritable compact mem ory medium SIM card Subscriber Identificati...

Страница 242: ...veloped to provide Internet access to users of mobile telephones and other compact mobile communications devices WAP services use the Wireless Markup Language WML as the language for dis playing conte...

Страница 243: ...e time of arrival 61 Announcements Switch off 55 Switch on 55 Announcing new SMS 134 Answered calls 102 Anti theft device 14 Apple 94 Audio mode 81 Automatic 73 Automatic call answering 108 111 Automa...

Страница 244: ...ection 81 CDC 94 239 CD R 88 239 CD RW 88 239 Centre 32 CF card 239 Changing PIN 111 Clock 192 Code number 14 Enter 14 Incorrect number 14 Colour display 188 Compression 22 Conference 115 Confirm voic...

Страница 245: ...er 14 Country 28 Destination 28 External POI 45 Geo coordinates 33 House number 32 Junction 33 Point of interest 40 Postcode 30 Road 31 Town 29 Entering PIN 98 Telephone number 100 Entering a destinat...

Страница 246: ...ourney time remaining 48 Junction 33 L Loading backup 191 Loading data 191 Loudness 20 240 M M3U 93 Mail 125 Mail settings 134 Main menu Address book 154 Media mode 86 Navigation 27 Radio mode 64 SMS...

Страница 247: ...t entry 37 New route 49 New SMS 125 Number from address book 101 Number is busy 100 Numbers dialled 102 O Off road 49 240 Operation in WAP pages 137 Options menu Media mode 83 Navigation 50 Radio 67 T...

Страница 248: ...g tone 110 Road 31 Route list 52 Route Option 54 57 Avoid Ferry 35 Avoid Motorway 35 Avoid Toll 35 Avoid Tunnel 35 Display 57 Dynamic Route 35 Fast Route 35 Modify 54 57 Short Route 35 Route option 34...

Страница 249: ...sel 119 Sound setting 18 Reset 22 Set 18 Speed limit 61 Speed dependent volume control 186 Standby mode 17 Station list 66 Station memory 77 Delete entry 79 Move entry 78 Name entry 79 Status display...

Страница 250: ...83 Traffic announcements 52 56 57 59 Read out 52 59 60 Set 60 Traffic lane recommendation 50 Traffic programme 73 Announcement 75 Automatic 74 Select station 74 Switch off 74 Switch on 74 Volume 75 Tr...

Страница 251: ...ume Acoustic signals 187 Display 187 Increase 18 Reduce 18 Set 18 Traffic programme 75 Voice output 182 W WAP 242 Establishing a connection 136 Main menu 144 Terminating a connection 138 140 WAP fast...

Страница 252: ...Mono Ua max 3Vrms at 10 k for subwoofer GAL In order to utilise GAL a square wave voltage with a mass related amplitude of 4 V to 12 V must be provided by the vehicle s electronic speedometer Volume i...

Страница 253: ...nce with other electrical electronic devices caused by the unit or interference with this unit caused by other electrical electronic devices is largely prevented The EC type approval mark e1 issued by...

Страница 254: ...se of this unit separately from other waste so as not to harm the environment or human health through uncontrolled waste disposal Recycle the unit to promote the sustained reuse of material resources...

Отзывы: