GSC3219TN
Owner’s Manual
15
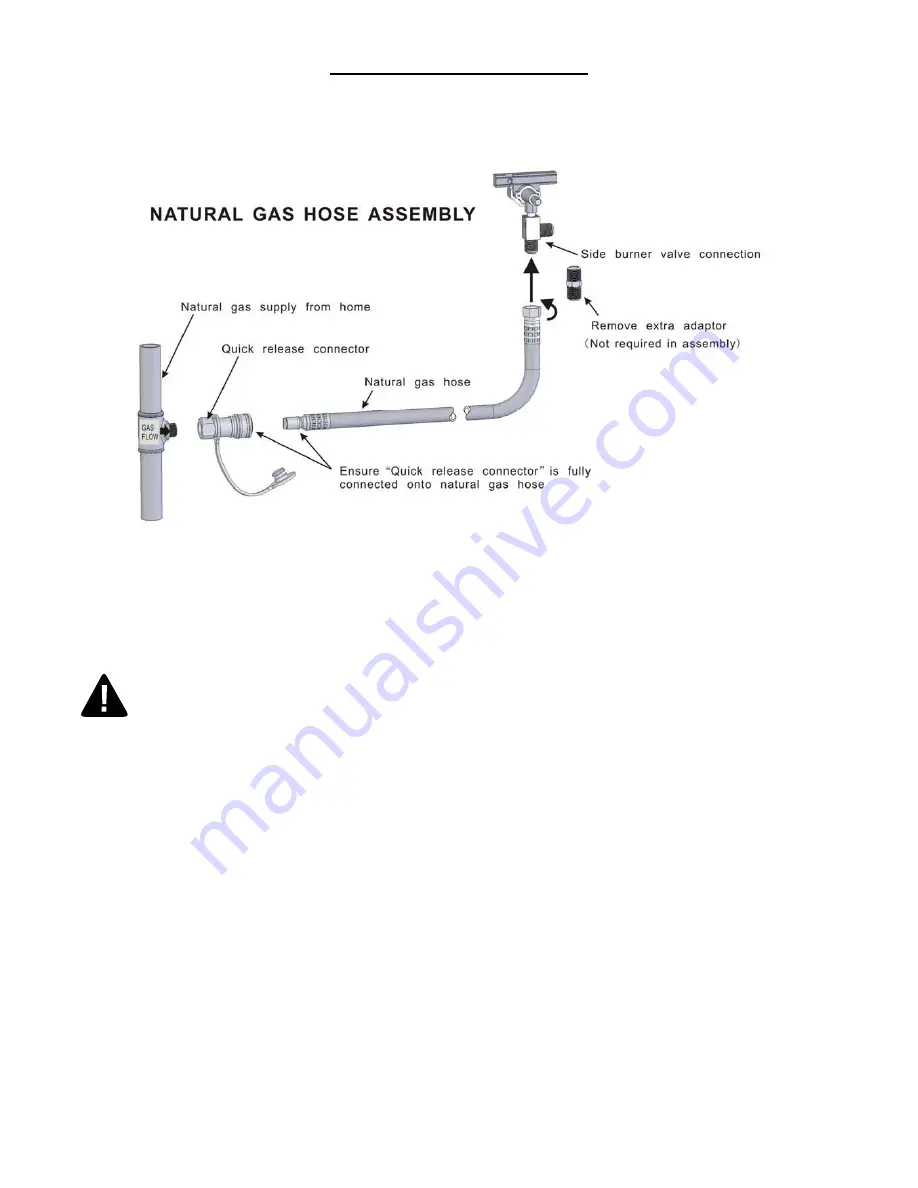
Natural Gas Connection
Apply sealing compound or pipe thread tape of the type resistant to the action of natural gas must be used on all male pipe
threads. Attach to side burner valve. Connect the other end of the flex hose to manual shut-off valve through a nipple. Connect a
manual shutoff valve to gas supply line.
.
During high pressure testing your gas grill and its individual shutoff valve must be disconnected from the gas supply piping
system. During any pressure testing of that system at least pressures in excess of 1/2 psi (3.5kPa).
During low pressure testing your gas grill must be isolated from the gas supply piping system by closing its individual manual
shutoff valve during any pressure testing of the gas supply piping system at test pressures equal to or less than 1/2 psi (3.5kPa).
Warning
: Burner valves are pre-tested at the factory to operate on natural gas. If you wish to convert or change it, be sure to
contact your grill distributor or dealer FIRST!
DANGER
To prevent fire or explosion hazard when testing for a leak:
1. Always perform the “leak test“ on page 14 before lighting the grill and each time the natural gas hose is connected for use.
2. Do not smoke or allow other sources of ignition in the area while conducting a leak test.
3. Conduct the leak test outdoors in a well-ventilated area.
4. Do not use matches, lighters or a flame to check for leaks.
5. Do not use grill until all leaks have been stopped. If you are unable to stop a leak, disconnect the natural gas supply, call for
gas appliance service or your local natural gas supplier.
Checking for Leaks
1. Make 2-3 oz. of leak solution by mixing one part liquid dishwashing soap with three parts water.
2. Make sure control knobs are in the “OFF” position.
3. Spray some solution on the connection points of the natural gas hose.
4. Inspect the solution at the connections for bubbles. If no bubbles appear, the connection is secure.
5. If bubbles appear, you have a leak. Go to step 6.
6. Disconnect the natural gas hose from the valve and reconnect. Make sure the connection is secured.
7. Retest with solution.
8. If you continue to see bubbles, replace the quick release connector or/and natural gas hose.


