


Image Position
H Size 50
V Size 50
Size 0
Phase 10
Auto Adjust
EXIT
MENU
OK
SCREEN
OK
0
EXIT
SCREEN
You can select:
Min Volume
: set the minimum volume
Max Volume
: set the maximum volume.
Panel Button Lock
: if Front-Panel lock is
on
, all
buttons are locked
.
Sub Menu Lock
: if
Submenu
lock is
on
,
operations like volume, brightness,
contrast, color, sharpness, color
temperature, hotel lock, child lock are
available, but operations on Screen menu,
Sound menu, Option menu, Channel menu,
and Enhanced settings are disabled.
Input Selection
: you can press
[CH
∧
/CH
∨
]
select the following inputs:
DTV, ATV,
AV, S-Video, Component, VGA, and HDMI
to be locked out
.
[VOL
∧
/VOL
∨
]
∨
v
v
v
v
v
to
v
w
w
Adjusting the Screen Menu
1
Press
[Menu]
to open the main menu.
2
Press
to select
Screen
, then
press
to enter the
Screen
menu.
Initial Setting
Initial settings include channel number
after rebooting and basic settings.
Basic settings includes setting picture
mode as standard, setting audio mode
as standard, setting zoom mode as
16:9, setting volume as min volume that
you set, etc.
[CH
/OK
]
Image Position
- Adjust the image position.
H Size
- Adjust the horizontal size of the
image.
V Size
- Adjust the vertical size of the image.
Clock
- Adjust the VGA Clock to match the
PC clock.
(VGA mode only)
Phase
- Adjust the VGA phase to match the
PC.
(VGA mode only)
Auto Adjust
- Auto adjust the VGA image
position.
(VGA mode only)
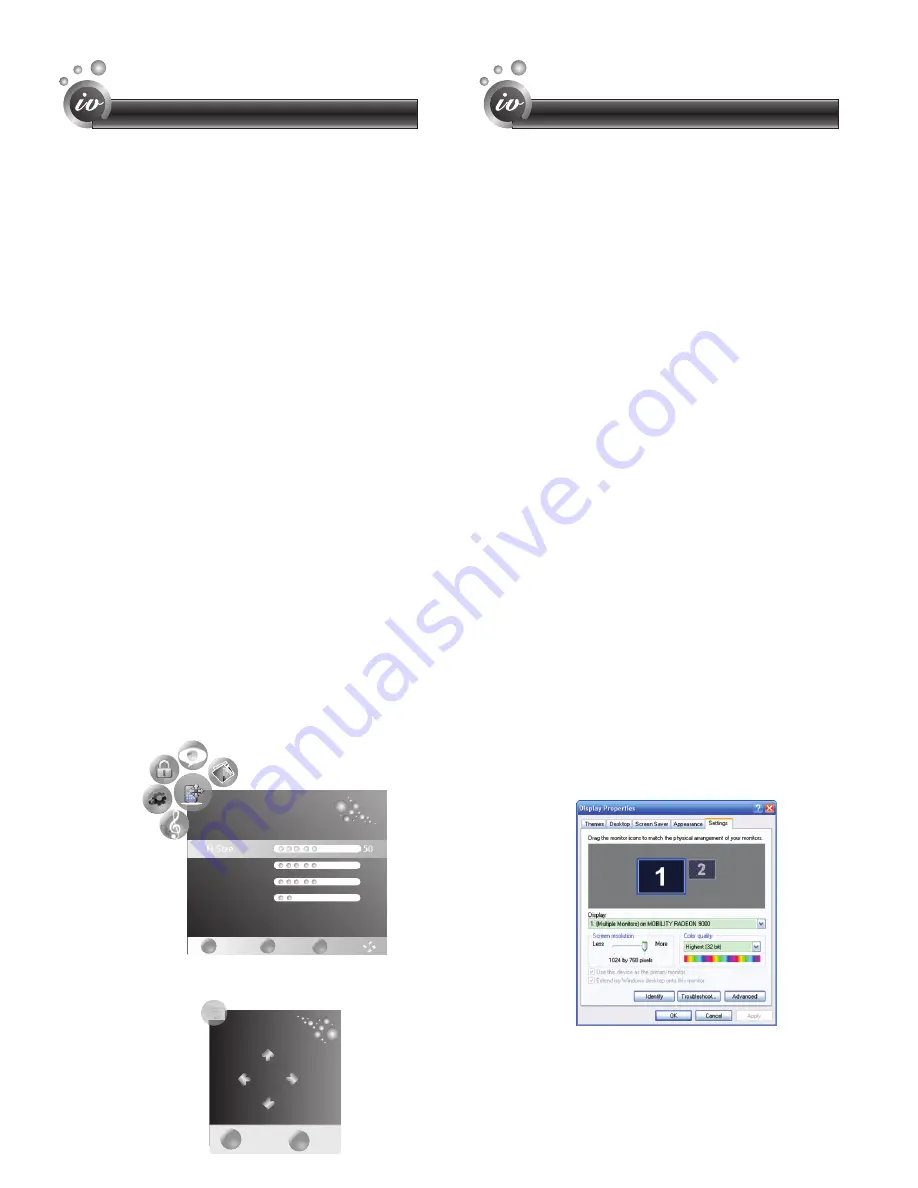
PC Setting
Set the PC Software properly to match one of
the
below options.
Supported VGA Modes:
Note: Your PC/Notebook may not be able to
display some of these resolutions.
Take Windows XP as an example, and the
Windows system display setting is as
illustrated:
1
Right click anywhere on your display, select
'Properties'.
2
Find the Settings tab on the dialogue box, set
the screen Resolution.
3
See above details about the resolutions
supported by this unit.
4
Click OK to exit.
VGA____ (640×480 60Hz)
SVGA___ (800×600 60Hz)
XGA____ (1024×768 60Hz)
SXGA___ (1280×1024 60Hz)
Features
Features
19


