background image

Auto Tuning

DTV Manual Tuning
ATV Manual Tuning 
Program Edit 

EXIT 

MENU

OK 

CHANNEL

MENU

EXIT

Channel Tuning

0%...       57.75MHz  TV

TV             :     1  Programs
DTV           :     0 Programs          
Radio         :    0  Programs          
Press <Menu> to Skip.
Press <Exit> to Skip.

Adjusting the picture menu

To adjust the picture:    

1

  Press 

[Menu] 

to open the main menu.

2

  Press


to select 

Picture


menu. 

3

  Press 


to highlight an option, 

then press 

 to adjust the 

option. You can adjust: 

Ÿ


Brightness 

– Increases the brightness 

to add more light to dark areas of the 
picture. Decreases the brightness to 
add more dark to light areas of the 
picture. 

Ÿ


Contrast

 – Increases the picture level 

to adjust the white areas of the picture. 
Decreases the picture level to adjust 
the black areas of the picture. 

Ÿ


Color

 – Adjusts the intensity of the 

colors. 

Ÿ


Sharpness

 – Increases the sharpness 

level to show cleaner and clearer 
images. Decreases the level to show a 
smoother picture. 

Ÿ

 Tint 

- change the picture quality when 

there is a NTSC signal at AV/S-video 
source.


Ÿ

 Color Temperature

–Changes the color 

temperature. You can select Cool, 
Cooler, Warm, Warmer, Medium. 

4  If you press 


to select the 

Enhanced Setting 

option, then press 

[OK] 

to enter. You can select 

Film Mode

 or 

Noise Reduction

; press 

[VOL

∧/

V

OL

to adjust the option. 

Ÿ

 Enhanced Setting

–Accesses 

advanced video settings such as: 

 Film 

Mode 

– To select Film mode: On or Off. 

[VOL

/VOL

]

[CH

/CH

]

[VOL

/VOL

]

[CH

/CH

]

Noise Reduction

–Reduces video noise 

in moving images without blurring the 
picture.

5  To exit press

 [Exit].

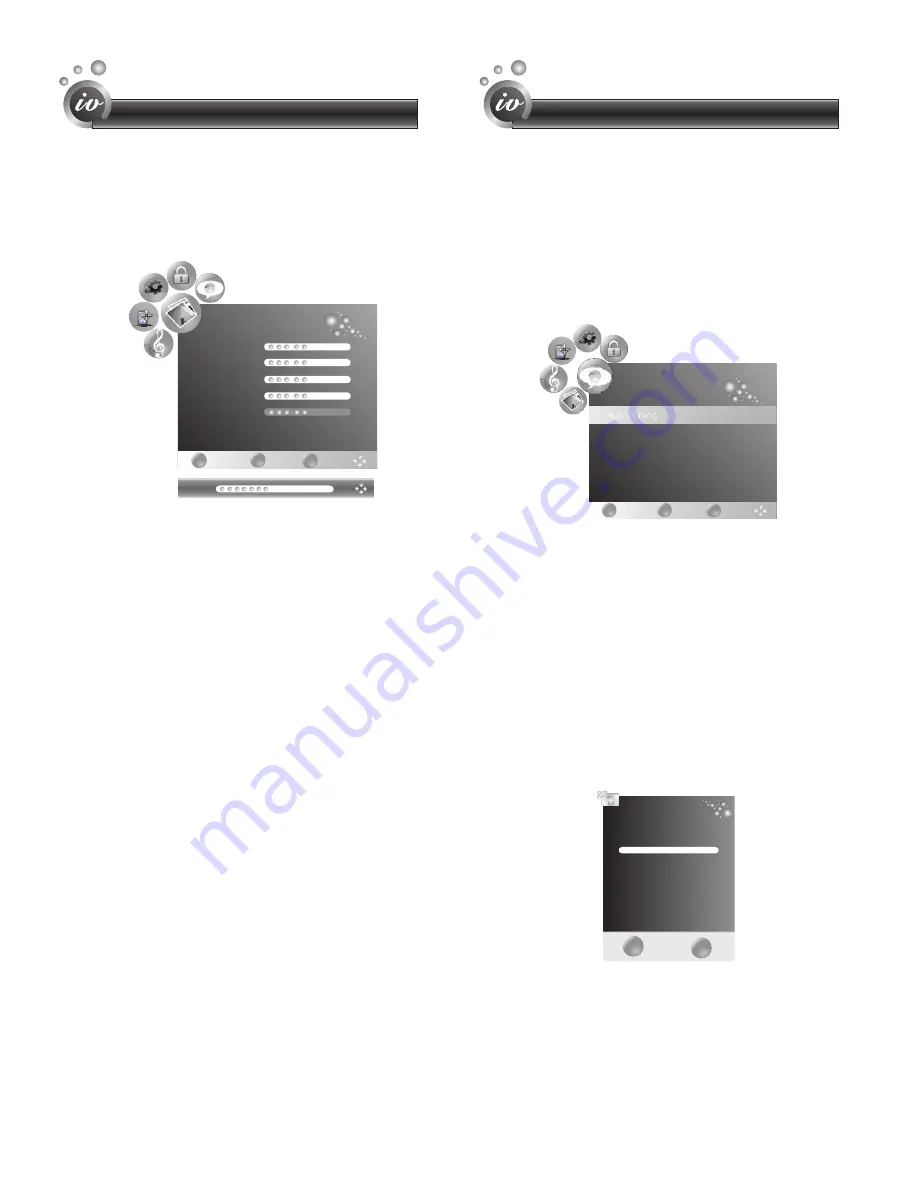
Adjusting the Channel Menu

1

   Press 

[Menu] 

to open the main menu.

2

   Press 


to select 

Channel

.


Ÿ

Press 

 to select 

Ÿ

ress 

to

v

Press 

 to select 

[VOL

/VOL

]

Auto Tuning

This is the easiest and most effective way to 

install all channels available in your area 

automatically.

[CH

/CH

]

Tuning

[CH

/CH

]


-

In both the Analog and Digital signal 

sourc.

Auto Tuning.

P

[OK]

   start an automatic search, 

and this will memorize all the available 

channels.  

Auto Tuning will take a few minutes; 

please wait until it has finished.

DTV Manual 


-

in Digital signal source

Digital channel numbers are different to the 

existing analog channel numbers; please 

contact the broadcaster in your state for the 

correct number.

Ÿ

the 

DTV 

Features

Features

15

Brightness                                       50

Contrast                                           50

Color                                                50

Sharpness                                        50

Tint                                                  0

Color Temperature     Medium

Enhanced Setting 

EXIT 

MENU

OK 

PICTURE

Contrast                                                    50

Содержание ALCD3257

Страница 1: ...81cm LCD HDTV with HD TUNER Instruction Manual Model Number ALCD3257 After Sales Support TEL 1300 366 144 WEB WWW awa com au...

Страница 2: ...over the course of the first 2 years after the date of purchase we will remedy the problem as quickly as possible once it has been brought to our attention In the unlikely event of such an occurrence...

Страница 3: ...aring the remote control 10 Learning the remote control 11 12 12 12 12 13 13 13 13 Turning your TV on and off Selecting the video source Adjusting the volume Changing channels Displaying channel lists...

Страница 4: ...nce around the TV for sufficient ventilation 150mm recommended minimum WARNING Do not remove the back cover of the TV set Accidental contact with high voltage components could result in electric shock...

Страница 5: ...rts List Accessories list Manual Book Quick Setup Guide Remote Batteries 116cm LCD HDTV with HD TUNER Instruction Manual Model Number ALCD3257 After Sales Support TEL 1300 366 144 WEB WWW awa com au 1...

Страница 6: ...ment to your TV Front panel NO Component Component Description 1 POWER Switch Press to turn the main power ON or OFF 2 POWER Indicator 3 Remote sensor Receives signals from the remote control Do not b...

Страница 7: ...ture quality 5 A V input 2 output 1 Connect standard video audio cables to these jacks 6 S Video 1 Connect an S Video device to this jack inserting the left and right audio leads into S VIDEO L and S...

Страница 8: ...ion terminal to the cable NOTE colors for inputs and cables must correspond on both devices VGA Computer Y P B C B P R C R Audio L Audio R Red Red White Blue Green Devices With Component output jacks...

Страница 9: ...re a Component YPBPR signal to be set to output in the devices settings please consult your device user manual for instructions Connecting HDMI Supports digital connections between HDMI enabled AV dev...

Страница 10: ...video graphic cards Connecting AUDIO Connect RCA audio cables to R AUDIO L on the rear of your set and the other ends to corresponding audio in connectors on the Amplifier or DVD Home Theater Connecti...

Страница 11: ...designated disposal area Do not throw the batteries into fire 2 Do not mix battery types or combine used batteries with new ones 3 Remove depleted batteries immediately to prevent battery acid from l...

Страница 12: ...ram information Next channel up button Volume decrease Left button Enter button Display the main menu Back menu display Mute the sound EXIT all menu display Electronic Program Guide Select AV Signal S...

Страница 13: ...ideo source depending on the video device you have connected to your TV you can select DTV ATV AV S Video Component VGA and HDMI as the video source To select the video source Press Source When the li...

Страница 14: ...uages English DOLBY Freeze Off Sleep Timer 120min No Information 12 02 576i Reminder DATE Schedule OK Inform EXIT 01 Jul 2008 14 00 PROGRAM GUIDE 01 Jul 14 00 15 00 DTV 11 Dt65 480p 14 00 17 00 Dt65 4...

Страница 15: ...al Tuning ATV Manual Tuning Program Edit EXIT MENU OK CHANNEL EXIT OK Favorite List 11 DT65 480p 12 DT65 720p 13 DT65 480p 1 TV1 2 BBC1 3 S 01 4 S 02 5 C 42 6 S 04 7 C 02 DTV DTV DTV TV TV TV TV TV TV...

Страница 16: ...arm Warmer Medium 4 If you press to select the Enhanced Setting option then press OK to enter You can select Film Mode or Noise Reduction press VOL VOL to adjust the option Enhanced Setting Accesses a...

Страница 17: ...ress to Press Press to select Search then press to Tuning menu VOL VOL Tuning CH CH Tuning Tuning menu VOL VOL CH CH VOL VOL Tuning VOL VOL Editing channels from memory After you scan for channels you...

Страница 18: ...You can change it from 5 seconds 10 seconds 15seconds 20seconds 25seconds 30seconds 35seconds 40seconds 45seconds 50seconds 55seconds and 60seconds Time Press to select Time in the Option Osd and pres...

Страница 19: ...NU on the right side of the front panel and POWER Menu and NUMBER etc on the remote control Press Menu to display the main menu only Lock Settings can be selected and adjusted by entering your passwor...

Страница 20: ...ngs Basic settings includes setting picture mode as standard setting audio mode as standard setting zoom mode as 16 9 setting volume as min volume that you set etc CH OK Image Position Adjust the imag...

Страница 21: ...he remote control does not operate Disorder display at power on Make sure the power cord is plugged in then press Power Bottom of the unit The remote control batteries may be dead Replace the batterie...

Страница 22: ...z 1080I 60Hz Power source AC 220 240V Power consumption W Audio output 6W 6W Connections ANT input Cable antenna 1 Video input Video 2 S Video 1 Component video 2 Video output Video 1 VGA input Analog...

Отзывы: