background image


- 35 - 

6.3 Safety instructions for maintenance 


o

  Inspect the power cable regularly for damage. Never use the device if the cable is 

damaged. If the power cable is damaged, have an authorised service center or 
qualified electrician replace it. 

o

  In case of damage or malfunction, please contact your stockist or our customer 

service centre. Pay attention to the troubleshooting tips in pt. 7. 

o

  Only a qualified technician and using original spare parts and accessories should 

carry out repairs and maintenance of the device. Do not attempt to repair the 
device yourself.


7. Possible Malfunctions 


Problem 

Cause 

Solution 

The device is turned on, 
but the red indicator light 
does not turn on. 

  The power plug is not 

properly inserted into 
the socket 

  Disconnected fuse  

  Damaged indicator light 


  Damaged switch 

  Properly insert the plug 

into the socket 


  Check the fuse  

  Check the device in 

another socket  

  Contact a salesperson 

Red descaling indicator is 
on during the operation. 


  The device is scaled


  Remove the plug. Leave 

the device until cooling 
down, then descale it 
according to section 


6.2 “Cleaning and 
descaling“


The device is turned on, 
the ON/OFF switch 
indicator is on, but the 
device is not heating. 

  Damaged heating 

element 

  Damaged thermostat 

  Contact a salesperson 


  Contact a salesperson 

The device turns off. 

  Damaged thermostat 


  The device is scaled 

  Remove the power plug 

and leave the device to 
cool. Remove the base 
and press the RESET 
button on the bottom of 
the device. Bear in mind 
the necessary quantity of 
water in the device 
Descale the device accor-
ding to section 6.2 „Clea-
ning and descaling“
 

Содержание PRO Plus 60T

Страница 1: ...Bartscher PRO Plus 40T Bartscher PRO Plus 60T Bartscher PRO Plus 100T A190145 A190165 A190195 V2 0814...

Страница 2: ...A190145 A190165 A190195 340 220 290 485 545 575 220 270 290...

Страница 3: ......

Страница 4: ...the device 22 2 3 Intended use 23 3 Transport packaging and storage 24 3 1 Delivery check 24 3 2 Packaging 24 3 3 Storage 24 4 Technical data 25 4 1 Technical specification 25 4 2 Overview of parts 26...

Страница 5: ...al symbols are used to highlight important safety instructions and any advice relating to the device The instructions should be followed very carefully to avoid any risk of accident personal injury or...

Страница 6: ...n of advice concerning operation and cleaning use other than designed alterations made by user use of inadequate spare parts We reserve the right to make technical changes for purposes of developing a...

Страница 7: ...anufacturer may be undertaken This device may only be operated in technically proper and safe condition 2 2 Safety instructions for use of the device The specifications regarding the industrial safety...

Страница 8: ...uch as in kitchens for store or office employees or in other service locations in suburban properties by guests of hotels motels and other places of accommodation in Bed Breakfasts The coffee maker wi...

Страница 9: ...The outer and inner packing material should be removed completely from the device before installation NOTE If you liked to dispose the packing consider the regulations applicable in your country Supp...

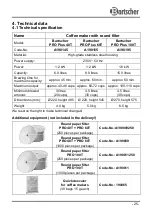
Страница 10: ...60 72 cups approx 100 110 cups Minimum brewed amount 3 litres 20 cups 4 5 litres 30 cups 4 5 litres 30 cups Dimensions mm 220 height 485 220 height 545 270 height 575 Weight 4 0 kg 5 0 kg 6 5 kg We re...

Страница 11: ...ld always be opened when reading the instruction manual Cover handle Cover Water container handle Water container Indicator light for maintaining hot water green Descaling indicator red ON OFF switch...

Страница 12: ...n be dangerous for the user or lead to damages of the device or personal injury and further the warranty expires Protect the device from frost and moisture Never use the device with wet or moist hands...

Страница 13: ...ce the device so that the plug is easily accessible so as to quickly disconnect the device if the need arises 5 3 Operation Preparing the device Remove the cover and then remove the filter basket toge...

Страница 14: ...tainer in the center Do not force the riser pipe into position Insert a round paper filter into the filter basket NOTE Only round paper filters should be used with the coffee maker with round filter W...

Страница 15: ...vice is accidentally turned on with little or no liquid the protection device trips and the device switches off automatically ATTENTION In the event that the overheating protection turns on disconnect...

Страница 16: ...can also be used to heat water Fill the cleaned water container with cold water insert the riser pipe and cleaned filter basket Turn on the device as in brewing coffee Turn off the device when the he...

Страница 17: ...the case of everyday use the entire faucet mechanism must be thoroughly cleaned every week With less frequent use it can be done less frequently o To clean the faucet the upper part of the holder shou...

Страница 18: ...is a scale deposit scraper for cleaning the heating hole at the bottom of the coffee maker NOTE Only the attached scale deposit scraper should be used o Place a cloth soaked with soapy steel wool or...

Страница 19: ...have tested Code No 190065 packing unit 30 bags 15 g each o Dissolve the content of the bag 15 g in approximately 5 liters of water o Push the riser pipe through the center of the filter basket and p...

Страница 20: ...g is not properly inserted into the socket Disconnected fuse Damaged indicator light Damaged switch Properly insert the plug into the socket Check the fuse Check the device in another socket Contact a...

Страница 21: ...e above examples you should contact customer service or the salesperson 8 Waste disposal Discarding old devices At the end of its service life the discarded device has to be disposed in accordance wit...

Отзывы: