background image

PREPARING THE ICE MAKER FOR LONG STORAGE

If the ice maker will not be used for a long time, or is to be moved to another place, it will be necessary to 

drain out all of the water in the system.

1. 

Allow all of the ice cubes have been ejected from the evaporator of ice maker. 

2.

 Turn off the unit, and unplug the power cord.

3. 

Drain out all of the water inside the unit according to section “Water Drainage”. When all of the water has 

been drained out, to install back the water drain pipe of the water tank..

4. 

Disconnect the water drainage pipe to the main drain pipeline or floor drain, plug on the drain cap again.

5.

 Drop the door open to allow for circulation and prevent from molding and mildewing.

6. 

Leave the power cord disconnected until ready to reuse.

7.

 Dry the interior & wipe the outside of the unit.

8. 

Put a plastic bag on the unit to resist out dust & dirty.

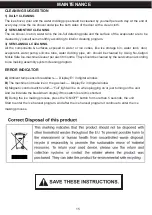
CLEANING & MAINTENANCE

WARNING

: Before carrying out any cleaning or maintenance operations, unplug the ice maker from the 

main power supply electricity. (EXCEPTION: Ice maker self-cleaning program). Do not use any alcohol 

or fume for cleaning or sanitizing of the ice maker. It may cause cracks on the plastic parts. Ask a trained 

service person to check and clean the condenser at least once a year, in order to let the unit work properly.

This appliance must be cleaned by use of a water jet.

12

Periodic cleaning and proper maintenance will ensure efficiency, top performance, hygienic, and long life. 

The maintenance intervals listed are based on normal conditions. You may want to shorten the intervals if 

you have pets, or the unit is used outdoors, or there are other special considerations.

NEVER

 keep anything in the ice storage bin that is not ice: Objects like wine and beer bottles are not only 

unsanitary, but also it’s labels may slip off and obstruct the drain pipe.

EXTERIOR CLEANING

The door and cabinet may be cleaned with a mild detergent and warm water solution such as 28g of dish 

washing liquid mixed with 7.5L of warm water. Do not use solvent-based or abrasive cleaners. Use a soft 

sponge and rinse with clean water. Wipe with a soft clean towel to prevent water spotting. The side steel 

plate can discolor when exposed to chlorine gas and should be cleaned. Clean the steel plate with a mild 

detergent and warm water solution and a damp cloth. Never use abrasive cleaning agents.

OPERATION

Содержание 94023

Страница 1: ...LEANING PROCEDURES WRITE THE PRODUCT S SERIAL NUMBER ON THE BACK OF THE MANUAL NEAR THE ASSEMBLY DIAGRAM OR MONTH AND YEAR OF PURCHASE IF PRODUCT HAS NO NUMBER OWNER S MANUAL AND SAFETY INSTRUCTIONS I...

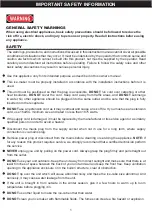
Страница 2: ...on cord as it may overheat and cause a risk of fire If you must use an extension cord use 16AWG minimum size and rated no less than 1875 watts If the supply cord is damaged it must be replaced by the...

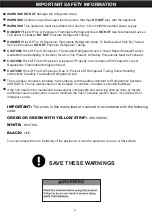
Страница 3: ...Carefully Flammable Refrigerant Used The ice maker should be installed in accordance with the safety standard for Refrigeration Systems ASHRAE15 The ice maker shall not be installed in corridors or ha...

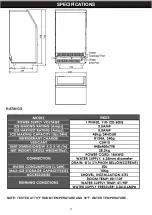
Страница 4: ...3 RATINGS NOTE TESTED AT 70 F ROOM TEMPERATURE AND 50 F WATER TEMPERATURE SPECIFICATIONS...

Страница 5: ...ulate smoothly hot air will blow out when unit running 7 Water draining port Normal plugged with the cap When need to drain the water unplug the cap and connect the white drain pipe 8 Water inlet port...

Страница 6: ...ct the inner cabinet is full of ice or not and to check the ice harvest process is over or not D Water tank E Water supplying pipe F Cover board on the right side of the evaporator G Water level switc...

Страница 7: ...ice and deice symbol display The machine is making ice when the symbol rotate and the machine is deice when the symbol flash 3 Automatic self cleaning symbol display 4 On off symbol display 5 Error co...

Страница 8: ...the refrigerant fluid to settle before plugging the ice maker in if the unit maybe fall upside down during shipping or transportation 5 The appliance must be positioned so that the plug is accessible...

Страница 9: ...service engineer This appliance requires a standard 110 120Volt 60Hz electrical outlet with good grounding means RECOMMENDED GROUNDING METHOD For your personal safety this appliance must be properly g...

Страница 10: ...ssory again connect the other end of this drainage to the main water drainage pipeline Make sure not to set the drainage pipe too high 3 Connect the water hose to the water faucet of the water main su...

Страница 11: ...he ice will be thicker Press button one time the ice making time will reduce one minutes the ice will be thinner Restart the machine it will go back to default 0 NOTE The time currently set only chang...

Страница 12: ...ng time and the display content will be switched every 5S WIRING DIAGRAM Your new ice maker may make sounds that are not familiar to you Most of the new sounds are normal The following describes the k...

Страница 13: ...fume for cleaning or sanitizing of the ice maker It may cause cracks on the plastic parts Ask a trained service person to check and clean the condenser at least once a year in order to let the unit wo...

Страница 14: ...om the water dividing pipe or the water flowing is very small please discharge this water dividing pipe to clean carefully Clean each little holes on the water dividing pipe displayed in the following...

Страница 15: ...e as above explanation the water pump runs for 8 minutes and stops for 3 minutes one cycle again one cycle The total duration time is 20 minutes for one self cleaning program During this process the T...

Страница 16: ...ump silicone tube water dividing pipe etc should be cleaned by Using Nu Calgon Nickle Safe Ice machine Cleaner per each 6 months They should be cleaned by the serviceman according to ice making assemb...

Страница 17: ...16 TROUBLESHOOTING...

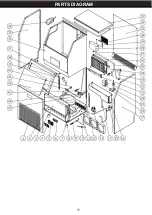
Страница 18: ...17 PARTS DIAGRAM...

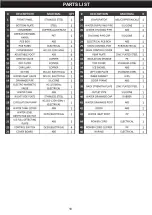
Страница 19: ...18 PARTS LIST...

Страница 20: ...ALL REPAIRS AND PARTS REPLACEMENTS SHOULD BE UNDERTAKEN BY CERTIFIEDAND LICENSED TECHNICIANS AND NOT BY THE BUYER THE BUYER ASSUMES ALL RISK AND LIABILITY ARISING OUT OF HIS OR HER REPAIRS TO THE ORI...

Отзывы: