OPERATION PANEL
A. “TIMER CLEAN” Button:
Quickly press this button once, to enter the Timer setting program; And press
this button for more than 5 seconds, to enter the Cleaning program.
B. “ON/OFF”button:
When the unit is off, press this button to turn on the unit; And during the Self-cleaning
program, or normal ice-making state, press this button to turn off the unit at once; And also if the unit is set
with the Timer, press this button to cancel the Timer setting. When the unit is making the ice cube, press
this button for more than 5 seconds, the unit will switch to ice harvest process by force.
C. LCD Display Window:
1. Environmental temperature display and ice making time countdown display:
Display ice-making
time countdown with ‘M’ as the unit display and display environmental temperature with ‘F’ as the unit
display.
2. Making ice and deice symbol display:
The machine is making ice when the symbol rotate and the
machine is deice when the symbol flash.
3.
Automatic self-cleaning symbol display
4.
On/off symbol display
5. Error code display:
E1 means the environmental temperature sensor is damaged. E2 means
ice making anomaly or there is a refrigerant leak.
6. Water flow in and water shortage display:
the arrow flashing indicates that the machine is in the
water, the whole symbol is bright to indicate that the machine is short of water.
7. Ice full alarm:
the machine will making ice again when you take out the ice.
8. Setting display
: Display timing switch machine with the H as unit display; display ice making time setting
with M as unit display. D&E “+” “-”button: Use to adjust the ice-making process duration period length, the
default setting is zero, 1 minute adding or decreasing per each pressing of “+” or “-” button. Also to adjust
the delay time of the timer, the default setting is zero, 1 hour adding or decreasing per each pressing of “+”
or “-” button.
6
INFORMATION
Содержание 94023
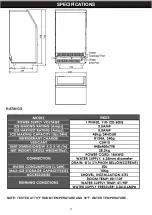
Страница 4: ...3 RATINGS NOTE TESTED AT 70 F ROOM TEMPERATURE AND 50 F WATER TEMPERATURE SPECIFICATIONS...
Страница 17: ...16 TROUBLESHOOTING...
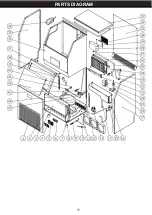
Страница 18: ...17 PARTS DIAGRAM...
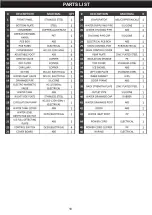
Страница 19: ...18 PARTS LIST...


