background image

Hold the TECH200 up to the tire, near the wheel at the valve stem location.  Press the 

 Button. The TECH200 

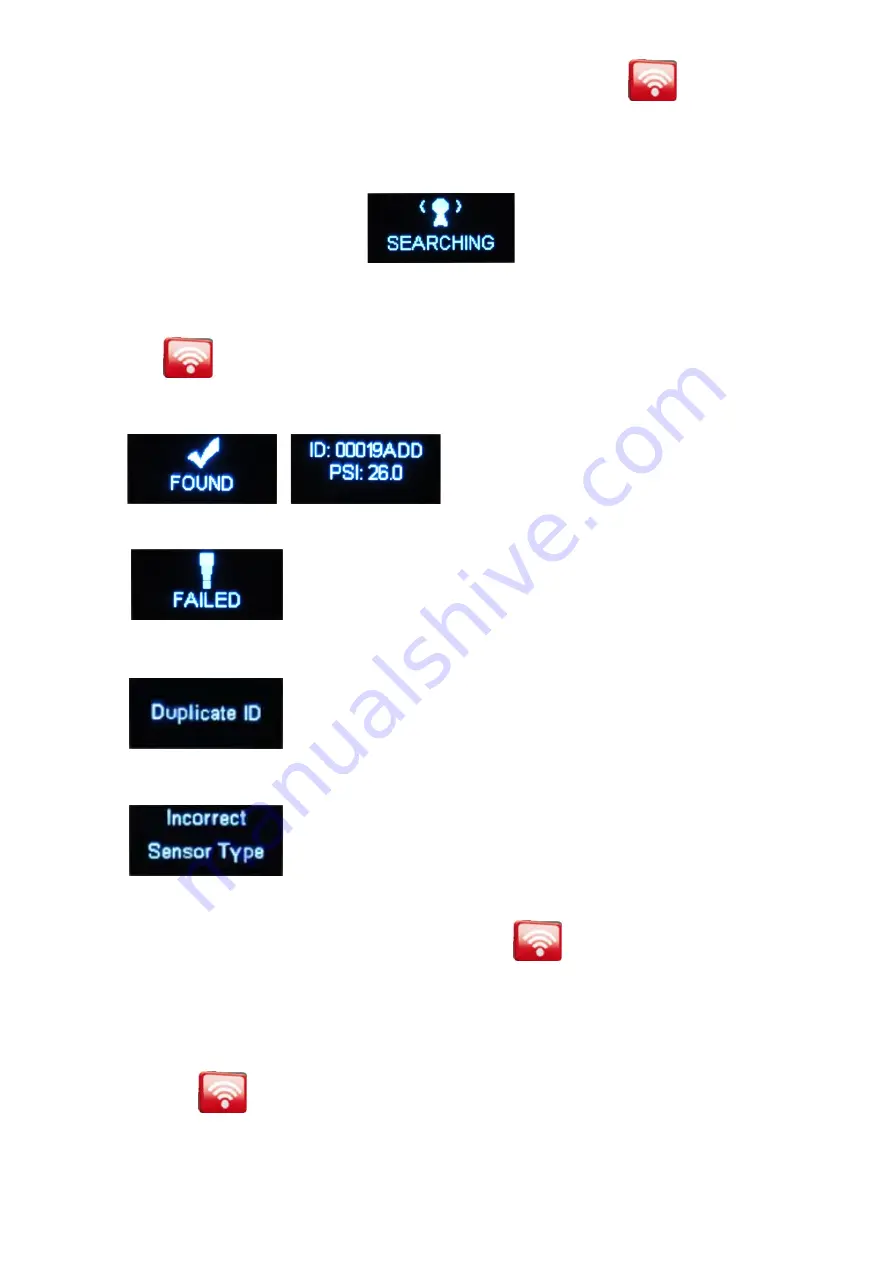
will indicate SEARCHING


NOTE:  In order to read properly, the TECH200 must be held against the tire and not the wheel or valve 

stem, refer to image shown above which shows the correct TECH200 position.   


Once you press  

 at the NISSAN or Select Year prompt, the TECH200 tool will search for the TPM sensor.  

If the TPM Sensor communication is successful, the TECH200 will display FOUND, give an audible indication and 

then display the senor ID number and the PSI of the selected tire.  


If the TPM sensor communication is not successful, the TECH200 will display FAILED.  


Retry reading and make sure the tool is held against the tire in the correct 

position. 


If the same sensor is read twice, the display will show:  


In this case please make sure you read the correct sensors, the tool is 

placed correctly and that no other sensor is around the vehicle. 


The TECH200 may also indicate that a wrong sensor type is used. 


If this is the case, you are trying to use a sensor that is not compatible with 

the vehicle’s TPM system. 


After the TECH200 returns to NISSAN or Select Year menu, press  

 to perform another TPM Sensor 

activation. 
 

NOTE:  Some vehicles have TPMs which cannot be activated by the tool. If this is the case an 

alternative test method will be displayed.   


Depending on the TPM type, it can take up to a minute for the TPM to respond. If you wish to cancel the TPM 

search, then pressing 

 when SEARCHING is visible on the screen will halt the search process. 


Updating the firmware in the TECH200 tool with the TECH200-Connect PC Software


7

Содержание Tech200

Страница 1: ...Tire Pressure Monitoring System Tool MODEL Tech200 User Guide J 45295 A...

Страница 2: ...or future updating and extension with new functions and vehicle coverage IMPORTANT Visit the SPX website to register your tool This enables you to download the latest tool software and to receive noti...

Страница 3: ...r transmitted in any form or by any means electronic mechanical photocopying recording or otherwise without the prior written permission of SPX DISCLAIMER All information illustrations and specificati...

Страница 4: ...t your eyes from dirt dust or metal chips Disposing of equipment Do not dispose of this equipment as miscellaneous solid waste but arrange to have collected separately The re use or correct recycling...

Страница 5: ...he packaging and to re use it if the TECH200 is moved to another site When using the TECH200 remember Do not subject the TECH200 to magnetic or electric interference Kit Components The TECH200 kit inc...

Страница 6: ...this only works when in the menu system Turning the TECH200 Off To switch the TECH200 off you go back to the bottom menu and then use the UP DOWN arrow keys to navigate to the Off menu item and press...

Страница 7: ...st the tire in the correct position If the same sensor is read twice the display will show In this case please make sure you read the correct sensors the tool is placed correctly and that no other sen...

Страница 8: ...ill be installed To exit the installer when it has finished press Close vi Next you can select All programs from the start menu and TECH200 Programmer will be available for use Click on the shortcut t...

Страница 9: ...The existing of a defect shall be determined by SPX in accordance with procedures established by SPX This warranty does not cover the AA batteries included with the kit No one is authorized to make an...

Отзывы: