12
www.barosnt.com
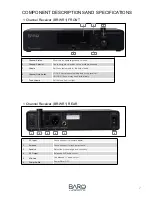
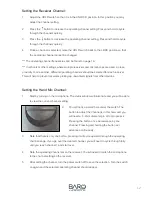
Setting the Receiver Channel:
1.
Adjust the HOLD switch so that it is in the UNLOCK position. In this position you may
adjust the channel setting.
2.
Press the
↑
button to increase the operating channel setting. Press and hold to cycle
through the channels quickly.
3.
Press the
↓
button to decrease the operating channel setting. Press and hold to cycle
through the channels quickly.
4.
Once a channel is selected, move the HOLD switch back to the LOCK position so that
the operating channel cannot be changed.
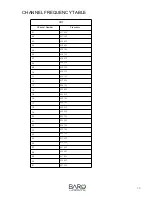
*** The operating channel frequencies can be found on page 16.
*** In schools or other settings where multiple receivers and microphones are used in close
proximity to one another, different operating channels should be selected for each receiver.
This will help to prevent receivers picking up unwanted signals from other devices.
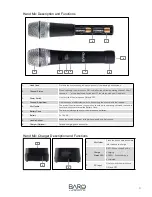
Setting the Hand Mic Channel:
1.
Start by turning on the microphone. The status window will illuminate and you will be able
to view the current channel setting.
2.
You will notice a small hole under the switch. The
button to adjust the channel is in this hole, and you
will need a 1~2mm diameter pin or tool to press it.
Pressing the button once will advance by one
channel. Pressing and holding the button will
advance continuously.
3.
Note that there is only one button, pressing it will cycle upward through the operating
channel range. If you go over the desired channel, you will need to cycle through fully
until you reach channel 1 and start over.
4.
Note the operating channel set on the receiver. You will need to match the microphone
to the channel setting on the receiver.
5.
After setting the channel, turn the power switch off to save the selection. Turn the switch
on again and the selected operating channel should appear.


