background image

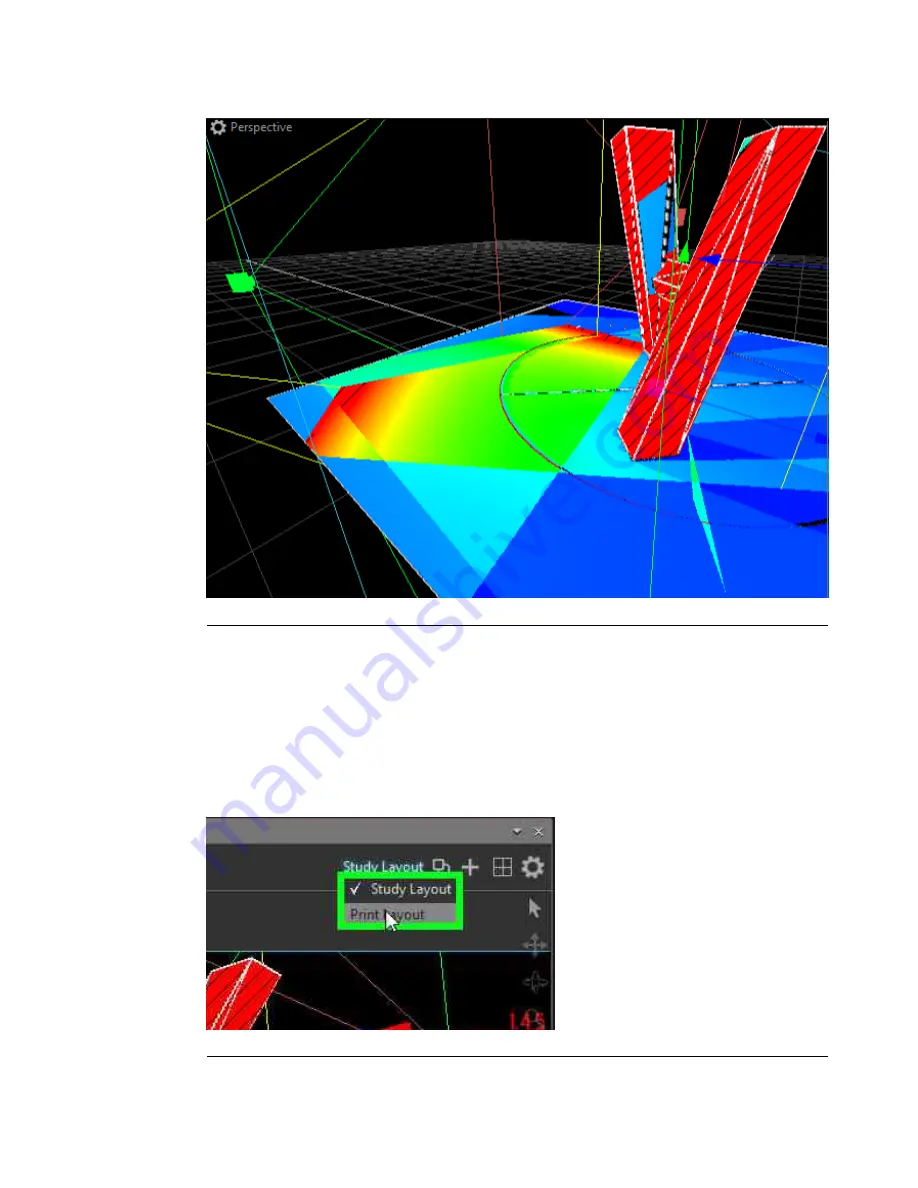
Figure I.13. Heat map

Print Layout

Two different layouts are available in the Viewport. The default layout is the

Study

Layout

, which is 3D-manipulation friendly. The other layout is the

Print Layout

, which

is the layout used to prepare a page for printing.

To switch to Print Layout, click on

Study Layout

on the Toolbar in the upper right-hand

corner of the Viewport, and select

Print Layout

from the drop-down menu.

Figure I.14. Change to Print Layout

147

Barco Pn: 60600320

Barco Media Server XHD-Series User Guide

Appendix I: Workflows

Содержание XHD-Series

Страница 1: ...Barco Media Server XHD Series User Guide Part number 60600320 Version 00 00 June 17 2015...

Страница 2: ...de a replacement at its own discretion within an appropriate period If this measure proves to be impossible or unsuccessful the purchaser can demand a reduction in the purchase price or cancellation o...

Страница 3: ...uipment is compliant with Class A of CISPR 32 In a residential environment this equipment may cause radio interference Product Modification Warning High End Systems products are designed and manufactu...

Страница 4: ...HighEndSystems Barco Pn 60600320...

Страница 5: ...mplies with the essential require ments of Council Directives 2004 108 EC EMC 2006 95 EC LVD and 2011 65 EC RoHS 2006 A11 2009 A1 2010 A12 2011 EN 60950 1 Safety EN 55022 2010 EN 61000 3 2 2006 A1 200...

Страница 6: ...6 Terms and definitions 22 2 Installation 25 2 1 Installation requirements 25 2 1 1 Disconnect device 25 2 1 2 Barco Media Server Windows image 25 2 1 3 X Agora GUI 25 2 2 Initial inspection 26 2 2 1...

Страница 7: ...B Replacing a power cord cap 65 B 1 Installing a Line Cord Cap U K Only 65 B 2 Vatic Fitter Heads Information Danmark 65 C AMD FirePro Control Center 67 C 1 Using Dedicated Fullscreen 67 C 2 Setting...

Страница 8: ...TE configuration 109 G 10 Settings pane 110 H Tools 115 H 1 2D mode 115 H 1 1 Workflow 115 H 1 2 2D concepts 116 H 1 3 Controls 117 H 1 4 2D media manipulation 118 H 1 5 Differences from 3D mode 121 H...

Страница 9: ...3 Calibration layout 150 I 4 Outputs layout 151 I 5 Playback layout 151 J More information 153 J 1 Keyboard shortcuts 153 J 1 1 Viewport keyboard and mouse shortcuts 153 J 1 2 Timeline keyboard and mo...

Страница 10: ...44 3 5 XHD 404 server rear panel 45 4 1 X Agora F1 Help 49 4 2 Launch the installer and select Next 50 4 3 Accept the license and select Next 51 4 4 Start the Installation or Update 52 4 5 X Agora 53...

Страница 11: ...ngs pane 112 H 1 Create new 2d project 115 H 2 Stage 116 H 3 Displays 117 H 4 Toolbar 118 H 5 2D media manipulation 119 H 6 Adorner manipulation 120 H 7 Fit and Align 121 H 8 Agent icon in the tray 12...

Страница 12: ...mode 146 I 13 Heat map 147 I 14 Change to Print Layout 147 I 15 New note 148 I 16 Hide elements of Print Layout 148 I 17 New view style 149 I 18 Assign view style 1 149 I 19 Assign view style 2 150 i...

Страница 13: ......

Страница 14: ...Revision history Remarks Date Revision number Initial release June 17 2015 00 00 xi Barco Pn 60600320 Barco Media Server XHD Series User Guide...

Страница 15: ......

Страница 16: ...eating interactive media content for various types of displays 1 1 About this guide 1 1 1 This guide This user guide describes how to operate a Barco Media Server The user guide is de signed to be a r...

Страница 17: ...ol appears next to extra information about the described subject Tip This symbol appears next to extra advice about the described subject 1 2 2 Picture overview Images and pictures given in the manual...

Страница 18: ...nd having access to live parts Safety standards also impose limits to the internal and external temperature variations radiation levels mechanical stability and strength enclosure construction and pro...

Страница 19: ...lling and operating your device Before operating the units please read this manual thoroughly and retain it for future reference Observe all warnings and instructions printed on the devices Barco Medi...

Страница 20: ...sk of fire or electrical shock Never spill liquid of any kind on the product Should any liquid or solid object fall into the cabinet unplug the set and have it checked by quali fied service personnel...

Страница 21: ...d not be placed in a built in installation or enclosure unless proper ventilation is provided The maximum recommended ambient temperature for this equipment is 40 C When using the unit in a multi unit...

Страница 22: ...olled waste disposal please separate these items from other types of waste and recycle them responsibly to promote the sustainable reuse of mater ial resources For more information about recycling of...

Страница 23: ...1 5 RoHS compliance 1 5 1 RoHS Chinese Mainland RoHS Barco Pn 60600320 20 Section 1 Introduction Barco Media Server XHD Series User Guide...

Страница 24: ...fasteners SJ T 11364 This table is prepared in accordance with the provisions of SJ T 11364 O SJ T 11363 O Indicates that this toxic or hazardous substance contained in all of the homogeneous material...

Страница 25: ...Turkey In conformity with the WEEE Regulation 1 6 Terms and definitions 3G A 3 Gbit s serial digital 10 bit or 12 bit video inter face SMPTE 424M and 425M Active DisplayPort to DVI Ad apter A Display...

Страница 26: ...at can restore the applications and set tings on the C drive to their original condition System Restore also restores the needed software li censes A Full Restore can erase the data on the D drive Win...

Страница 27: ......

Страница 28: ...ect device for PERMANENTLY CONNECTED EQUIPMENT a readily accessible disconnect device shall be incorporated external to the equipment for PLUGGABLE EQUIPMENT the socket outlet shall be installed near...

Страница 29: ...higher than 0 C 32 F and lower than 40 C 104 F Neglecting this may result in startup failure Save the original shipping box and packing material these will be necessary if you ever have to ship your...

Страница 30: ...or scratches notify your Barco sales representative as soon as possible 2 3 Rack mount procedure The Barco Media Server chassis is designed to be rack mounted Please note the following important poin...

Страница 31: ...ed off any time after it has been initially powered on you can power on the system again using the power switch on the front panel If the Barco Media Server does not start ensure that the master power...

Страница 32: ...r license contains only the licenses needed to operate Barco Media Server software Barco Media Server software can be downloaded from the Barco website Go to http www barco com Products Solutions Imag...

Страница 33: ...s licensing This section describes how to check current licenses and request an update for an existing license issued by Barco for a Barco Media Server XHD Series server Checking current licenses 1 La...

Страница 34: ...D series product codes to properly work with Barco Media Server software Figure 2 4 XHD series product codes Requesting an update for an existing XHD series license 1 Launch CodeMeter Control Center 2...

Страница 35: ...nch the CodeMeter Control Center 2 Insert the XDG 100 Designer USB drive in a USB port on your computer 3 Find the XDG 100 license listed in CodeMeter Control Center See Figure 2 5 CodeMeter Control C...

Страница 36: ...nse 1 Launch CodeMeter Control Center 2 Insert the XDG 100 Designer USB drive in a USB port on your computer 3 Find the XDG 100 license listed in CodeMeter Control Center See Figure 2 5 CodeMeter Cont...

Страница 37: ...r some of your work may be lost 2 8 1 Software shutdown After saving your work and closing X Agora you can shut down the Barco Media Server through Windows 1 Right click the Windows icon at the far le...

Страница 38: ...following steps to perform a System Restore 1 Plug the USB Recovery drive into one of the external USB 3 0 ports on the Barco Media Server The Barco USB Recovery drive is a USB 3 0 device you may red...

Страница 39: ...ring this time a number of small windows appear and disappear Wait until you see a full screen menu titled Barco Media System Restore Menu Figure 2 10 Barco Media Server System Restore Menu 6 Select t...

Страница 40: ...ll the data on the D drive See Full System Restore p 39 Figure 2 11 Confirmation screen 7 Select Confirm and the Restore begins 8 Allow the Restore to run The Restore process takes between 10 and 30 m...

Страница 41: ...arco Media Server automatically restarts 9 Allow a few minutes for the Barco Media Server to reconfigure Figure 2 13 Completion screen After the restoration is complete you may remove the USB System R...

Страница 42: ...3 0 device you may reduce recovery time by using this drive in a USB 3 0 port 2 Right click the Windows icon at the lower left hand corner of the screen to restart As the system restarts it displays t...

Страница 43: ...D drive If you wish to restore the applications software licenses and settings on the C drive without erasing the data on the D drive use System Restore See System Restore p 35 Figure 2 15 Barco Medi...

Страница 44: ...l red button labelled CLR_CMOS located near the front end of the PCIe 3 0 x16_4 expansion slot In the XHD 402 and XHD 404 media servers this slot holds the video out card In the XHD 200 and XHD 400 me...

Страница 45: ......

Страница 46: ...ervers Although the XHD 200 series and XHD 400 2 4 series servers differ in height they have the same buttons switches LED indicators and USB 3 0 ports on the front panel Figure 3 1 XHD series server...

Страница 47: ...re 3 3 XHD 400 server rear panel XHD 400 4u chassis Outputs 4 Inputs 0 Figure 3 4 XHD 402 server rear panel XHD 402 same 4u chassis as XHD 400 Barco Pn 60600320 44 Section 3 Hardware Barco Media Serve...

Страница 48: ...link DVI capture Figure 3 5 XHD 404 server rear panel XHD 404 same 4u chassis as XHD 400 Outputs 4 DisplayPort 1 2a Inputs 4 3G SDI Genlock synchronization module 45 Barco Pn 60600320 Barco Media Serv...

Страница 49: ......

Страница 50: ...ure discrepancies between components 4 1 3 Network X Agora relies on the proper functioning of your network and makes a few assumptions TCP and UDP communication is open on the network These protocols...

Страница 51: ...s you to work with 2D projects in which all playback takes place on LED or LCD displays or with 3D projects in which you can also use projectors and import your own 3D models 4 2 2 X Agora Agent X Ago...

Страница 52: ...es on the X Agora network Acts as a centralized logger and message relay carrier between players Hosts all media files Synchronizes all players with updates to the media and virtual scene This documen...

Страница 53: ...Figure 4 2 Launch the installer and select Next 3 Select Accept to accept the license then select Next Barco Pn 60600320 50 Section 4 Software Barco Media Server XHD Series User Guide...

Страница 54: ...wn menu and select Next If the software is not already present the Installation Wizard automatically chooses the Install option You can choose where to put the software and also where to put the proje...

Страница 55: ...Installation or Update 5 Select Next to start the Installation or Update You may have to confirm to some prompts for X Agora requirements Barco Pn 60600320 52 Section 4 Software Barco Media Server XH...

Страница 56: ...or additional configuration files are not removed Note Updating an installation is possible for upgrades and also downgrades using the same steps 4 4 Network setup Every machine in your setup can be a...

Страница 57: ...s of X Agora Agent point to the new master player You can also change the default configuration manually To change the default configuration manually 1 Launch Agent as an administrator Double click on...

Страница 58: ...Desktop or from the Start Menu 2 Launch X Agora by selecting the X Agora shortcut from the Desktop or from the Start Menu Note X Agora Server must be running for X Agora to launch Note The Windows ser...

Страница 59: ......

Страница 60: ...pendix A Specifications This appendix contains specifications for Barco Media Servers and specifications and pinouts for standard connectors 57 Barco Pn 60600320 Barco Media Server XHD Series User Gui...

Страница 61: ...USB 3 0 4 USB 2 0 4 USB 3 0 2 USB 2 0 USB 100 V AC 220 V AC 100 V AC 220 V AC Input voltage 2 Gigabit Ethernet 1 Gigabit Ethernet Networking 512G SSD 256G SSD Storage Dimensions Width 48 cm 19 0 in W...

Страница 62: ...A 2 Standard connection specifications 59 Barco Pn 60600320 Barco Media Server XHD Series User Guide Appendix A Specifications...

Страница 63: ...uts DisplayPort Four Standard DisplayPort outputs DisplayPort 1 2a support including Adaptive Sync and HBR2 Resolution 4 096 2 160 Maximum DisplayPort 1 2a resolution 2 560 1 600 Maximum DisplayPort 1...

Страница 64: ...via future firmware upgrade PCI Express 4 lane PCIe 2 0 SD HD 3G SDI video capture Table A 2 Standard connection specifications A 3 Standard connector pinouts A 3 1 DisplayPort connector pinouts Figur...

Страница 65: ...Lane 2 n 9 DP_PWR Power for connector 3 3 V 500 mA 20 ML_Lane 3 p 10 Table A 3 DisplayPort connector pins A 3 2 DVI connector pinouts Figure A 2 DVI connector illustrates the DVI connector Figure A 2...

Страница 66: ...S Clock 23 TMDS Data 1 3 Shield 11 TMDS Clock 24 TMDS Data 3 12 Table A 4 DVI connector pins Signal Pin Signal Pin Analog Horizontal Sync C4 Analog Red Video C1 Analog Common Ground Return C5 Analog G...

Страница 67: ...r Pin TX0 TXD white green 3 1 TX0 TXD green 3 2 RX0 RXD white or ange 2 3 TX1 blue 1 4 TX1 white blue 1 5 RX0 RXD orange 2 6 RX1 white brown 4 7 RX1 brown 4 8 Table A 6 Ethernet connector pins Barco P...

Страница 68: ...United Kingdom core colours in the mains lead of this equipment may not cor respond with the coloured markings identifying the terminals in the fixture s plug In that case install a line cord cap acco...

Страница 69: ......

Страница 70: ...mode all outputs must be set in an Eyefinity Group We will explain in this section how to setup an Eyefinity Group using the AMD FirePro Control Center and how to manage the Eyefinity Group inside the...

Страница 71: ...Figure C 1 Create Eyefinity Display Group 3 Click on Use a new arrangement Barco Pn 60600320 68 Appendix C AMD FirePro Control Center Barco Media Server XHD Series User Guide...

Страница 72: ...ment 4 Select the screen from which you want to create the Eyefinity group and click on Next The other screens will be disabled 69 Barco Pn 60600320 Barco Media Server XHD Series User Guide Appendix C...

Страница 73: ...yefinity group 5 Select the layout type for now X Agora supports only horizontal layouts 2x1 3x1 4x1 etc and click on Next Barco Pn 60600320 70 Appendix C AMD FirePro Control Center Barco Media Server...

Страница 74: ...Figure C 4 Select a group layout 71 Barco Pn 60600320 Barco Media Server XHD Series User Guide Appendix C AMD FirePro Control Center...

Страница 75: ...ty group should now span across multiple screens as shown in Figure C 6 Eyefinity group spanning multiple screens Figure C 6 Eyefinity group spanning multiple screens Barco Pn 60600320 72 Appendix C A...

Страница 76: ...ions to set up the correct screen order Figure C 7 Arrange Eyefinity Display Group C 3 Disable Eyefinity Group To disable the Eyefinity Group click on Disable Eyefinity Group in the AMD Eyefinity Mult...

Страница 77: ...ng the Identify Monitors button shows only one large number for the group The displays that are part of the Eyefinity Group however are also identified individually with smaller numbers from 1 to 6 de...

Страница 78: ...up is also represented by a rectangle that spans across the correct number of displays in the group In the fol lowing screenshot the group spans across two outputs Figure C 10 Eyefinity group spanning...

Страница 79: ......

Страница 80: ...ter 1 Right click anywhere on the desktop to summon the desktop menu 2 Click on AMD FirePro Control Center Figure D 1 Select AMD FirePro Control Center 3 Select AMD FirePro in the navigation pane and...

Страница 81: ...d Remove the selected EDID or branch emulation 5 Click on the Minus icon to remove the selected EDID The text for the selected connection changes from DisplayPort Emu lated to DisplayPort Connected D...

Страница 82: ...ol Panel Figure D 4 NVIDIA Control Panel Figure D 4 NVIDIA Control Panel shows that the DVI port of the Quadro K620 is not connected but the DisplayPort port is connected to an ASUS monitor 4 Click un...

Страница 83: ...you to remove an emulated EDID file from a connection 5 Select the Unload tab on the Manage EDID window 6 Select the emulated EDID that you wish to remove Only emulated EDIDs may be selected and remo...

Страница 84: ...on check the DVI input on the Datapath VisionAV HD video capture card in the Barco Media Server XHD 402 1 Click the Windows icon at the lower left hand corner of the screen to access the Windows Apps...

Страница 85: ...at the lower left hand corner of the screen to access the Windows Apps screen 2 Select the dREC icon to open dREC 3 dREC displays the Record module The Device Control panel displays the video capture...

Страница 86: ...nput if there is any If there is no input signal the Video Preview panel displays the message NO SIGNAL Figure E 2 dREC Record module showing NO SIGNAL 83 Barco Pn 60600320 Barco Media Server XHD Seri...

Страница 87: ......

Страница 88: ...nnect the power cord from the Barco Media Server Remove all cables from the Barco Media Server Make sure that your hands are free of dirt grease or foreign substances that may damage the PCIe card or...

Страница 89: ...e notes to Table 2 1 in the Box content p 26 section of this user guide Make sure cable is seated cor rectly and the thumbscrews are tight The video cable may not be prop erly connected Enable the dis...

Страница 90: ...ific channel Be sure not to exceed maximum cable length The suggested cable length has been exceeded Be sure to use the supplied con verters See Note 2 to Table 2 1 Box content Swap the converter for...

Страница 91: ...hes are plugged in on the motherboard The internal cables may be discon nected The unit does not respond to any front panel switches Try a different USB device in the port The USB device may be faulty...

Страница 92: ...You can access these panes by using the Window tab on the Menu bar at the top of the screen A checkmark next to an item in the Window tab drop down menu indicates that the pane for that item is activ...

Страница 93: ...e number and layout of views Click on the Views Template button in the top right hand corner of the Viewport pane to change the number and layout of views Barco Pn 60600320 90 Appendix G Interface Bar...

Страница 94: ...s according to the selected tool To move or scale selected objects in the scene use the 3D manipulator with axes Dragging an axis moves or scales the selected objects along that axis Right clicking in...

Страница 95: ...G 2 Displays pane The Displays pane allows you to adjust the properties of projectors and screens to the real world constraints of your project Barco Pn 60600320 92 Appendix G Interface Barco Media Se...

Страница 96: ...ow the parameters of the selected display 2 Edit the parameters of the display such as its x y and z coordinates lens shift and throw ratio for projectors or resolution G 2 1 Display groups The displa...

Страница 97: ...an use the menu shown in Figure G 6 New group If you want to add a display to an existing display group use the icon of that group See Figure G 7 Add display to an existing group Barco Pn 60600320 94...

Страница 98: ...e G 8 3D Object Properties pane G 4 Actions pane Actions give you real time tools to go beyond basic video and sound playback They make it possible to add real time visual effects to your Timelines co...

Страница 99: ...lack to the scene Fade In Fades out from the scene to black Fade Out Allows for manual fade control of the scene Manual Fade Defines a revealer object that when in front of a defined revealed object r...

Страница 100: ...top Timeline Selects the name of the Timeline to be stopped from the drop down list in this Action s properties Stop Timeline by name Stops a specific Timeline upon an event trigger Stop Timeline on e...

Страница 101: ...tangible user inter face object TUIO inputs that can then be used to control real time media elements in your project Figure G 9 Interactivity pane G 5 1 Input variables Once an input is created and...

Страница 102: ...drag and drop the input variable into the action parameter field to bind them Figure G 11 Moving a blob using its x and y positions shows an example using the x and y positions of a detected moving ob...

Страница 103: ...er example in which a new blob that will be a trigger to play a Timeline using the startTimelineOnEvent behavior is detected Figure G 12 Detecting a blob that will trigger a Timeline Barco Pn 60600320...

Страница 104: ...e X Agora scene folder Note The X Agora media folder is located at X Agora Installation Folder xframe scenes scene name medias Media assets are placed in their respective subfolders depending on their...

Страница 105: ...e Properties pane gives access to all user editable elements To access the properties of any user interface element click on the element to open its Properties pane Barco Pn 60600320 102 Appendix G In...

Страница 106: ...G 7 1 Video and image properties Figure G 15 Video properties for a Timeline element 103 Barco Pn 60600320 Barco Media Server XHD Series User Guide Appendix G Interface...

Страница 107: ...dia Free running Allows media to play when the Playhead is paused inside the element Mask Uses the element as a alpha mask Disabled Disables the element When the surface is a display media can be move...

Страница 108: ...boost factor between 100 and 100 Brightness the brightness boost factor between 100 and 100 The Reset button resets the color correction properties to their default values G 8 Timelines pane The Timel...

Страница 109: ...k the symbol directly to the right of the Timeline Group The top bar in the Timelines tab allows you to show currently playing Timelines stop all Timelines or search for a specific Timeline To duplica...

Страница 110: ...manipulation controls are Go to Start Moves the Playhead to the start of the Timeline Last Frame Moves the Playhead to the last previous frame Play Pause Plays or pauses the Timeline Stop Stops the T...

Страница 111: ...fixed while zoom ing By default zooming is fixed on the left of the Timeline This button overrides the default Zoom in Zooms in on the Timeline You can also zoom in by using the mouse scroll button H...

Страница 112: ...line from the Output control 2 Choose the correct input device in the Audio devices section of the player s Properties pane Figure G 20 SMPTE device configuration 3 Configure the master player 4 Launc...

Страница 113: ...player to see any effect If the master player is not running the Timeline does not react to the SMPTE signal Running only the designer does not cause the signal quality gauge to react to the SMPTE sig...

Страница 114: ...Access Settings The Projection study section of the Settings menu provides access to key features of the Projection Study Tool 111 Barco Pn 60600320 Barco Media Server XHD Series User Guide Appendix...

Страница 115: ...ain greater than 1 0 Surface gain indicates how much the surface on which you are projecting diffuses back the light The following settings define the mapping of a range of values to the color gradien...

Страница 116: ...lution Set the maximum desired resolution The Preferences section of the Settings pane allows you to toggle ON or OFF the project ors in a Timeline layout and the reference grid 113 Barco Pn 60600320...

Страница 117: ......

Страница 118: ...D mode Select the 2D checkbox in the New Project dialog to create a new 2D project See Figure H 1 Create new 2d project H 1 1 Workflow The workflow in 2D mode is very similar to the workflow in a 3D p...

Страница 119: ...lt The stage is a visual reference giving you a way to build boundaries within which to work No restrictions force you to place displays and elements within the stage but it is strongly suggested that...

Страница 120: ...ed to be bigger in your scene even if they have the same native resolution The size in pixels in the scene is defined as the Stage Resolution By default the native and stage resolutions are the same T...

Страница 121: ...s or unlocks the selection of displays The Stage Prop erties icon shows the stage s properties in the Properties pane H 1 4 2D media manipulation In order to move and resize media more easily when in...

Страница 122: ...elected in multiple ways As in 3D mode clicking on the Timeline element selects it In 2D mode it is also possible to select the media elements directly in the Viewport by clicking on them A selection...

Страница 123: ...e top middle bottom left right or center of the selection The fit options are available only when media and a display are selected In 3D mode with a screen the display is implicitly the screen so no d...

Страница 124: ...d moving should be done in Programming Layout The size and position of all elements are in pixels There are no real world units The Content Production Tool is unavailable Reverse Calibration is unavai...

Страница 125: ...the brains of the operation the server Figure H 8 Agent icon in the tray Double clicking on the Agent icon in the notification area opens the Agent interface displaying the Configuration tab The Conf...

Страница 126: ...eos to eventually re encode them You can also use the Media Encoder to crop full resolution image sequences or videos creating video packages that conform to the crop definitions generated in your stu...

Страница 127: ...not use the local crop file they will use this global crop defini tion file Supported source movie exten sions a list of file extensions that X Agora recognizes as movie files Supported source image e...

Страница 128: ...folder containing the images inside the job list section A new job appears in the list and the new job can then be started paused or stopped To re encode a video repeat the process by dragging the vi...

Страница 129: ...was created in the Content Production Tool you must also apply the split on the image sequences to pro duce a video package Figure H 12 Media Encoder Figure H 13 Media Encoder job H 4 Content product...

Страница 130: ...1 Viewpoints A Viewpoint is a virtual representation of a point of view from which content can be created by video and motion graphics artists Content can be created for ISO or perspect ive templates...

Страница 131: ...emplate Split content Specifies the projectors for which content produced from this Viewpoint will be cropped Only one Viewpoint can be used to split content Export template Exports the image seen fro...

Страница 132: ...ewpoint in the Viewpoints Pane to expose its properties in the Properties Pane 2 Click on the Export Template button in the Properties Pane 3 Save your template xml file in a folder where you can retr...

Страница 133: ...can just connect to the server using a laptop and continue your work seamlessly Once calibration is done you can just go back to your server and continue working on your project Figure H 16 Connect t...

Страница 134: ...figure it to read your live video capture hardware Note Make sure your live video feed capture hardware is connected to the player machine that will output it to display hardware Figure H 17 Live inpu...

Страница 135: ...he 2D mode to create projects that do not need to include 3D elements Figure H 18 A Keyframed Timeline Element To enable Keyframing for a specific property click on the orange diamond next to the prop...

Страница 136: ...the interpolation mode by using the icon next to the property name You can also move between Keyframes by using the left and right arrows You can add a new Keyframe by using the orange button in the m...

Страница 137: ......

Страница 138: ...d documenting the various options for projector placement and the ad vantages or disadvantages for each option is referred to as a projection study The Projection Study layout allows you to generate d...

Страница 139: ...f necessary Optionally for complex projects once a final display configuration has been chosen use the Content Production tool to create 2D templates for the artists to work in the scene If your proje...

Страница 140: ...oned a The default unit scale of the X Agora 3D space is 1 unit 1 m b To adjust the scale or position of your model select the model in the player Viewport or the 3D Objects pane and then click on the...

Страница 141: ...function If you select a single object and click on Create Projector Array in the Properties pane X Agora automatically detects the projection area by choosing the biggest surface of the selected mod...

Страница 142: ...f and svg Those file types can be separated in two categories Modeling software formats fbx obj and CAD drawing formats dwg dxf and svg The most complete file format for X Agora is fbx however you may...

Страница 143: ...e an aspect ratio setting Auto mode chooses a combination of aspect ratios to best conform to the desired coverage area Alternatively you can set all projectors to a fixed aspect ratio I 1 6 Projectio...

Страница 144: ...ures the distance of the projectors from the projection surface Throw Ratio This is a property defined by the quality of the lens used on the projectors Aspect Ratio Auto mode automatically chooses as...

Страница 145: ...ure I 8 Create a 3D Object Use the button to create a 3D primitive a plane sphere or cube to create a light or Measure or to import a 3D model created with third party 3D modelling software Each objec...

Страница 146: ...ar automatically between the two objects in the 3D view Moving one of the two objects also moves the Measure and changes its Distance property 6 Click on the Color picker icon to modify the color of t...

Страница 147: ...t is printed or exported is wysiwyg what you see in the Viewport is what you get in your docu ment To create a new Projection Study click on the in the Study Layout Toolbar in the upper right hand cor...

Страница 148: ...Properties pane displays when you click on the Page tab in the Viewport Pages can be printed or exported to PDF from the Properties pane of the page Visualization mode Visualization modes are among th...

Страница 149: ...rojection surface The minimum and maximum values for the heat map can be set in the Settings pane The heat map displays values from blue to red Values under the minimum or over the maximum are shown w...

Страница 150: ...ther layout is the Print Layout which is the layout used to prepare a page for printing To switch to Print Layout click on Study Layout on the Toolbar in the upper right hand corner of the Viewport an...

Страница 151: ...where in the Viewport with any text Figure I 15 New note The Projector Specifications the Cartouche and the Notes can be shown or hidden for each page To show or hide these items 1 Click on the Extras...

Страница 152: ...ackground the edges and the objects Figure I 17 New view style Figure I 18 Assign view style 1 To assign a view style to a view 1 Click on the Extras icon in the upper left hand corner of the desired...

Страница 153: ...p 126 I 2 Programming layout The Programming tool allows you to build content Timelines I 3 Calibration layout Use the Calibration layout to calibrate individual projectors when on site X Agora featu...

Страница 154: ...ys based on your choice of projector connections while advanced control gives you control over every aspect of the config uration I 5 Playback layout The Playback layout is meant to play your show It...

Страница 155: ......

Страница 156: ...Home Zoom Scroll wheel J 1 2 Timeline keyboard and mouse shortcuts Keep the offset of dragged ele ments while changing layers Shift and drag the Timeline element Panning in a Timeline MMB and drag LMB...

Страница 157: ...r screens can be created in X Agora X Agora stores no UV information for any CAD file format therefore UV Sets in the media elements properties will not work To use the imported model as a projection...

Страница 158: ...media is gamma corrected as opposed to linear or log J 2 4 Supported video formats X Agora supports most common video formats and codecs including MPEG 2 and MPEG 4 both the container and codec Quickt...

Страница 159: ......

Отзывы: