Barco UDM Series Скачать руководство пользователя страница 82

R5911443 /02

UDM

82

Image 8-15

2.

In the Warp menu, click

Warp

to toggle between

On

and

Off

.

Image 8-16

Image 8-17

8.7.2 Warping

Screen Size

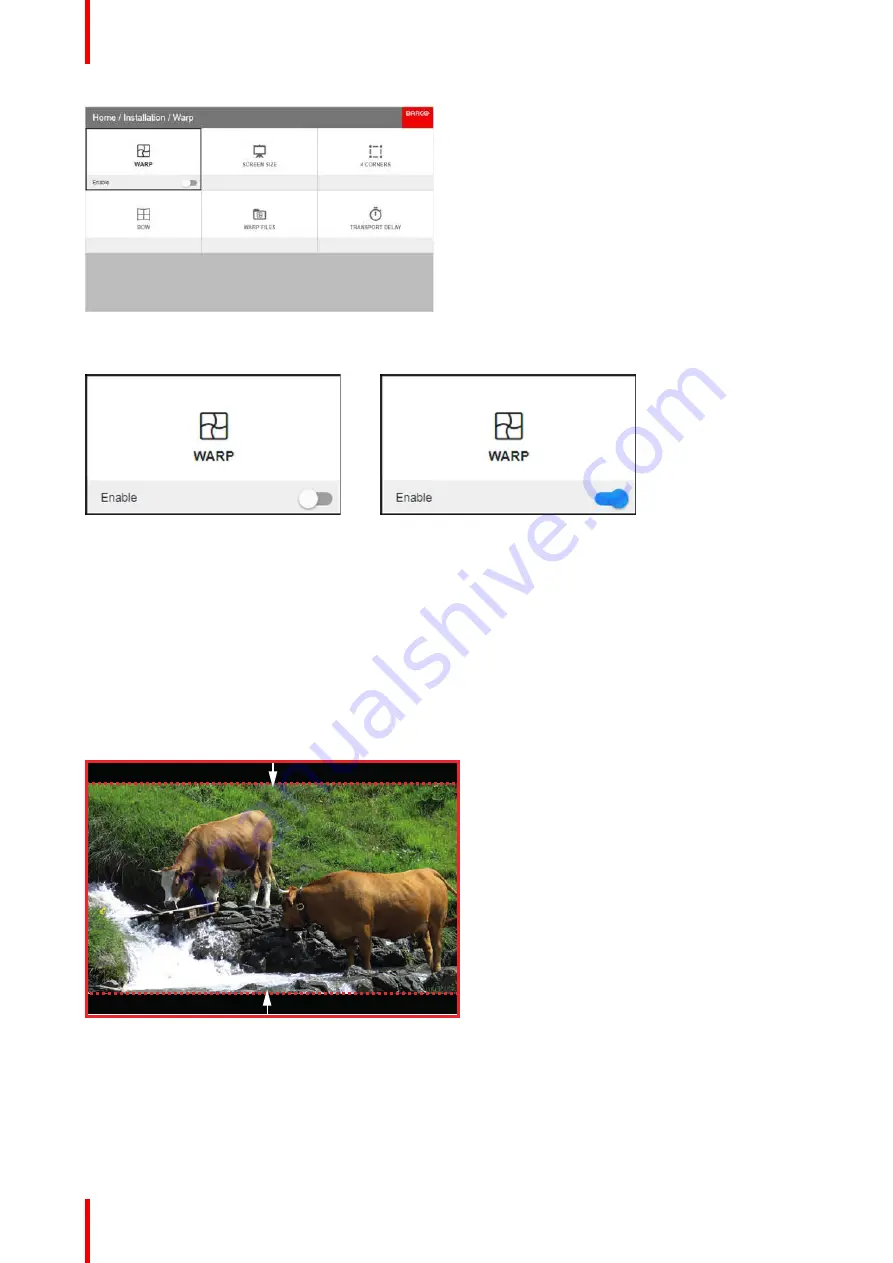
About (Warp) Screen Size adjustment

If the used source aspect ratio is different than the projector aspect ratio, e.g. source is 16:9 and projector is
16:10, then black bars will be projected. In the example case a black bar on top and bottom of the image will
be projected. The warp area contains not only the image information but also the black bars. If we want to
position e.g. the active left top corner exactly on the screen using 4 corner warp, then it is very hard to do that
as we are moving the black left top corner and we do not have control over the exact position of image left top
corner. By moving the outline of the warp screen size to the active image information, the corner points of the
warp area are now exactly on the corner points of the active image information and makes warping much
easier.

Image 8-18: Warp outline example

How to adjust the image?

1.

In the main menu, select

Installation

Warp

Screen Size

.

GUI

Installation

Содержание UDM Series

Страница 1: ...ENABLING BRIGHT OUTCOMES User manual UDM...

Страница 2: ...rco NV President Kennedypark 35 8500 Kortrijk Belgium www barco com en support www barco com Barco NV Beneluxpark 21 8500 Kortrijk Belgium www barco com en support www barco com Product revision Softw...

Страница 3: ...to perfect manufacturing as part of the legally stipulated terms of guarantee On receipt the purchaser must immediately inspect all delivered goods for damage incurred during transport as well as for...

Страница 4: ...ITE Information Technology Equipment Warning This is a class A product In a domestic environment this product may cause radio interference in which case the user may be required to take adequate meas...

Страница 5: ...control battery installation 32 3 2 Remote control protocol setup 33 3 3 Remote control on off button 33 3 4 Using the RCU 34 3 5 Functionality overview 35 3 6 Functions of the button pressed indicato...

Страница 6: ...s 76 8 2 Configuring the lens shift 76 8 3 Configuring the lens Mid position 77 8 4 Laser ranging 78 8 5 Manipulating the rigging frame 79 8 6 Orientation 80 8 7 Warping 81 8 7 1 Warping On Off 81 8 7...

Страница 7: ...32 10 15 Electronic Convergence 133 10 16 Advanced Settings 134 10 16 1 Advanced Settings Color 134 10 16 2 Advanced Settings Statistics 135 11 GUI Status menu 137 11 1 Status menu overview 138 12 Pro...

Страница 8: ...WiFi GSM compliance information 173 D 1 Compliance FCC 174 D 2 Compliance IC 174 E Environmental information 177 E 1 Disposal information 178 E 2 Turkey RoHS compliance 178 E 3 China RoHS compliance 1...

Страница 9: ...DM projector Ensure that you understand and follow all safety guidelines safety instructions and warnings mentioned in this chapter before installing the UDM projector Clarification of the term UDM us...

Страница 10: ...cluding electrical business equipment intended to operate in normal environments offices and homes This safety standard imposes important requirements on the use of safety critical components material...

Страница 11: ...wed to perform service functions inside the product enclosure 1 2 Important safety instructions To prevent risk of electrical shock This product should be operated from a mono phase AC power source En...

Страница 12: ...presents a significant risk for the human eye when exposed directly within the beam This risk is not specific related to the characteristics of laser light but solely to the high thermal induced energ...

Страница 13: ...y of this projector could result in the spontaneous ignition of that material resulting in a fire For this reason it is absolutely necessary to leave an exclusion zone around all external surfaces of...

Страница 14: ...arton and packing material They will come in handy if you ever have to ship your equipment For maximum protection repack your set as it was originally packed at the factory Unplug this product from th...

Страница 15: ...fore stacking or transporting flight cases check that the four lock handles on each flight case are in good working order and locked securely When stacked make sure the wheels of the upper flight case...

Страница 16: ...he HD Restriction Zone RZ based on the HD The HD depends on the amount of lumens produced by the projector and the type of lens installed See chapter HD in function of modifying optics page 20 To prot...

Страница 17: ...T SH RA PR TH RZ SH B TOP VIEW A SIDE VIEW Image 1 2 A Side view B Top view RA Restricted Access location boot area of projector PR Projector TH Theater RZ Restriction Zone in the theater SH Separatio...

Страница 18: ...creased to prevent exposure to the hazard distance zone The LIP shall be installed by Barco or by a trained and Barco authorized installer or shall only be transferred to laser light show variance hol...

Страница 19: ...nto a defuse coated projection screen As displayed in Image 1 4 two areas should be considered the restricted enclosed projection area RA and the observation area TH RA TH sw PD HDDIFFUSE sw RZ sw sw...

Страница 20: ...surface is below 5000 cd m or 15000 LUX 1 6 HD in function of modifying optics Hazard distance 0 1 2 3 4 5 6 7 8 9 10 11 12 13 1 1 2 1 4 1 6 1 8 2 0 2 2 2 4 2 6 2 8 3 0 3 2 3 4 3 6 3 8 4 0 4 2 4 4 4...

Страница 21: ...w barco com support WiFi GSM module For WLAN Frequency 2402 MHz 2482 Mhz Max EIRP 19 dBm Frequency 5150 5350 MHz 5470 5725 Mhz Max EIRP 23 dBm For GSM E GSM Frequency 900 MHz Max EIRP 33 5 dBm EDGE Fr...

Страница 22: ...R5911443 02 UDM 22 Safety information...

Страница 23: ...This chapter and by extension this whole document the user manual is intended for the user who want s to operate the projector It does not contain installation instructions because the installation ha...

Страница 24: ...on screen in front of the projector T L F R B Image 2 1 T Top L Left F Front R Right B Back Projector component location 6 5 1 2 3 4 7 8 Image 2 2 1 Dust filter top air inlet 2 Dust filter side air in...

Страница 25: ...ructions see chapter Product maintenance page 139 There is only one air outlet which is located at the rear of the projector Image 2 4 CAUTION Keep the air inlets and outlet at all times free Make sur...

Страница 26: ...l cause irreversible damage to the projector If no proceed with the next step 2 Press the mains switch reference 2 to switch on this projector 2 1 OVERVOLTAGE Image 2 6 When 0 is pressed the projector...

Страница 27: ...jection Connect the source 1 Connect the source cable with the appropriate input port on the Input Communication module Tip See chapter Input Communication page 39 for more info about supported input...

Страница 28: ...Use the arrow keys to select the desired source the SEL LED reference 2 of the selected source lit up GREEN and the image of the selected source is projected 2 Image 2 13 Quick test pattern selection...

Страница 29: ...n the remote control The projector goes to standby mode The after cooling cycle will start about 30 seconds During this period the Power on off button will blink Once the after cooling cycle has ended...

Страница 30: ...R5911443 02 UDM 30 1 Image 2 16 Mains switch 2 Unplug the power cord from the projector Getting Started...

Страница 31: ...ity overview 35 3 6 Functions of the button pressed indicator 35 3 7 Function of the RGB filter button 36 3 8 Displaying and Programming addresses into the RCU 36 3 9 Using the XLR connector of the RC...

Страница 32: ...How to install 1 Push the battery cover tab with the fingernail a little backwards 1 and pull at the same time the cover upwards 2 1 2 Image 3 1 2 Insert the two AA size batteries making sure the pola...

Страница 33: ...te control battery installation page 32 2 Place the switch in the desired position Image 3 4 Remarks when using the RC5 protocol Due to new or updated functionality not all buttons of the Pulse RCU ar...

Страница 34: ...sensor window or if there are obstacles between the RCU and the IR receiver Image 3 6 The RCU can also hard wired been used See chapter Using the XLR connector of the RCU page 36 Using the RCU in com...

Страница 35: ...hile entering values 17 Macro button 18 Menu back 19 Default value button 20 Lens focus 21 RGB filter 22 Test patterns 23 Power on 24 Power off 25 3 5 mm jack 26 RCU on off 3 6 Functions of the button...

Страница 36: ...projector address and the broadcast address can be seen under the Communication heading The projector s address is displayed on the LCD status screen and or the OSD How to Program an Address into the...

Страница 37: ...cable with the mini jack connector reference 2 Image 3 9 of the RCU 2 Connect the other end of the cable with the mini jack input of the projector 2 Image 3 9 Note While the mini jack cable is connect...

Страница 38: ...R5911443 02 UDM 38 Image 3 10 2 Place back side XLR side of the RCU into the sleeve and pull the other side of the sleeve over the front side of the RCU Image 3 11 Pulse Remote Control Unit...

Страница 39: ...D panel 40 4 3 Communication connections 41 4 4 LED and Button indication chart 43 4 5 Pulse Quad Combo input Mk II 44 4 6 Pulse Quad Combo input Mk I 45 4 7 Pulse Quad DP 1 2 input 46 4 8 Pulse SFP i...

Страница 40: ...eypad and LCD panel 2 Optional antenna for WiFi connection 3 Optional antenna for GSM 4 Communication Panel 5 Quad Combo Input board 6 Free input slot here filled with the Quad DP 1 2 Input board 4 2...

Страница 41: ...ote control The LCD Display will fade out 30 seconds after the last key operation 4 3 Communication connections Communication Panel 3 2 1 4 5 6 7 8 9 10 11 12 13 Image 4 3 1 WIFI antenna for wireless...

Страница 42: ...to the projector update copying data from the projector backup RS232 422 input Sub D port Pin Description 1 DCD Data Carrier Detect 2 RXD Receive Data 3 TXD Transmitted Data 4 DTR Data Terminal Ready...

Страница 43: ...the firmware file a fw file the projector will automatically start one of the following processes cornet version nr fw The projector will upgrade or downgrade depending on the version number LogExtrac...

Страница 44: ...ng SDI input A supports 12G input signals SDI input C functions as a loop through output for any signal placed on input A SDI input D functions as a loop through output for any signal placed on input...

Страница 45: ...Port 1 2 see chapter Specifications page 143 4 6 Pulse Quad Combo input Mk I Overview Quad Combo input Mk I SEL SEL SEL SEL SEL SEL SEL SDIIN SDIIN OUT SEL SYNC A SYNC B SYNC C SYNC D DP HDMI SYNC HDB...

Страница 46: ...ich only supports 3G SEL SEL SEL SEL SDI IN SDI IN OUT SYNC A SYNC B SYNC C SYNC D 1 Image 4 7 Quad Combo Input Mk I board without markings above the SDI inputs C D SEL SEL SEL SEL SDI IN SDI IN OUT A...

Страница 47: ...FPA SFPB SEL SYNC 1 2 3 Image 4 10 1 Neutrik Duo optical connector or Neutrik Quad optical connector 2 Neutrik Duo optical connector or Neutrik Quad optical connector 3 2x12G SDI 10GE transceiver For...

Страница 48: ...R5911443 02 UDM 48 Input Communication...

Страница 49: ...49 5 1 Overview 50 5 2 Navigation 51 5 3 Test Patterns 52 About this chapter This chapter gives an general overview of the Graphic User Interface R5911443 02 UDM GUI Introduction 5...

Страница 50: ...ror warning messages that are currently active About General info about the projector This includes serial number software version mounted lens and light source runtime Preview A preview pane of the p...

Страница 51: ...ight blue Press the Menu Selection button center key of the arrow keys also called OK button to activate that item and to jump one level deeper 3 Use the numeral keys to enter values or use the arrow...

Страница 52: ...s the last selected sub item as long as the projector is running The menu memory is reset when restarting the projector from standby 5 3 Test Patterns How to use test patterns 1 In the main menu selec...

Страница 53: ...R5911443 02 UDM 53 4 To turn the test pattern off return to the previous menu GUI Introduction...

Страница 54: ...R5911443 02 UDM 54 GUI Introduction...

Страница 55: ...ingle source 56 6 2 Displaying multiple sources Stitched layouts 56 6 3 Connector Settings 58 About the Source menu This menu is used to select review and configure sources into the projector R5911443...

Страница 56: ...r s resolution the image is stretched or shrunk It is however possible to configure and display two or four source signals to make up one single image in full native resolution This is called a Stitch...

Страница 57: ...ut 4x DisplayPort Passive stereo Even if passive stereo sources are selected the output of this projector can only be in either 2D or in Active Stereo Advanced image processing will make sure a passiv...

Страница 58: ...y Identification Data EDID When entering the menu for each input connector you can change the following Color Space Signal Range EDID How to configure a connector 1 Press Menu to activate the menus an...

Страница 59: ...for an HDMI connector 5 You can change the following To force a limit on the color space select one of the available color spaces To force a limit on the used signal range select one of the available...

Страница 60: ...R5911443 02 UDM 60 GUI Source...

Страница 61: ...e sharpness 63 7 3 Adjusting the gamma correction 64 7 4 Setting the desired Gamma type 65 7 5 Digital Shift Zoom 66 7 6 P7 Realcolor 69 7 7 Setting the output resolution 71 7 8 Displaying HDR content...

Страница 62: ...ndow together of the projected image How to set up Contrast 1 In the main menu select Image Contrast Image 7 1 Image menu Contrast 2 Use the or key to change the contrast enhancement until the desired...

Страница 63: ...select the other image adjustment options 7 2 Adjusting the sharpness About adjusting the sharpness The sharpness adjustment amplifies the high frequency components in the picture This means that by...

Страница 64: ...rpness slider 3 If necessary use the or key to select the other image adjustment options 7 3 Adjusting the gamma correction About gamma correction Gamma correction is an image quality enhancement func...

Страница 65: ...ulate certain specific DICOM gammas at a few selected max light outputs The DICOM gamma assumes that both ambient light and the projector outputs black as 0 cd m Then there will be a few predefined ga...

Страница 66: ...lected This will determine the used gamma type based on the incoming signal However keep in mind when using AUTO mode your media player needs to be configured correctly as well While most mainstream m...

Страница 67: ...ing in the center of the image will increase in size This means that the outer part of the picture will be outside the picture frame When zooming out the result is that the picture will be smaller tha...

Страница 68: ...itally shifted Image 7 19 Picture shifted horizontally Image 7 20 Picture shifted vertically Digital Shift Zoom 1 In the main menu select Image Digital Zoom Shift Image 7 21 Image menu Digital Zoom Sh...

Страница 69: ...ift the lens image in vertical direction 7 6 P7 Realcolor Purpose When blending images from multiple projectors the measured color coordination of each projector can be altered to a desired common lev...

Страница 70: ...he desired value with the numeric keys Note You can only pick coordinates within the measured color triangle 4 For Custom White click on White point and choose one of the following Coordinates Configu...

Страница 71: ...r standard for broadcasting Rec 709 Color standard for high definition televisions HDTV Image 7 27 Example of one of the presets Rec 709 Note After choosing one of the presets you can still alter the...

Страница 72: ...the 4K UHD output resolution for the best image at the highest light output If the main purpose of the projection is text spreadsheets presentations or similar purposes use the 4K UHD S output resolut...

Страница 73: ...R content depends on the following factors Mastering luminance This is content specific and cannot be changed Screen luminance Every projection screen has a specific luminance measured in nits or foot...

Страница 74: ...R5911443 02 UDM 74 5 Alter the HDR boost if necessary You can modify this value to somewhere between 0 8 and 1 2 GUI Image...

Страница 75: ...shift 76 8 3 Configuring the lens Mid position 77 8 4 Laser ranging 78 8 5 Manipulating the rigging frame 79 8 6 Orientation 80 8 7 Warping 81 8 8 Blending masking 93 8 9 Laser illumination 100 8 10 S...

Страница 76: ...by using the vertical and horizontal lens shift If you want to reach a lens shift beyond what is possible with the optical shift you can also perform a digital lens shift This digital shift will occur...

Страница 77: ...the lens image in vertical direction 8 3 Configuring the lens Mid position What can be done The lens can be force back to the center position by selecting MID LENS and confirming How force lens in Mi...

Страница 78: ...utline of where the projected image should be How to manipulate the laser range finder 1 In the main menu select Installation Laser ranging Image 8 6 Installation menu laser ranging The Laser ranging...

Страница 79: ...rame When can you manipulate the rigging frame You can manipulate the rigging frame in the Pulse menu when The projector is mounted in a motorized rigging frame The wiring of the motorization is conne...

Страница 80: ...r button to rotate the rigging frame image either clockwise or counterclockwise 5 Confirm with the OK button to return to the frame shift menu or use the Menu back button to return to the Lens menu 8...

Страница 81: ...warping is the process of digitally manipulating an image to compensate for the distortion of the screen Consequently it can also be used to generate an image with irregular shape While an image can...

Страница 82: ...y the image information but also the black bars If we want to position e g the active left top corner exactly on the screen using 4 corner warp then it is very hard to do that as we are moving the bla...

Страница 83: ...showing the result of the adjusted outline Tip The value can also be entered by the numeric keys on the remote control Press to delete existing numbers and enter the new value by the numeric keys 4 C...

Страница 84: ...menu 4 Corners The 4 Corners menu is displayed Image 8 23 4 Corners Warping 2 To enable 4 Corners warping make sure the 4 corners slider is set to On Image 8 24 The slider is enabled when set to the...

Страница 85: ...mage The border is a visual aid showing the result of the warped corners 6 Repeat from go to step 4 for each corner until all corners are warped in the desired position To reset the 4 corner adjustmen...

Страница 86: ...s enabled visible by the blue highlight 3 To perform a symmetric adjustment make sure the Symmetric slider is set to On visible by the blue highlight Image 8 29 Bow menu both Bow and Symmetric sliders...

Страница 87: ...up and down arrow keys The linearity is adjusted by using the left and right arrow keys The correction will occur symmetrically on each side of the center of the highlighted side 7 Repeat this step f...

Страница 88: ...e 8 34 Right vector of the upper side of the picture 3 Adjust angle and linearity length individually to obtain the correct correction and confirm Tip Adjust the angle by using the up and down arrow k...

Страница 89: ...asymmetric bow correction Definition of angle and linearity length in the bow warp procedure Image 8 38 To reset the bow adjustments select Reset and confirm 8 7 5 Warping Warp files About custom War...

Страница 90: ...he Pulse API Reference Guide When uploading a warp file that is too big or with warp parameters outside the limits of the projector some irregularities can occur It will show up in two ways 1 No warp...

Страница 91: ...ort delay The value is normally given in milliseconds Functional description Every projector in a multi projector setup will have a different latency This latency depends on the amount of warp and on...

Страница 92: ...nstallation menu Warp 4 In the Warp menu select Transport Delay Image 8 46 Warp menu Transport delay The Transport menu is displayed Image 8 47 5 Enter the value either by the arrow keys one step at a...

Страница 93: ...ach edge there will be a drop off curve for the blend zone 8 8 1 Blend Mask About masking and blending width or height Offset is used to clip the image on one or multiple sides masking This is used to...

Страница 94: ...mask 2 to determine the width of the masked area When the blending lines are activated you will get a visual indication of the screen of the installed blending area 1 2 Image 8 51 1 Start position ma...

Страница 95: ...the projector also must be set to 500 pixels First step is to align the image from the projectors as accurate as possible in a mechanical way meaning without any optical corrections At the same time e...

Страница 96: ...point directly via the curl program or some other tool that supports http upload For more information on uploading downloading Blend files using the Projector Toolset refer to the Projector Toolset us...

Страница 97: ...of each edge of the blend and adding an additional size of 8 pixels to reduce the effect known as sea of mirrors You can also specify the offsets manually by turning off the automatic calculation The...

Страница 98: ...Black Level Adjustment in the GUI you can also upload or download a custom Black Level adjustment file in png jpeg or tiff format to from the projector To upload or download Black Level adjustment fi...

Страница 99: ...zone 1 one for the Blend zone zone 2 and one for the zone where there is only the picture of the right projector zone 3 Picture Left Picture Right Blend Zone Image 8 63 The black levels for zone 1 an...

Страница 100: ...mode All light sources naturally decrease their intensity over time In order to prevent a decreasing output in a multi projector setup you can activate CLO mode to make sure that the light output rema...

Страница 101: ...iginal aspect ratio 1 1 An exact rendering of the source signal which may be smaller than the native resolution Fill screen Fills the screen to the screen size defined in the Screen Size menu while re...

Страница 102: ...ple when using NVIDIA Quadro cards use the NVIDIA Control Panel to manage your 3D settings 8 11 1 Active Stereo Passive Stereo What is Passive Stereo Passive Stereoscopic 3D also known as Passive Ster...

Страница 103: ...f a 3D emitter is used that radiates IR beams the IR beams may interfere with the IR communication between projector and the RCU If such interference occurs connect the RCU to the projector using the...

Страница 104: ...ode 2D input 2D output 3D input Active Stereo output Mono Forces all source signals to 2D output ActiveStereo Forces all source signals to Active Stereoscopic 3D Use the following table as an indicato...

Страница 105: ...oubling sequence If the frame rate of the projected moving 3D content doesn t look smooth this option may help improve this Dark time You can select how much dark time the projected image will have be...

Страница 106: ...rk Time 3 Use the slider to set the desired stereo Sync delay 4 If it is necessary to invert the stereo sync output enable the Swap eyes option 5 If the projected moving 3D content doesn t look smooth...

Страница 107: ...107 9 1 Profiles introduction 108 9 2 Profiles setup parameters 108 9 3 Enable Profiles 109 R5911443 02 UDM GUI Profiles 9...

Страница 108: ...aming different viewing environments and so on This is useful in installations where the projector are used for different purposes Image 9 1 9 2 Profiles setup parameters Available profile settings Ar...

Страница 109: ...File blend Enabled status Selected files S curve gamma Black Level Mask Black level Enabled status Width for each side File Black level Enabled status Selected file R G B gain values Illumination Illu...

Страница 110: ...gn to preset slot enables a shortcut to the actual profile from the remote control If assigned preset slot are set to 1 this profile can be recalled by pressing the key MACRO and then 01 on the remote...

Страница 111: ...numeric shortcut from the remote control Edit a profile 1 Enter the menu Home Profiles Edit Select the profile to be edited 2 Set or change the Assign to preset slot number or delete the actual profil...

Страница 112: ...R5911443 02 UDM 112 GUI Profiles...

Страница 113: ...SM configuration 124 10 7 Themes 125 10 8 Setting the measurement system 125 10 9 Lens features 126 10 10 Controlling the backlight of the LCD Display 127 10 11 Reset 128 10 12 Lens Calibration 130 10...

Страница 114: ...serves as an entry point into and exit point out of a network For example a local network LAN may need a gateway to connect it to a wide area network WAN or to the Internet MAC address Media Access Co...

Страница 115: ...color of the switch becomes blue An automatic IP is assigned When connected it is indicated with the connection symbol and the indication Connected 3 Select APPLY and click OK How to manually set up t...

Страница 116: ...sk and Default Gateway 6 Select APPLY and click OK to confirm all changes When the connection is established it is indicated with the connection symbol and the indication Connected 10 1 3 Wireless IP...

Страница 117: ...r hidden by default select Add New SSID Fill in the details of the network Image 10 8 5 If required by the chosen wireless network fill in the user name password and confirm Tip If you already connect...

Страница 118: ...t APPLY and click OK to confirm all changes 7 Select the Select SSID dropdown menu and select the desired wireless network 8 Press Connect to connect to the selected network 9 If required by the chose...

Страница 119: ...d be separately addressable with an RCU or with a computer using serial communication Therefore each projector has its own address The factory default individual projector address is 0 When the addres...

Страница 120: ...or enabled When all sensors are turned off the projector will no longer respond to signals from the remote control To re enable the sensors use the menu keypad on the projector How to disable 1 In th...

Страница 121: ...ple devices or projectors How to set a different Hostname 1 In the main menu select System Settings Communication Hostname Image 10 15 System Settings Hostname The Hostname menu is displayed Image 10...

Страница 122: ...A full configuration spread over 14 channels For the full mapping of each used channel refer to the DMX chart in the appendices See DMX chart page 167 DMX Monitor If a DMX device is connected the set...

Страница 123: ...n be done The output voltage on the front XLR connector can be enabled or disabled If enabled the output voltage level can be set to 0 V 12 V or 24V The output voltage depends on the application or pe...

Страница 124: ...on the SIM card ensure to enter the correct PIN code When your SIM card is blocked you have to remove the SIM card from the GSM module and to insert the SIM card in a mobile phone so that you can ent...

Страница 125: ...t interface theme 1 In the main menu select System Settings Themes Image 10 24 System Settings Menu Themes 2 In the themes menu select the desired Theme You can choose one of the following Light or Da...

Страница 126: ...Length unit 10 9 Lens features What can be done Some lens features can be disabled once they are correctly aligned so that a misalignment during a show is not possible How to enable disable 1 In the m...

Страница 127: ...an be controlled You can choose how quickly the backlight of the LCD turns off You can select one of the default values or enter a custom value Stealth Mode Alternatively you can turn on Stealth Mode...

Страница 128: ...ing Factory setting DMX DMX Mode Basic Start Channel 1 Illumination Power 100 ImageBlend Blend Mask size Black Level Disabled all value to zero Black Level Files Blend Files Disabled all files deleted...

Страница 129: ...oler Cooling mode set to internal Settings for Motorized Frame All values to mid value Profile Settings for projector profile and macro s All profiles are deleted Screen Screen luminance Unit nits Sys...

Страница 130: ...ration Lens calibration is a time consuming operation How to calibrate 1 In the main menu System Settings Maintenance Lens Calibration Image 10 33 Maintenance menu Lens Calibration The Lens Calibratio...

Страница 131: ...ss a Flex code is necessary This Flex code can be requested for free and uploaded via Projector Toolset For more information about uploading this Flex code see Projector Toolset s user guide chapter F...

Страница 132: ...ibration Image 10 37 Maintenance menu Frame Calibration The Frame Calibration menu is displayed Image 10 38 Frame Calibration menu 2 In the Frame Calibration menu select the desired calibration action...

Страница 133: ...can only be done by a qualified service technician How to display the convergence settings 1 In the main menu navigate to System Settings Maintenance Electronic Convergence Image 10 39 Maintenance me...

Страница 134: ...pe with the remote As long as you type in the service code in the correct order the Advanced Settings option will become visible Image 10 43 Maintenance menu Advanced Settings The Advanced Settings me...

Страница 135: ...he values to the desired position taking into account the color gamut values 5 Select APPLY and click OK 10 16 2 Advanced Settings Statistics What can be seen The statistics screen shows the general i...

Страница 136: ...age 10 47 Maintenance menu Advanced Settings 2 In the Advanced Settings menu select Statistics Image 10 48 Advanced Settings menu Statistics The Statistics will be displayed Image 10 49 Statistics men...

Страница 137: ...137 11 1 Status menu overview 138 No settings can be modified in the status menu Its only for consulting R5911443 02 UDM GUI Status menu 11...

Страница 138: ...ojector software package version Model name Projector model name Illumination Shows the used light source power in and runtime Communication Lists the projector network address the remote control broa...

Страница 139: ...1 Software update 140 12 2 Cleaning the lens 141 12 3 Cleaning the exterior of the projector 142 About this chapter This chapter contains general maintenance procedures R5911443 02 UDM Product mainten...

Страница 140: ...click on New to myBarco and follow the instructions With the created login and password it is possible to log in where you can download the software 3 Download the latest firmware format fw from Barco...

Страница 141: ...ed The projector will reboot when completed CAUTION While it is technically possible to downgrade the software to an older version using this method it is NOT recommended and should be avoided as much...

Страница 142: ...ether with a clean lens cleaning cloth Polish again with a dry one If smears occur when cleaning lenses replace the cloth Smears are the first indication of a dirty cloth 12 3 Cleaning the exterior of...

Страница 143: ...tions for UDM W15 149 A 5 Specifications SDI inputs 150 A 6 Specifications HDMI inputs 151 A 7 Specifications HDBaseT inputs 152 A 8 Specifications DisplayPort 1 2 inputs 153 A 9 Specifications SFP in...

Страница 144: ...s Motorized zoom and focus with lens memory on TLD lenses Motorized lens shift with position memory on all lenses Color correction P7 Light source Laser phosphor with inorganic phosphor wheel Light so...

Страница 145: ...t WxLxH 850 x 665 x 613 mm 33 46 x 26 18 x 24 13 inches Weight 48 kg 105lbs shipping weight from factory 61 kg 134 5 lbs Standard accessories Power cord wireless XLR wired rugged remote control Certif...

Страница 146: ...processing Embedded warp blend Processing Pulse Electronics Keystone correction Yes Integrated web server Yes CLO constant light output Standard 3D Active eye wear optional passive circular optional 2...

Страница 147: ...mmed A 3 Specifications for UDM W22 Specifications Projector type WUXGA 3 chip DLP digital projector Technology 0 96 DMDTM x3 Resolution 1 920 x 1 200 Brightness 21 000 center lumens 20 000 ansi lumen...

Страница 148: ...160 V reduced power 18 5A 200 240V 10 13 5A 50 60Hz Max power consumption 1800W nom 2400w max 230 volts ECO STBY 2W 1560W nom 1950w max 120 volts ECO STBY 2W Noise level typical at 25 C 77 F 49 dB A O...

Страница 149: ...torized lens shift with position memory on all lenses Color correction P7 Light source Laser phosphor Light source lifetime 20 000 hrs Optical dowser Digital mechanical internal Picture by picture Two...

Страница 150: ...d accessories Power cord wireless XLR wired rugged remote control Certifications Compliant with UL60950 1 and EN60950 1 complies with FCC rules regulations part 15 Class A and CE EN55032 Class A Rohs...

Страница 151: ...0 50 Hz and 60 Hz 12G SDI BarcoLink 4k Channel A only Single link 3840 x 2400 50 Hz 59 94 Hz and 60 Hz A 6 Specifications HDMI inputs For readability the video timings listed are summarized For the fu...

Страница 152: ...25 297 MHz pixel clock Color space YCbCr 4 2 2 YCbCr 4 4 4 RGB 4 4 4 Color depth 24 bpp 30 bpp 36 bpp HDCP support HDCP 1 x supported on HDBaseT Input 1 Network support Yes on HDBaseT Input 1 For fut...

Страница 153: ...2 2 YCbCr 4 4 4 RGB 4 4 4 Color depth 24 bpp 30 bpp 36 bpp Data rate support 1 62 Gbps Reduced Bit Rate RBR 2 7 Gbps High Bit Rate HBR 5 4 Gbps High Bit Rate 2 HBR2 For future release Interlaced supp...

Страница 154: ...er to display high resolution images e g 3840 x 2160 60 Hz via the DP1 2 input the quality of the cable must be adequate in addition the length of the cable can also influence the performance In case...

Страница 155: ...Hz 3G SDI Single link 1920 x 1080 50 Hz and 60 Hz 1920 x 1200 50 Hz 59 94 Hz and 60 Hz 2048 x 1080 50 Hz and 60 Hz 12G SDI Single link 3840 x 2160 50 Hz and 60 Hz 4096 x 2160 50 Hz and 60 Hz 3840 x 24...

Страница 156: ...R5911443 02 UDM 156 Specifications...

Страница 157: ...B 3 Overview video timings HDMI 2 0 inputs 160 B 4 Overview video timings DisplayPort 1 2 inputs 162 B 5 Overview video timings HDBaseT inputs 164 About this chapter This chapter contains the tables w...

Страница 158: ...r Network Inputs 3G SDI Inputs DisplayPort 1 2 Inputs HDBaseT HDMI 1 4 Inputs 640 x 480 60 X X X 720 x 480 60 X X 720 x 576 50 X X 800 x 600 60 X X X 1024 x 768 60 X X X 1280 x 720 24 X X 1280 x 720 2...

Страница 159: ...2160 60 X X X 3840 x 2400 50 X X 3840 x 2400 60 X X 4096 x 2160 24 X X X 4096 x 2160 25 X X X 4096 x 2160 30 X X X 4096 x 2160 50 X X X 4096 x 2160 60 X X X B 2 Overview video timings SDI Inputs Over...

Страница 160: ...10 Single Link 3840 x 2160 60 12G SDI10 Single Link 3840 x 2400 50 12G SDI BarcoLink 4k 10 Single Link 3840 x 2400 59 94 12G SDI BarcoLink 4k 10 Single Link 3840 x 2400 60 12G SDI BarcoLink 4k 10 Sin...

Страница 161: ...op bottom 1920 x 1080 25 1920 x 1080 30 1920 x 1080 50 Side by Side SbS progressive 1920 x 1080 60 Side by Side SbS progressive 1920 x 1200 50 1920 x 1200 60 2048 x 1080 24 2048 x 1080 25 2048 x 1080...

Страница 162: ...0 120 4 Quadrant mode 2 x 2 layout Active 3D 960 x 2160 120 4 Column mode 4 x 1 layout Active 3D 960 x 2400 120 4 Column mode 4 x 1 layout Active 3D 1024x 768 60 1024 x 2160 60 4 Column mode 4 x 1 lay...

Страница 163: ...out Active 3D 1920 x 2400 60 2 Column mode 2 x 1 layout 2048 x 1080 24 2048 x 1080 25 2048 x 1080 30 2048 x 1080 48 2048 x 1080 50 2048 x 1080 60 2048 x 1080 120 4 Quadrant mode 2 x 2 layout Active 3D...

Страница 164: ...udes support of 1 1 001 x those refresh rates Video timing active pixels x active lines Vertical refresh rate Hz Available layout modes other than standard layout 1 x 1 layout 640 x 480 60 720 x 480 6...

Страница 165: ...yout 1 x 1 layout 2048 x 1080 24 2048 x 1080 25 2048 x 1080 30 2048 x 1080 48 2048 x 1080 50 2048 x 1080 60 2048 x 2160 50 2 Column mode 2 x 1 layout 2048 x 2160 60 2 Column mode 2 x 1 layout 2560 x 1...

Страница 166: ...R5911443 02 UDM 166 Video timing tables...

Страница 167: ...167 C 1 DMX chart input board positioning 168 C 2 DMX chart Basic 168 C 3 DMX chart Extended 169 R5911443 02 UDM DMX chart C...

Страница 168: ...nd 24 31 Activate third profile preset If held for 1 second 32 39 Activate fourth profile preset If held for 1 second 40 47 Activate fifth profile preset If held for 1 second 48 55 Activate sixth prof...

Страница 169: ...00 on input 3 Contrast 0 255 128 Adjusts the contrast between 0 and 100 on input 4 Input selection 0 7 0 No function 8 15 Activate first profile preset If held for 1 second 16 23 Activate second profi...

Страница 170: ...oom adjustment14 9 Lens shift vertical MSB 0 255 128 Set coarse lens shift in vertical direction 10 Lens shift vertical LSB 0 255 128 Set fine lens shift in vertical direction 11 Lens shift horizontal...

Страница 171: ...t source on If held for 5 seconds 88 95 Power down Light source off if held for 5 seconds 96 255 Reserved for future functionality 14 Various 0 7 0 Reserved for future functionality 8 15 Calibrate len...

Страница 172: ...R5911443 02 UDM 172 DMX chart...

Страница 173: ...ntains important compliance information related to the WiFi and GSM module Regulatory information for US and Canada can be accessed in the OSD of the projector In order access it select System Setting...

Страница 174: ...two conditions 1 This device may not cause harmful interference and 2 This device must accept any interference received including interference that may cause undesired operation of the device FCC RF R...

Страница 175: ...nt doit tre install et utilis avec un minimum de 20 cm de distance entre la source de rayonnement et votre corps Avis d industrie Canada Le pr sent appareil est conforme aux CNR d Industrie Canada app...

Страница 176: ...R5911443 02 UDM 176 WiFi GSM compliance information...

Страница 177: ...osal information 178 E 2 Turkey RoHS compliance 178 E 3 China RoHS compliance 178 E 4 Taiwan RoHS compliance 180 E 5 Contact information 181 E 6 Production address 181 R5911443 02 UDM Environmental in...

Страница 178: ...y the Directive 2006 66 EC which must be collected and disposed of separately from municipal waste If the battery contains more than the specified values of lead Pb mercury Hg or cadmium Cd these chem...

Страница 179: ...terials for this part is below the limit requirement in GB T 26572 X GB T 26572 X Indicates that this toxic or hazardous substance contained in at least one of the homogeneous materials used for this...

Страница 180: ...External cables Internal wiring Optical lenses Lens holder Nuts bolts screws washers fasteners Laser Power Supply Unit Fan Remote Control Pump 1 0 1 wt 0 01 wt Note 1 Exceeding 0 1 wt and exceeding 0...

Страница 181: ...s contact information To find your local importer contact Barco directly or one of Barco s regional offices via the contact information given on Barco s web site www barco com E 6 Production address F...

Страница 182: ...R5911443 02 UDM 182 Environmental information...

Страница 183: ...onnector to be used The standard specifies component connection standards with regard to computer interface It is also called RS 232 C which is the third version of the RS 232 standard and is function...

Страница 184: ...resses from a central point and automatically sends a new IP address when a computer is plugged into a different place in the network IP Internet Protocol The network layer of TCP IP Required for comm...

Страница 185: ...GB adjustment 99 Brightness 62 C CE Certification 20 Clean Exterior 139 Filters 139 Lens 139 Cleaning Exterior 142 Lens 141 Communication 39 DMX 41 Introduction 40 IR control Broadcast address 118 IR...

Страница 186: ...173 GSM activation 124 GUI Image 61 Installation 75 Introduction 49 Navigation 51 Overview 50 Test Patterns 52 H Hazard Distance 16 19 Modifying optics 20 Hazardous Chemicals 15 HDBaseT inputs Specifi...

Страница 187: ...108 Profiles Introduction 108 Preset variables 107 Projector Components 24 Orientation 24 Projector control DMX 122 Network Introduction 114 XLR connector 123 Pulse RCU 31 Remote Control Unit 31 Q Qu...

Страница 188: ...o 29 Start Image projection 27 Status Light 43 Status menu 137 Overview 138 Stealth mode 127 Stitched layouts 56 Switching off 29 Switching on 26 Switching to standby 29 System Settings 113 125 Advanc...

Страница 189: ...2 UDM List of tools Clean cotton cloth Clean micro fiber lens cleaning cloth e g Toraysee cloth s Compressed air Lens cleaner e g ZEISS lens cleaner Purosol or other water based lens cleaner products...

Страница 190: ...Barco NV Beneluxpark 21 8500 Kortrijk Belgium Registered office Barco NV President Kennedypark 35 8500 Kortrijk Belgium www barco com R5911443 02 2020 02 21...

Отзывы: