27
Preparations
Others
Operation
26
Normal
→
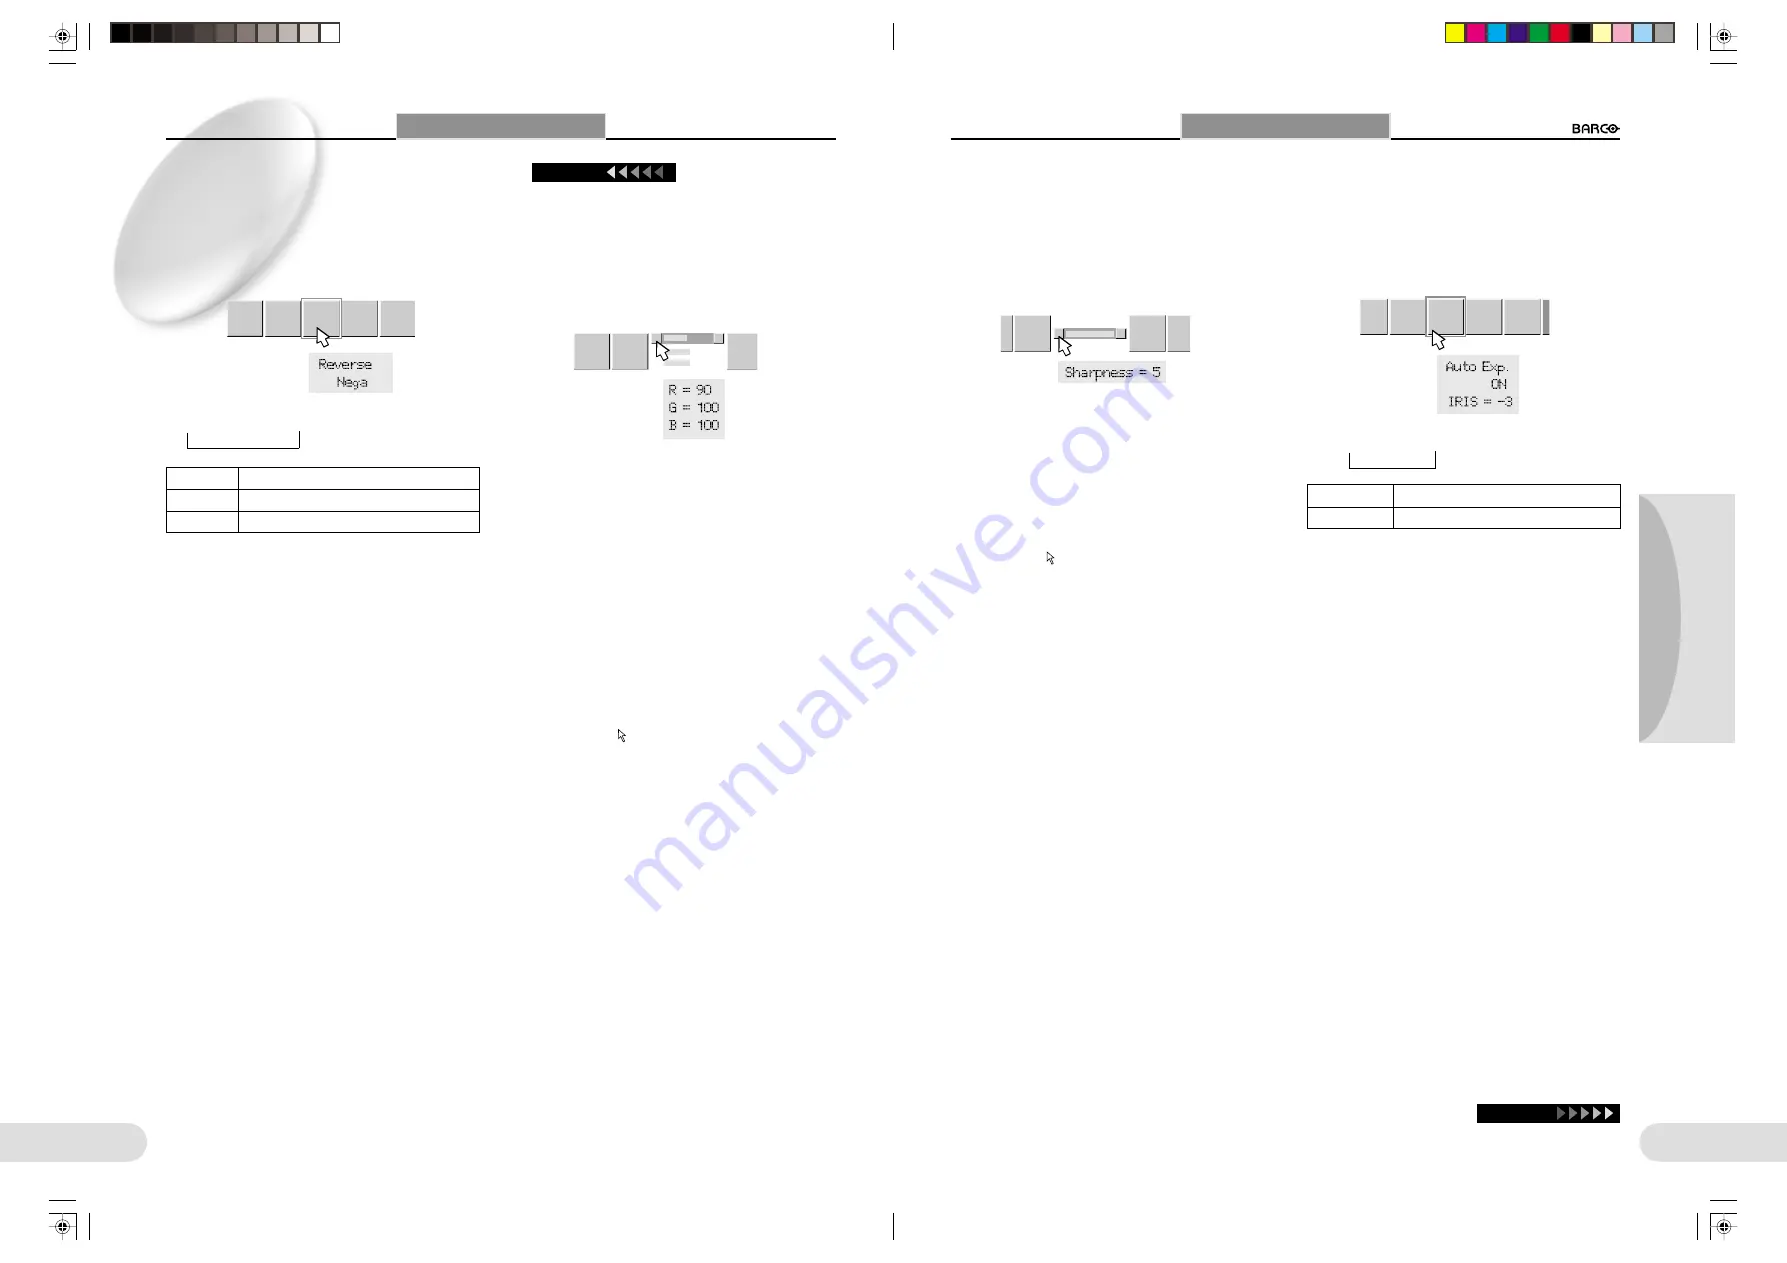
Nega
→
BlueBack
L
Reverse
-------------------------------------------------------------
To reverse the image.
L
Color
-----------------------------------------------------------------
To adjust the colors.
You can independently adjust R (red), G (green), and B (blue)
in 21 steps each in the range of 50 to 150.
→
WBset
Tone
Reverse
Color
Sharp-
ness
Tone
Reverse
Iris
A/M
Using Menus
○ ○ ○ ○ ○ ○ ○ ○ ○ ○ ○ ○ ○ ○ ○ ○ ○ ○ ○ ○ ○ ○ ○ ○ ○ ○ ○ ○ ○ ○ ○ ○ ○ ○ ○ ○ ○ ○ ○ ○ ○
Items to be Adjusted Using Menus
Continued
L
Sharpness
---------------------------------------------------------
To adjust the image contours, which can be adjusted in 6
steps.
L
Iris A/M
------------------------------------------------------------
To alternately select automatic and manual iris adjustments.
se
Color
Fit/
Over
Chang
Point
Color
Sharp-
ness
Iris
A/M
Fit/
Over
Change
Pointer
S
Using Menus
Auto Exp. ON
→
Auto Exp. OFF
Auto Exp.ON
To activate the Auto Iris function
Auto Exp.OFF
To deactivate the Auto Iris function
Continue
→
Using the mouse
1 Left-click the “Reverse” menu icon.
Each left click changes the setting as shown above.
2 Click the right mouse button to register your
adjustment.
From the operation panel
1 Press either the ZOOM W or T button.
Each press of the ZOOM W or T button changes the
setting as shown above.
2 Press the FREEZE button to register your ad-
justment.
The same adjustment can be performed us-
ing the REVERSE button.
Using the mouse
1 Left-click the adjustment bar of the color to
be adjusted.
Buttons appears at the left and right ends of the adjust-
ment bar for the selected color.
2 Left-click the left or right button at the ends
of the adjustment bar.
The value set on the adjustment bar changes.
3 To adjust other colors, repeat step 1 and 2.
4 Click the right mouse button to register your
adjustment.
5 Move the
pointer anywhere off the adjust-
ment bar and click the left mouse button.
The adjustment bar disappears.
From the operation panel
1 Press the FOCUS
8
or
9
button to select the
color to be adjusted.
Buttons appears at the left and right ends of the adjust-
ment bar for the selected color.
2 Press either the ZOOM W or T button to ad-
just the color.
The value set on the adjustment bar changes.
3 To adjust other colors, repeat step 1 and 2.
4 Press the FREEZE button to register your ad-
justment.
5 Press the FREEZE button.
The adjustment bar disappears.
Using the mouse
1 Left-click the left or right button at the ends
of the adjustment bar.
The value set on the adjustment bar changes.
2 Click the right mouse button to register your
adjustment.
3 Move the
pointer anywhere off the adjust-
ment bar and click the left mouse button.
The adjustment bar disappears.
From the operation panel
1 Press either the ZOOM W or T button.
The value set on the adjustment bar changes.
2 Press the FREEZE button to register your ad-
justment.
3 Press the FREEZE button.
The adjustment bar disappears.
Using the mouse
1 Left-click the “Iris A/M” menu icon.
Each left click changes the setting as shown above.
2 Click the right mouse button to register your
adjustment.
From the operation panel
1 Press either the ZOOM W or T button.
Each press of the ZOOM W or T button changes the
setting as shown above.
2 Press the FREEZE button to register your ad-
justment.
Normally select Auto. In Auto mode, adjustment in the
range of ±3 steps can be performed. Should the re-
flection from an object disturb proper imaging with
the Auto setting, select Manual and adjust with the
BRIG/– buttons on the operation panel.
When you press the BRIG button, the lens
aperture becomes wider for a brighter picture.
When you press the BRIGHTNESS – button, the lens
aperture becomes narrower for a darker picture.
Normal
For normal pictures
Nega
For black-and-white negative pictures
BlueBack
For blue background
**BARCO 018-037(E)
2000.7.18, 8:19 PM
26-27
Содержание R9840700
Страница 5: ...BARCO E 2000 7 18 8 12 PM 44 45...