2. Installation Guidelines
C
AUTION
:
While starting up the projector, the electronics detect if a lamp is installed. If no lamp is installed,
it is not possible to start up the projector.
Check the manometer on regular times, at least when replacing the lamp. The pressure should be ± 1 bar.
2.7
Transporting the projector
What to do?
1. Switch the projector to stand by.
2. Let cool down the projector for at least 15 minutes.
3. Switch off the projector and unplug from the wall outlet.
4. On the input side of the projector, remove the side by turning the 3 bolts a quarter turn counter clockwise (image 2-7).
5. Take off the side cover
6. Loosen the retaining bolts of the lamp (image 2-8).
7. Pull out the lamp casing. Wear heat resistant gloves, the case can be hot.
8. Pack the lamp casing into the original lamp packing and transport it vertically.
2.8
Battery Insertion in the Remote Control
Where to
fi
nd the batteries
The batteries are not placed in the remote control to avoid remote control operation in its package, resulting in a shorter battery life
time.
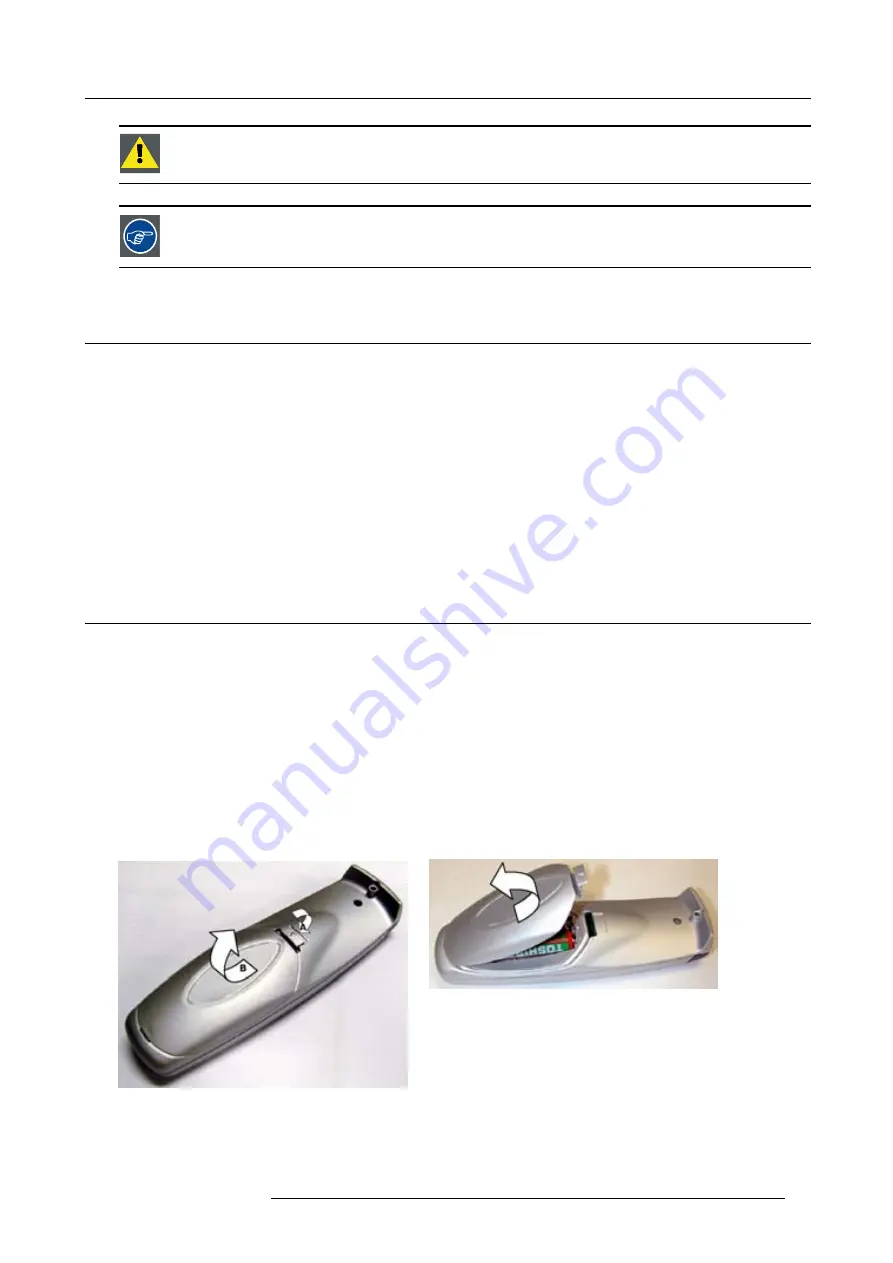
How to install the batteries
1. Push the cover tab (A) with the
fi
ngernail a little backwards and pull upwards the cover top (B). (image 2-10)
2. Slide the cover forwards to remove. (image 2-11)
3. Push the battery body towards the spring and lift it up to remove. (image 2-12)
4. Insert two AA size batteries, making sure the polarities match the + and – marks inside the battery compartment (image 2-12).
5. Insert the lower tab of the battery cover in the gap at the bottom of the remote control, and press the cover until it clicks in place
Image 2-10
Battery cover unlock
Image 2-11
Battery cover removal
R5976690 XLM H25 25/05/2009
17
Содержание R9010100
Страница 1: ...XLM H25 Owner s manual R9010100 R5976690 06 25 05 2009 ...
Страница 8: ...Table of contents 4 R5976690 XLM H25 25 05 2009 ...
Страница 26: ...2 Installation Guidelines 22 R5976690 XLM H25 25 05 2009 ...
Страница 40: ...3 Connections 36 R5976690 XLM H25 25 05 2009 ...
Страница 50: ...4 Getting Started 46 R5976690 XLM H25 25 05 2009 ...
Страница 106: ...7 Installation 102 R5976690 XLM H25 25 05 2009 ...
Страница 126: ...B Standard Source Set up files 122 R5976690 XLM H25 25 05 2009 ...
Страница 136: ...Index 132 R5976690 XLM H25 25 05 2009 ...


