


6-17
5975688 BARCOVISION 1609S 131097
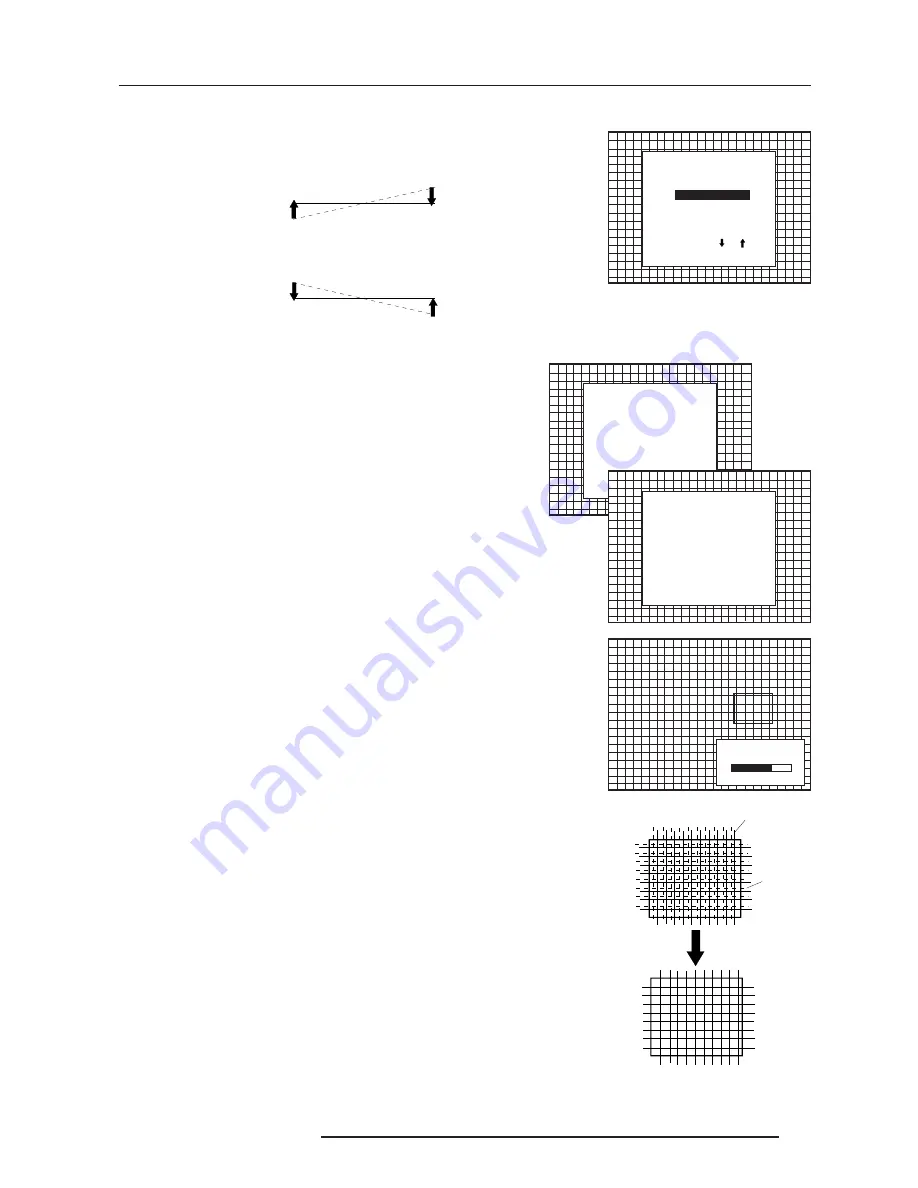
Random Access Adjustment Mode
Select with or
then <ENTER>
<EXIT> to return.
COARSE CONVERGENCE
Select with or
then <ENTER>
<EXIT> to return.
HORIZONTAL SIDES
VERTICAL CORNERS
Select with or
then <ENTER>
<EXIT> to return.
CONVERGENCE
Select with or
then <ENTER>
<EXIT> to return.
COARSE ADJUSTMENT
RED ON GREEN
BLUE ON GREEN
FINE ADJUSTMENT
GREEN ONLY
RED ON GREEN
BLUE ON GREEN
CONVERGENCE
SEL : select area
using
arrow keys
ADJ : adjust area
using
arrow keys
Toggle between
SEL and ADJ
with <ENTER>
<ENTER> continue
<EXIT> to return
70
red image
green image
Vertical corners
Highlight 'Vertical corners' and press
ENTER
to start the adjustment.
To make a coarse adjustment of the red or blue horizontal lines in zone
10, 14, 18 and 22 simultaneously.
Hint :
- Adjust until the red or the blue horizontal lines are on the green lines
or as close as possible to the green lines.
- During these adjustments, the horizontal convergence adjustments
in zones 10 to 25 will be set to midposition (barscale 50).
Fine Convergence Adjustment.
Use these controls after coarse convergence adjustment to optimize
the convergence of the red and blue image on the green image.
Use the control disk to make horizontal or vertical convergence
adjustments in the selected zone and then press
ENTER
to move the
box to another zone or
EXIT
to return to the Convergence menu.
ENTER
toggles arrow keys between zone selection and zone
adjustment .
EXIT
returns to convergence menu.
Note : The green convergence adjustments can be added as an
option. When these are available, always start with 'green only'. This
option will also be indicated on the convergence menu.
Highlight first 'Green only' when available with the control disk and
press
ENTER
to display the convergence adjustment menu.
Continue with red on green and blue on green.
CONVERGE
ADJUSTMENT
Содержание R9002240
Страница 1: ...VISION 1609s R9002240 R9002249 OWNER S MANUAL...
Страница 2: ......
Страница 3: ...BARCO PROJECTION SYSTEMS VISION 1609s R9002240 R9002249 Date 131097 Art No R5975688 OWNER S MANUAL...
Страница 40: ...6 18 5975688 BARCOVISION 1609S 131097 Random Access Adjustment Mode...
Страница 56: ...Orbiting A 4 5975268 BARCOGRAPHICS 1209s 010797...


