


2. Display Controller installation
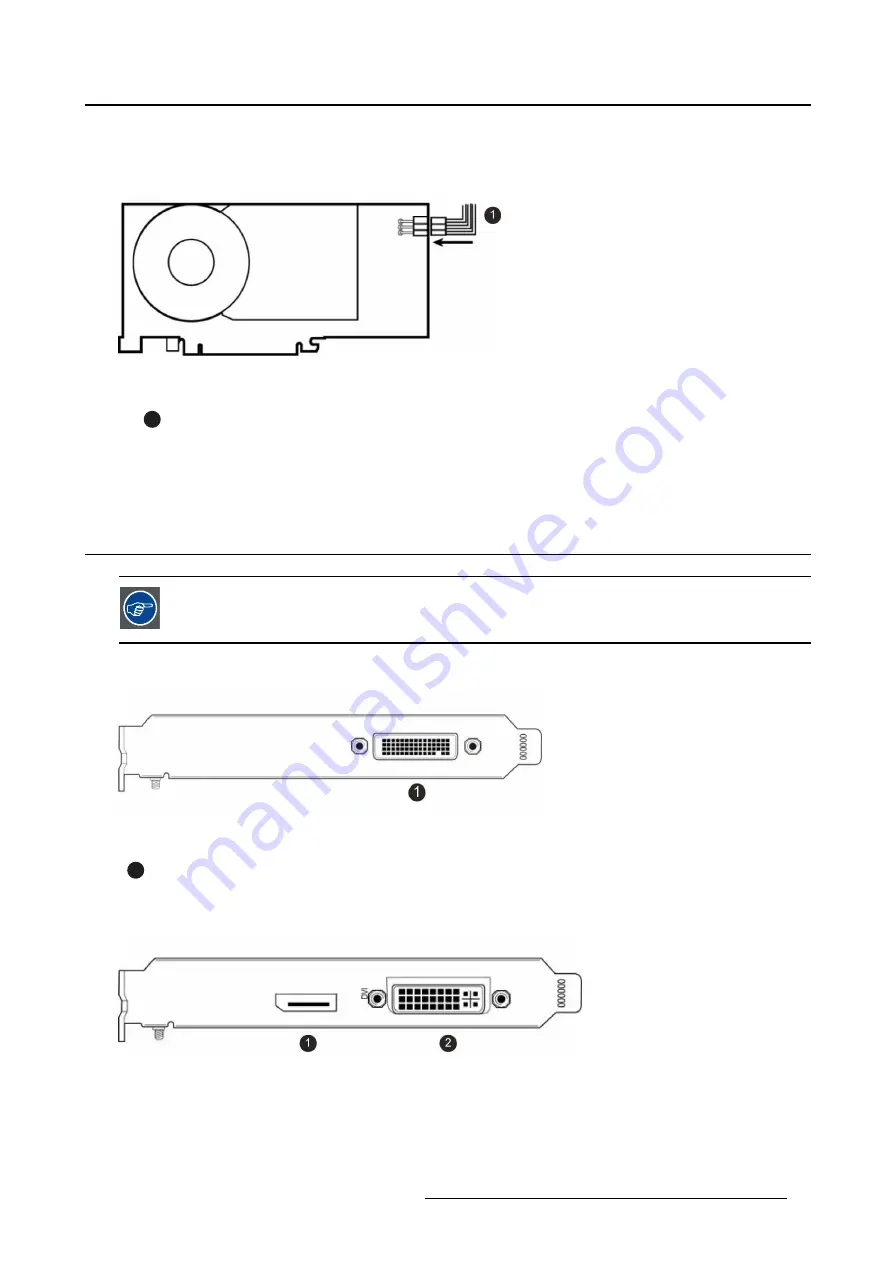
8. Connect the power cable to the 6-pin power connection on the Display Controller. Make sure the cables
are not interfering with anything inside the computer (for example, a cooling fan).
Tip:
This step only applies to the MXRT-7400, MXRT-7500 & MXRT-7600.
Image 2-2
Power connection for the MXRT-7400, MXRT-7500 & MXRT-7600 controllers
1
6-pin graphics controller power cable
9. Screw in or
fi
rmly fasten the Display Controller. Replace and secure the computer cover.
2.4
Connecting your Barco Displays
For a detailed description of the display installation and signal connection, please refer
to the Display User Guide.
IO-Panel for the Barco MXRT-1450 & MXRT-1451
Image 2-3
MXRT-1450 & MXRT-1451
1
DMS-59 connector provides DVI-I / Head 1 & Head 2 output connections through included the
Y-adapter cable.
IO-Panel for the Barco MXRT-2400 & MXRT-2500
Image 2-4
MXRT-2400 & MXRT-2500
K5905271 DISPLAY CONTROLLER 27/02/2017
7
Содержание MXRT-1450
Страница 1: ...Display Controller User Guide Windows 7 Windows 8 1 and Windows 10 K5905271 11 27 02 2017...
Страница 6: ...1 Welcome 4 K5905271 DISPLAY CONTROLLER 27 02 2017...
Страница 14: ...2 Display Controller installation 12 K5905271 DISPLAY CONTROLLER 27 02 2017...
Страница 20: ...3 Driver and software installation 18 K5905271 DISPLAY CONTROLLER 27 02 2017...
Страница 40: ...5 Driver and software features 38 K5905271 DISPLAY CONTROLLER 27 02 2017...