


R5906852-01
F80 series
76
Do not forget to disable the
Show lines
button after you achieved the desired blend zone.
Example of the use of blending
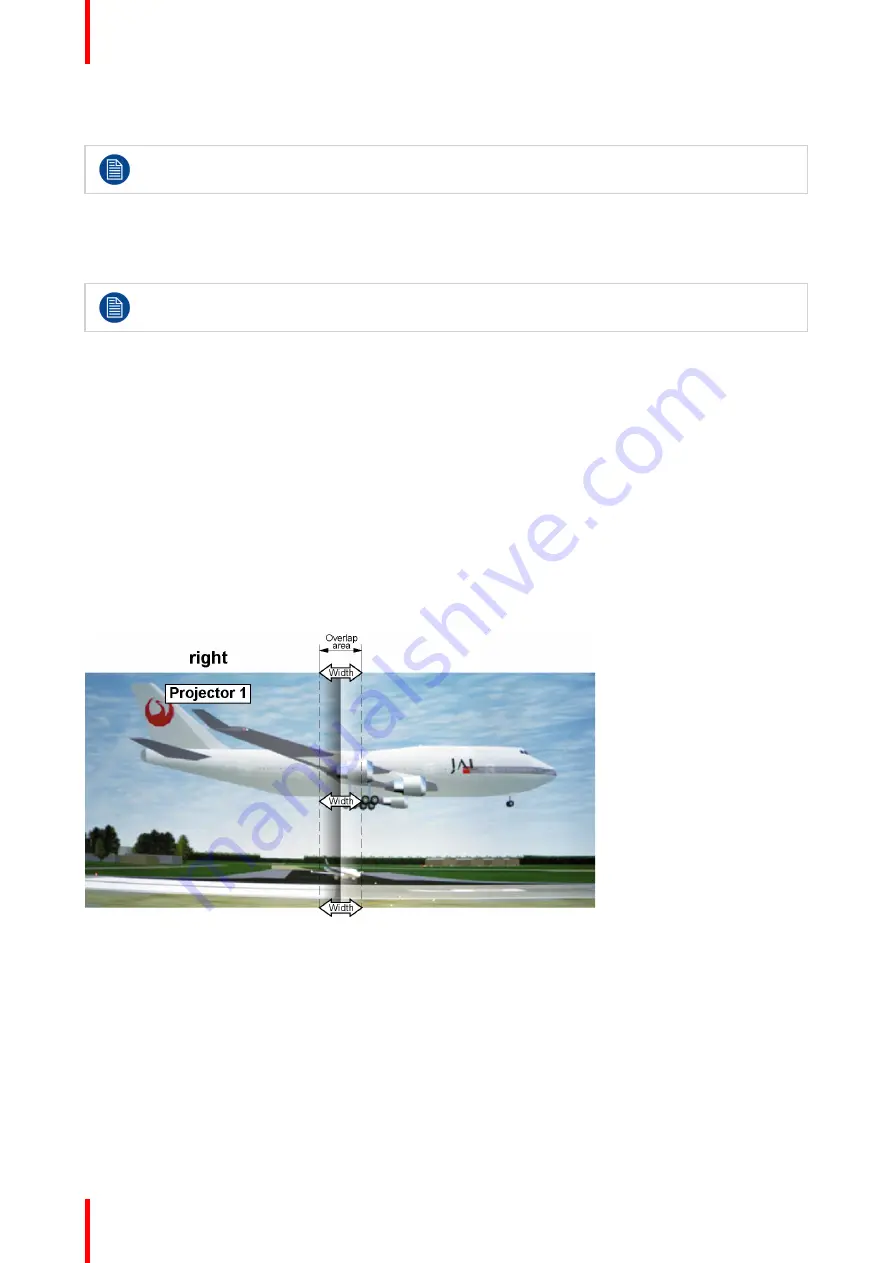
When projecting an image with 2 or more projectors, there is always an small overlap that should be corrected
by using the blending function.
In order to obtain a satisfying result for the Blend function, the overlap / mask zone are
recommended to be at least 10% of the picture width.
The basic principle is that the overlap setup in the source shall correspond with the mask width setup for the
projector. That means that if the overlap zone for the source is set to 500 pixels, the width of the mask zone for
the projector also must be set to 500 pixels.
First step is to align the image from the projectors as accurate as possible in a mechanical way, meaning
without any optical corrections. At the same time, establish an overlap in the pictures between the two
screens.
Then adjust the remaining irregularities by using the shift and warp features in the projectors to obtain the last
fine tuning of the alignment.
Enable blending and activate Show lines.
First set the mask width for the right edge of the first projector. Enter a width value equal to the overlap area
(width1).
Repeat for the left edge of the second projector.
Adjust the offset to cut the image on each side (masking).
Image 8-36: Set up for projector 1
Содержание F80 series
Страница 1: ...ENABLING BRIGHT OUTCOMES User Manual F80 series...
Страница 8: ...R5906852 01 F80 series 8...
Страница 21: ...21 R5906852 01 F80 series Remote Control Unit 2...
Страница 24: ...R5906852 01 F80 series 24 Remote Control Unit...
Страница 32: ...R5906852 01 F80 series 32 Input Communication...
Страница 44: ...R5906852 01 F80 series 44 Getting Started...
Страница 45: ...45 Overview Overview Navigation Test Patterns R5906852 01 F80 series Graphic User Interface GUI 5...
Страница 82: ...R5906852 01 F80 series 82 GUI Installation...
Страница 98: ...R5906852 01 F80 series 98 Status menu...
Страница 101: ...101 R5906852 01 F80 series Specifications A...
Страница 115: ...R5906852 01 F80 series 115 Environmental information...


