2. General
2.5
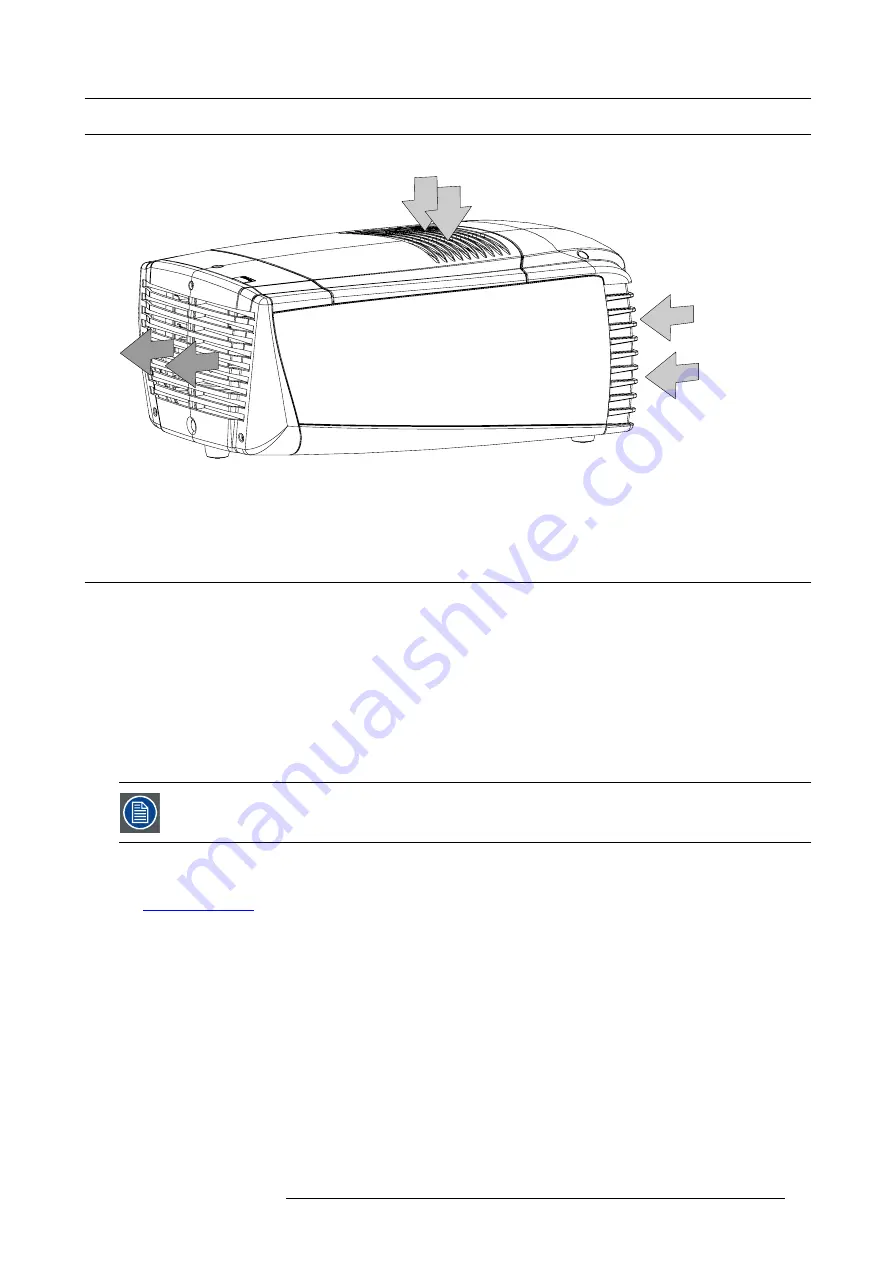
Projector air inlets and outlets
Air inlets and outlets
Image 2-8
The CLM R10+ has 2 inlet channels and one air outlet. The air outlet is located at the rear of the projector. The air inlets are located
at the front and top of the projector.
2.6
Free download of Projector Toolset
About Projector Toolset
Projector Toolset is a software tool to set up, con
fi
gure, manage and control Barco projectors.
The concept of this Projector Toolset software is modular. The basic package can be extended with several optional device plug-in
modules, now and in the future available.
The Projector Toolset software works with con
fi
gurations that can be loaded. Within a con
fi
guration, different snapshots can be
taken. A snapshot represents a current state of a con
fi
guration and can be reloaded to return to this typical state. These terms will
be used through the complete software.
Projector Toolset is a stand-alone application that runs on a Java Virtual Machine and that does not require extra services to run.
Several con
fi
gurations can be controlled simultaneously. Even when the con
fi
gurations are connected via different ways.
Projector Toolset is only available in a download version, no CD can be ordered.
Where to
fi
nd the download
fi
le(s)
The program and all necessary plug-ins, as well as the Reference manual can be downloaded for free from Barco’s Partnerzone,
URL
https:\\my.barco.com
. Registration is necessary.
If you are not yet registered, click on Partnerzone registration and follow the instructions. With the created login and password, it is
possible to enter the partnerzone where you can download the Projector Toolset software and the device plug-in updates as well as
the corresponding reference manual.
When downloading the complete Projector Toolset, this software contains already the latest device plug-ins. When you already have
the latest core version of Projector Toolset, it is possible to download only device plug-in updates from the same web site location.
As Projector Toolset is a stand alone application, it is not necessary to install any other software. A Java virtual machine is included
with this download.
Installation
Download
fi
rst the reference manual (Part number: R59770052) and follow the installation instructions as written in this manual.
R59770021 CLM R10+ 15/03/2010
17
Содержание CLM R10+ R9050100
Страница 1: ...CLM R10 Users manual R9050100 R90501001 R59770021 10 15 03 2010 ...
Страница 14: ...1 Safety 10 R59770021 CLM R10 15 03 2010 ...
Страница 22: ...2 General 18 R59770021 CLM R10 15 03 2010 ...
Страница 35: ...3 Physical installation Skew Image 3 28 Skew adjustment R59770021 CLM R10 15 03 2010 31 ...
Страница 36: ...3 Physical installation 32 R59770021 CLM R10 15 03 2010 ...
Страница 48: ...5 Connections 44 R59770021 CLM R10 15 03 2010 ...
Страница 64: ...7 Start up of the Adjustment mode 60 R59770021 CLM R10 15 03 2010 ...
Страница 74: ...8 Input menu 70 R59770021 CLM R10 15 03 2010 ...
Страница 115: ...10 Layout menu Image 10 61 Image 10 62 Image 10 63 Image 10 64 R59770021 CLM R10 15 03 2010 111 ...
Страница 116: ...10 Layout menu 112 R59770021 CLM R10 15 03 2010 ...
Страница 158: ...13 Projector control 154 R59770021 CLM R10 15 03 2010 ...
Страница 172: ...14 Service menu 168 R59770021 CLM R10 15 03 2010 ...
Страница 186: ...16 Servicing 182 R59770021 CLM R10 15 03 2010 ...
Страница 195: ...17 Projector covers removal and installation Image 17 18 Secure the lamp door R59770021 CLM R10 15 03 2010 191 ...
Страница 196: ...17 Projector covers removal and installation 192 R59770021 CLM R10 15 03 2010 ...
Страница 204: ...C DMX Chart 200 R59770021 CLM R10 15 03 2010 ...
Страница 210: ...D Specifications 206 R59770021 CLM R10 15 03 2010 ...
Страница 216: ...E Troubleshooting 212 R59770021 CLM R10 15 03 2010 ...
Страница 222: ...F Mounting optional Carry handle 218 R59770021 CLM R10 15 03 2010 ...
Страница 224: ...G Order info 220 R59770021 CLM R10 15 03 2010 ...
Страница 232: ...Index 228 R59770021 CLM R10 15 03 2010 ...


