background image

20

ACS-2048  •  User’s Guide

2.  Hardware Orientation

ACS-2048 Front Panel

aáëéä~ó=pÉÅíáçå

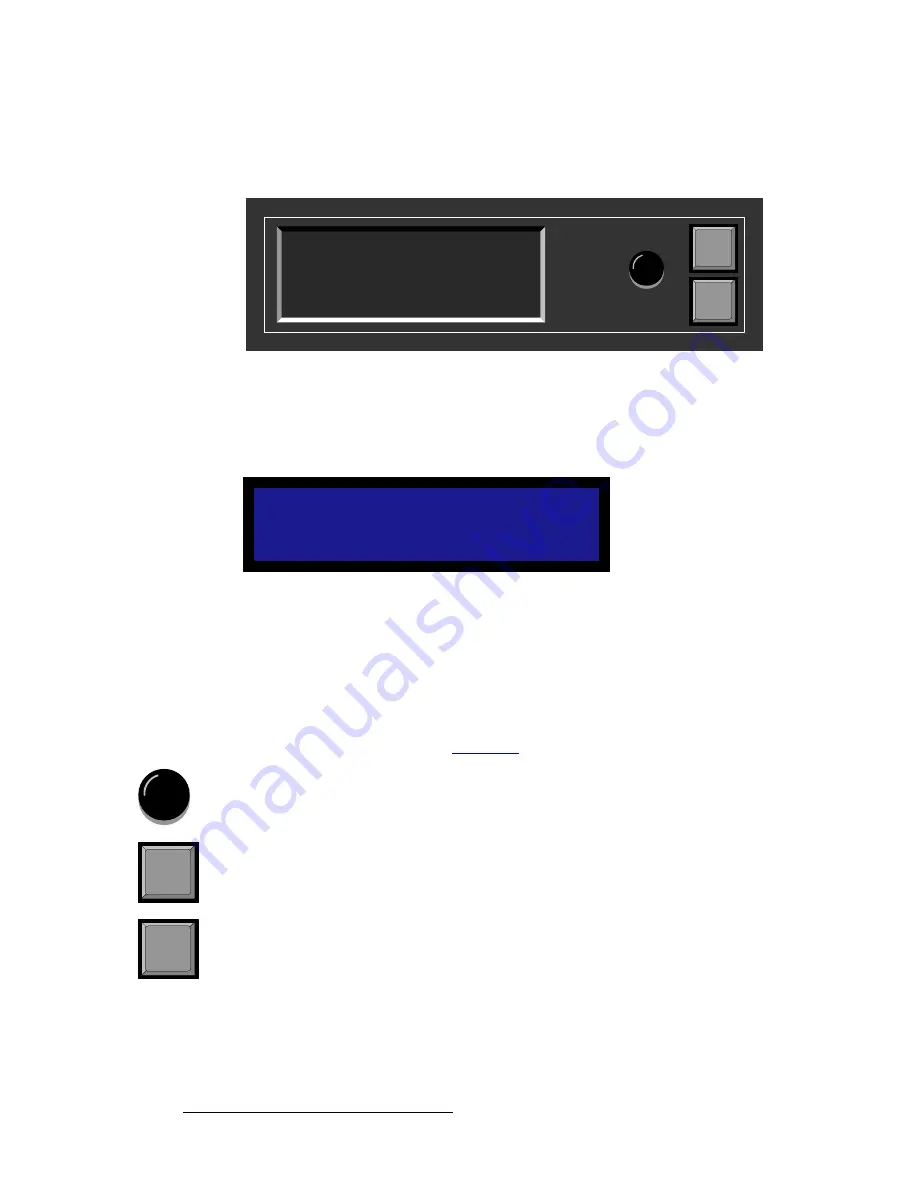
The figure below illustrates the 

Display Section

:

Figure 2-2.  

Display Section with Main Menu

Descriptions of each button and control are provided below:

The 

Menu Display 

is a 4 line x 20 character Vacuum Fluorescent Display (VFD) 

that shows all ACS-2048 menus and sub-menus.  Brightness is adjustable.  

Figure 2-3.  

Sample Menu Display (Main Menu)

Please note:

~

The top line names the current menu, in all capital letters.

~

The navigation cursor (

>

) in the left-hand column indicates the current 

line on which action can be taken.

~

The double arrow (

>>

) indicates that a sub-menu is available.

In Chapter 4, refer to the “

Menu Tree

” section on page 35 for menu details.

ADJUST

 — use the 

Adjust Knob

 to scroll through all system menus.  

~

Turn the knob counter-clockwise (

CCW

) to scroll down.

~

Turn the knob clockwise (

CW

) to scroll up.

SEL

 — press to enter a sub-menu, change a parameter, accept a parameter, or to 

answer “

Yes

” to certain menu queries.

ESC

 — press to exit a menu without making changes, cancel an operation, or to 

answer “

No

” to certain menu queries.  Each press takes you back up the menu 

tree by one level.  

A C S - 2 0 4 8   M A I N   M E N U
> I n   A u t o   A c q u i r e

O N

I n p u t

> >

O u t p u t

> >

Adjust

ACS-2048 MAIN MENU
> In Auto Acquire
   Input

Output


ON

>>
>>


SEL


ESC


SEL


ESC

Содержание ACS-2048

Страница 1: ...rëÉêÛë dìáÇÉ pJOMQU Manual 26 0603000 00 Revision 02 ...

Страница 2: ...rference in which case the user will be responsible for correcting any interference dì ê åíÉÉ åÇ çãéÉåë íáçå Barco provides a guarantee relating to perfect manufacturing as part of the legally stipulated terms of guarantee On receipt the purchaser must immediately inspect all delivered goods for damage incurred during transport as well as for material and manufacturing faults Barco must be informe...

Страница 3: ...e complied with by the customer qê ÇÉã êâë Brand and product names mentioned in this manual may be trademarks registered trademarks or copyrights of their respective holders All brand and product names mentioned in this manual serve as comments or examples and are not to be understood as advertising for the products or their manufactures çãé åó ÇÇêÉëë Barco Media and Entertainment 11101 Trade Cent...

Страница 4: ...eration dêçìåÇáåÖ íÜÉ mêçÇìÅí This product is grounded through the grounding conductor of the power cord To avoid electrical shock plug the power cord into a properly wired receptacle before connecting to the product input or output terminals A protective ground connection by way of the grounding conductor in the power cord is essential for safe operation rëÉ íÜÉ mêçéÉê mçïÉê çêÇ Use only the powe...

Страница 5: ...nce servicing instructions in the literature accompanying the appliance sboqfppbjbkq Le point d exclamation dans un triangle equilatéral signale à alerter l utilisateur qu il y a des instructions d operation et d entretien tres importantes dans la litérature qui accompagne l appareil slopf eq Ein Ausrufungszeichen innerhalb eines gleichwinkeligen Dreiecks dient dazu den Benutzer auf wichtige Bedie...

Страница 6: ...ó The table below lists the changes to the ACS 2048 User s Guide Table 0 1 Change History Rev Date ECP Description Approved By 01 9 6 07 549078 ACS 2048 User s Guide R Pellicano 02 10 15 08 562625 Updates for code version 1 02 R Pellicano ...

Страница 7: ... K K K K K K K K NT In This Chapter 17 ACS 2048 Front Panel 18 Display Section 20 Inputs Section 21 ACS 2048 Rear Panel 23 Ü éíÉê P fåëí ää íáçå K K K K K K K K K K K K K K K K K K K K K K K K K K K K K K K K K K K K K K K K K K OR In This Chapter 25 Safety Precautions 26 Unpacking and Inspection 26 Site Preparation 26 Cable and Adapter Information 26 Rack Mount Installation 27 Power Installation ...

Страница 8: ... Format 53 Output Mode 53 Gamma 54 Test Pattern 54 Output Adjust 55 Save Output Config 56 System Menu 57 Trans Time 57 VFD Brightness 58 Ethernet 58 EDID DVI Input Format 60 DVI Cable Equalization 62 Temperature 62 User Preference 63 File Association 64 Diagnostics 65 Save System Config 65 Status Menu 67 Software Version 68 Factory Reset 68 Using Inputs 69 Understanding Backlighting 69 Input Selec...

Страница 9: ...Specifications 85 Agency Specifications 85 Pinouts 86 Analog 15 pin D Connector 86 DVI I Connector Pinouts 87 Ethernet Connector 88 Mini DIN Connector 88 Input Format Table 89 ééÉåÇáñ _ oÉãçíÉ çåíêçä mêçíçÅçäK K K K K K K K K K K K K K K K K K K K K K K K K K K K K K VP In This Appendix 93 Communicating with ACS 2048 93 Command Protocol 94 Command Responses 94 Query Options 94 IBRT 94 Error Codes ...

Страница 10: ...5 SAVE 105 SELMODE 105 SUBNET 106 TEMP 106 TRNTIME 106 VER 106 VFDBRT 106 ééÉåÇáñ çåí Åí fåÑçêã íáçå K K K K K K K K K K K K K K K K K K K K K K K K K K K K K K K K KNMT In This Appendix 107 Warranty 107 Return Material Authorization RMA 107 Contact Information 108 fåÇÉñ K K K K K K K K K K K K K K K K K K K K K K K K K K K K K K K K K K K K K K K K K K K K K K K K K K K KNMV ...

Страница 11: ... Hardware Orientation on page 17 provides detailed diagrams of the system s front and rear panels Chapter 3 Installation on page 25 provides comprehensive system installation instructions Chapter 4 Operation on page 31 provides menu tress plus comprehensive system operating instructions Chapter 5 Upgrading Software on page 73 outlines procedures for upgrading system software components Appendix A ...

Страница 12: ...åÇ fåÇÉñ Use the Table of Contents bookmarks to navigate a desired topic Click any item to instantly jump to that section of the guide You can also use the Index to jump to specific topics within a chapter Each page number in the Index is a hyperlink çåîÉåíáçåë The following conventions are used throughout this guide The symbol denotes an operations procedure The symbol S denotes an example Entrie...

Страница 13: ...ing the installation or operation of the ACS 2048 system please consult with the factory Refer to Appendix C Contact Information on page 107 for contact details cÉ íìêÉë Major features of the ACS 2048 system are listed below Supports universal inputs HD SDI SD SDI DVI Analog Composite and S Video All inputs support standard interlaced sources and all input connectors are located on the front panel...

Страница 14: ...the Input Menu section on page 43 for information about this feature File Association Menu A File Association menu has been added to the System Menu that enables users to associate an input configuration file with each of the eight inputs This function tells the system which file to use when an input is selected from the front panel In Chapter 4 refer to the File Association section on page 64 for...

Страница 15: ...Ray player and the digital cinema projector The source device queries the display to ensure that the equipment is HDCP compliant before video is shown Note that non HDCP equipment such as PCs will work with any DVI compliant display but HDCP compliant equipment only shows content on HDCP compliant displays Please note the following important points When an HDCP compliant device is connected to the...

Страница 16: ...d RGBHV sources 1 x composite for composite NTSC or PAL video sources e g DVD 1 x S Video for encoded NTSC or PAL Y C or S Video sources 1 x Aux not currently implemented In Chapter 2 refer to the Inputs Section heading on page 21 for details on all inputs ééäáÅ íáçå nìÉëíáçåë At Barco we take pride in offering unique solutions to demanding technical problems If you have application questions requ...

Страница 17: ...ï êÉ lêáÉåí íáçå få qÜáë Ü éíÉê This chapter provides detailed diagrams of the ACS 2048 s front and rear panels along with comprehensive explanations of each The following topics are discussed ACS 2048 Front Panel ACS 2048 Rear Panel ...

Страница 18: ...r s analog pins In Appendix A refer to the Input Specifications section on page 82 for specifications and the DVI I Connector Pinouts section on page 87 for pinouts 3 Input 3 Connector One DVI I connector is provided for Input 3 which corresponds to the third button in the Inputs Section This input is identical to Input 2 Input 1 SD HD SDI Input 5 Adjust Inputs Input 2 DVI RGBHV Input 3 DVI RGBHV ...

Страница 19: ...t is almost identical to Input 4 except that BNC connectors are used in place of the HD 15 connector 6 Input 6 Connector One BNC connector is provided for Input 6 which corresponds to the sixth button in the Inputs Section The input is dedicated to Composite NTSC or PAL video In Appendix A refer to the Input Specifications section on page 82 for details 7 Input 7 Connector One 4 pin mini DIN conne...

Страница 20: ...n indicates the current line on which action can be taken The double arrow indicates that a sub menu is available In Chapter 4 refer to the Menu Tree section on page 35 for menu details ADJUST use the Adjust Knob to scroll through all system menus Turn the knob counter clockwise CCW to scroll down Turn the knob clockwise CW to scroll up SEL press to enter a sub menu change a parameter accept a par...

Страница 21: ...g indicates that sync has been lost from the current on air source In this situation internal black automatically replaces the previous on air source and the source cannot be used on air until sync is restored Descriptions of each input button are provided below When any valid input is selected the button lights and the input is routed to the output using a transition through black The transition ...

Страница 22: ...e internal test pattern as the source There are two ways to use the TEST PAT button When TEST PAT is pressed the button lights and the internal test pattern is routed to the output using a CUT transition When another input is selected the system transitions to the new input When the TEST PAT button is already lit press the TEST PAT button again to toggle back to the last selected input In Chapter ...

Страница 23: ... to change the output mode and bit width In Chapter 4 refer to the Output Menu section on page 53 for details Please note In 10 bit or 12 bit mode both outputs A and B must be connected to the projector In 8 bit mode a connection is required from Connector A only HDCP encryption is provided on both connectors A and B Frame rates of 50Hz and 59 94Hz are supported In Appendix A refer to the Output S...

Страница 24: ...ion ACS 2048 Rear Panel 3 AC Power One AC Connector is provided for connecting ACS 2048 to AC The integral switch turns the chassis on and off In Appendix A refer to the Physical and Electrical Specifications section on page 84 for power details ...

Страница 25: ...des detailed instructions for installing the ACS 2048 hardware The following topics are discussed Safety Precautions Unpacking and Inspection Site Preparation Cable and Adapter Information Rack Mount Installation Power Installation Signal Installation Format Connection Table ...

Страница 26: ...x compare its contents against the packing slip If you find any shortages contact your Barco sales representative Once you have removed all the components from their packaging and checked that all the listed components are present visually inspect each unit to ensure there was no damage during shipping If there is damage notify the shipping carrier immediately for all claims adjustments páíÉ mêÉé ...

Страница 27: ... uneven weight distribution Connect the unit only to a properly rated supply circuit Reliable grounding earthing of rack mounted equipment should be maintained Rack mount the unit from the front rack ears using four rack screws not supplied Rack threads may be metric or otherwise depending upon the rack type Install the lower of the two mounting holes first mçïÉê fåëí ää íáçå Use the following ste...

Страница 28: ...olts at 15 amps must be used and must conform to IEC 227 and IEC 245 standards This cord will be fitted with a tandem prong type plug The rear panel ON OFF switch does not disconnect the unit from input AC power To facilitate disconnection of AC power the power cord must be connected to an accessible outlet near the unit Building Branch Circuit Protection For 115 V use 20 A for 230 V use 8 A Avert...

Страница 29: ...o the Input 3 connector Inputs 2 and 3 are identical This input does not support Composite S Video or YUV formats d Connect a YUV or RGBHV source to the Input 4 connector e g from a YUV or RGB source or a laptop This input does not support Composite or S Video formats Refer to the Format Connection Table section on page 30 for a table of analog input combinations e Connect a YUV or RGBHV source to...

Страница 30: ...íáçå q ÄäÉ Use the following table to connect various source formats to the ACS 2048 using the universal input connectors on Input 4 and Input 5 in conjunction with a customer supplied VGA to 5 x BNC breakout cable Please note RGB format typical devices Computers YUV or YPbPr Betacam format typical devices DVD player Betacam deck Using a customer supplied VGA to 5 x BNC breakout cable multiple inp...

Страница 31: ...sive menu descriptions and detailed operating instructions for the ACS 2048 The following topics are discussed Control Overview Power Up Initialization Quick Setup and Operations Menu Tree Quick Function Reference Using the Main Menu Using Inputs Using Test Patterns Front Panel Lockout ...

Страница 32: ... inputs from the Barco projector s Communicator touch screen but more advanced interfaces can be configured using the protocol Refer to Appendix B on page 93 for additional details mçïÉêJré fåáíá äáò íáçå After connecting power to the ACS 2048 locate the power switch on the back of the chassis and turn the power ON While the system is initializing the following messages are displayed Figure 4 1 Sy...

Страница 33: ...hat power is properly connected to the ACS 2048 In Chapter 3 Power Installation on page 27 3 Connect Ethernet Ensure that Ethernet is properly connected to the ACS 2048 Chapter 3 Signal Installation on page 29 4 Turn on power Turn on power to the ACS 2048 your projector and to all peripheral devices as required This chapter Power Up Initialization on page 32 5 Set output format Set the desired out...

Страница 34: ...13 Repeat for each input repeat steps 10 and 11 for each input that you have connected to the ACS 2048 14 Adjust system parameters As required adjust all desired system parameters such as transition time display brightness and your user preferences This chapter System Menu on page 57 15 Save system configuration After completing all system adjustments save the system configuration This chapter Sav...

Страница 35: ...Video Sync Sel Pulldown Cmp Sync Slice Output Format Output Mode Gamma Test Pattern Output Adjust Mode Type Raster Box Trans Time VFD Bright Ethernet EDID User Prefs Save Config DHCP Config Network IP M Set Static IP Set Netmask Set Gateway EDID Format Auto Input Save All Inputs Sel Menu Context TEST PAT Timing Adjust Output Auto Config Sampling Sample Phase H Total H Position H Active V Total V P...

Страница 36: ...olumn indicates the current line on which action can be taken This arrow scrolls as you rotate the knob Scrolling Turn the ADJUST knob counter clockwise CCW to scroll down Turn the ADJUST knob clockwise CW to scroll up To enter a sub menu scroll to the desired line and press SEL To change a parameter scroll to the desired line and press SEL The cursor changes to the edit cursor Use the ADJUST knob...

Страница 37: ...es to certain menu queries The ESC button is also used to answer No to certain menu queries If a value is displayed between brackets e g SMPTE this indicates that the value can not be changed Note The display itself is four lines high and the ADJUST knob is used to scroll through the various lines Throughout this chapter entire menus will be shown for clarity rather than a series of four line sect...

Страница 38: ...ng Adjust 48 Adjust input colorspace Colorspace 45 Adjust input format Input Format 44 Adjust output format Output Format 53 Adjust output gamma Gamma 54 Adjust output size position Output Adjust 55 Adjust pulldown comp Processing 50 Adjust sample phase Timing Adjust 48 Adjust sync selection Processing 50 Adjust sync slice Processing 50 Adjust the image Image Adjust 46 Adjust transition time Trans...

Страница 39: ...twork Ethernet 58 Create input file association File Association 64 Crop the image Image Adjust 46 Delete input configuration Delete Config 52 Display software version Software Version 68 Display system status Status Menu 67 Enable or disable all input select User Preference 63 Enable or disable auto input save User Preference 63 Enable or disable DHCP Ethernet 58 Enable or disable menu context mo...

Страница 40: ...tic IP address Ethernet 58 Set user preferences User Preference 63 Turn on system power Power Up Initialization 32 Understand auto acquire Understanding Auto Acquire 70 Understand button backlighting Understanding Backlighting 69 Understand input selection rules Input Selection Rules 69 Use front panel lockout mode Front Panel Lockout 72 Use inputs Using Inputs 69 Use test patterns Using Test Patt...

Страница 41: ...unctions The Save Config function on the Input Menu saves a configuration for the currently selected input in non volatile memory Note that if the Auto Input Save function is enabled in the User Preferences Menu the system automatically saves inputs The Save Config function on the Output Menu saves all output configuration parameters in non volatile memory The Save Config function on the System Me...

Страница 42: ...oints It is recommended that you leave the In Auto Acquire mode ON In this mode if the timing changes on any of your inputs whether or not you have a saved configuration file you will always get an output image On the other hand if the mode is OFF and the timing of an input changes the output will be black When the In Auto Acquire mode is ON the ACS 2048 automatically detects and acquires the inpu...

Страница 43: ...ferent input button In this case the menu fields update to reflect the values for the newly selected input Following are descriptions of each Input Menu function INPUT 1024x768 59 94 Type Analog Colorspace RGB Image Adjust Contrast 100 0 Brightness 100 0 Color Balance Timing Adjust Processing Reset Config Save Config Delete Config Recall Config Note Changing entries for one input will not affect t...

Страница 44: ...elect an input that has been saved using the Save Config function the video format is displayed only in the Status Menu within brackets S 1024x768 59 94 This example is a saved exact match from the format table or library S 1024x768 59 90 This example is a saved best guess When In Auto Acquire is OFF the system attempts to lock to the signal using the associated input configuration file If the ass...

Страница 45: ...put 3 RGB SMPTE For input 4 RGB SMPTE For input 5 RGB SMPTE For input 6 SMPTE For input 7 SMPTE Please note The default selection for YPbPr or YUV is SMPTE In Appendix A refer to the Input Format Table section on page 89 for information on the formats that are RGB SMPTE or both When both RGB and SMPTE are listed the first item in the list is the default When the input is analog including CVBS Y C ...

Страница 46: ...ct V Crop to crop both the top and bottom edges simultaneously Values are in lines The output window is maintained in both size and aspect ratio Select H Pan to pan a cropped image left and right within the selected aspect ratio Values are in pixels Note that the value reads 0 if the image has not been cropped horizontally Select V Pan to pan a cropped image up and down within the selected aspect ...

Страница 47: ...type Each menu allows you to adjust the input s color balance parameters RGB Color Balance Menu Hue Saturation Color Balance Menu od_ çäçê _ ä åÅÉ jÉåì If the current input s type is set to RGB the RGB Color Balance Menu appears Figure 4 10 RGB Color Balance Menu sample Each of the individual contrast and brightness settings operates in conjunction with the global contrast and brightness settings ...

Страница 48: ...ange SDI YPbPr 75 0 to 125 0 Select Reset All to set all values back to their default settings qáãáåÖ Çàìëí From the Input Menu select Timing Adjust to display the Timing Adjust Menu The menu changes slightly depending on the selected sampling mode 1 1 or Oversample This menu allows for exact positioning of the input signal s active area The figure below illustrates the Timing Adjust Menu Figure 4...

Страница 49: ...t 0 For all Horizontal active area fields all units are measured in pixels H Total adjusts the total pixel count per line This value cannot be adjusted if the input type is DVI SDI H Position adjusts the offset of start of active area from H sync H Active sets the size of the active area For all Vertical active area fields all unit are measured in lines V Total indicates the total line count per f...

Страница 50: ...s to standard video component s video composite and SD HD SDI inputs The mode which detects the 3 2 film pulldown sequence should be turned ON to properly process video derived from film source material Adjustment range OFF ON Default OFF Sync Slice This function selects the sync comparator threshold for RGsB RGB with Sync on Green or YPbPr analog component video sources When ACS 2048 detects Macr...

Страница 51: ...physical input When you select a file number and save an input the system automatically creates a file association on the File Association Menu using the selected file number Refer to the File Association section on page 64 for details When you perform the Save Config function input configuration parameters are saved in non volatile memory for each input source If you do not perform the Save Confi...

Страница 52: ...figuration file for the selected input This file will be used when that input is selected on the front panel The Recall Config Menu appears Figure 4 17 Recall Config Menu sample To recall a saved input configuration file scroll to the File Number line Press SEL and select a file number To recall the selected file scroll to the Recall File line and press SEL After recalling the system remains on th...

Страница 53: ...e ACS 2048 2048x1080p 59 94Hz 2048x1080p 50Hz lìíéìí jçÇÉ From the Output Menu select Output Mode to change the selected output mode between 8 bit 10 bit or 12 bit output Adjustment range 8 bit 10 bit or 12 bit output Default 10 bit this mode requires connecting both outputs to the projector Please note the following points regarding the ACS 2048 s two DVI I output connectors In 10 bit or 12 bit m...

Страница 54: ... input drops to its backlit state depending on sync When the mode is turned OFF the TEST PAT button turns off and the last selected input will either be lit bright or blinking depending on sync The Test Pattern Menu remains on the display Type This function enables you to select a test pattern Available choices are Off H Ramp V Ramp 100 Col Bars 16 x 16 Grid 32 x 32 Grid Burst TEST PATTERNS Mode O...

Страница 55: ...emporarily turned off and the output video is black As you adjust H and V size and position the raster box adjusts accordingly When you exit the menu the raster box is cleared and the selected input will be scaled to fit within this exact size and position The following functions are available H Size adjusts the horizontal size in pixels V Size adjusts the vertical size in lines H Position this fi...

Страница 56: ... you perform the Save Config function all configuration parameters from the Output Menu are saved in non volatile memory If you do not perform the function output data will not be restored upon the next system power up If you make a change in the Output Menu and attempt to exit the menu by pressing ESC or TEST PAT without saving changes the system displays the following prompt Figure 4 22 Save Out...

Страница 57: ...Menu select Trans Time to change the current transition rate that is used when you switch between inputs Please note the following points The transition type is fixed as Transition to Black When you change inputs the current input fades to black then the new input s video transitions up at the selected Trans Time The transition time is defined as the total time required for the system to fade to b...

Страница 58: ...ct Ethernet to display the Ethernet Menu Figure 4 25 Ethernet Menu sample The following Ethernet functions are available DHCP DHCP can be turned OFF or ON When OFF the Config Network field appears which enables you to manually enter a static IP address Subnet mask and Gateway When ON the ACS 2048 queries the DHCP server for a valid IP address and the Config Network field is hidden If the ACS 2048 ...

Страница 59: ... the Netmask Menu which enables you to set a netmask The editing procedure is discussed below Figure 4 28 Netmask Menu Select Set Gateway to display the Gateway Menu which enables you to set a gateway The editing procedure is discussed below Figure 4 29 Gateway Menu sample Use the following steps to edit the IP address Netmask or Gateway Valid fields range from 000 to 255 a Press SEL to begin edit...

Страница 60: ... found or the network cable is not connected the address reads 000 000 000 000 MAC Address The M line is an information only line that shows the MAC hardware address of the unit s Ethernet port bafa asf fåéìí cçêã í From the System Menu select EDID DVI In Frmt to display the EDID DVI Input Format Menu which enables you to update the preferred EDID resolution for the ACS 2048 s two DVI inputs 2 and...

Страница 61: ... line When SEL is pressed the following message is briefly displayed Figure 4 31 Programming EDID Message 1 If the non volatile memory programming is successful the following message is displayed Figure 4 32 Programming EDID Message 2 If the EDID programming failed the following message will be displayed Figure 4 33 EDID Programming Failed Message If this message persists please contact customer s...

Страница 62: ...quate for most users unless cables longer than 5M are used and unless your signals are running at high pixel clock rates e g UXGA Set to Default returns the equalization settings to their default values qÉãéÉê íìêÉ From the System Menu select Temperature to display the System Temperature Menu Figure 4 35 System Temperature Menu sample The System Temperature Menu is an information only display that...

Страница 63: ... that do not have a valid sync signal detected When ON you can select inputs that do not have valid sync and are not backlit When OFF you cannot select inputs that do not have valid sync and the Invalid Selection message will be displayed if you attempt to do so Menu Context This preference determines the behavior of certain ACS 2048 menus The following conditions apply When Menu Context is ON reg...

Страница 64: ...th the input numbers themselves e g input 1 1 input 2 2 etc However any association can be configured On the Save Config and Recall Config menus when you select a file number and save or recall an input the system automatically creates a file association using the selected file number For example if you save input 1 with file number 10 that association will be listed on the File Association Menu T...

Страница 65: ...ints regarding the system configuration file When you perform the Save Config function all configuration parameters from the System Menu are saved in non volatile memory If you do not perform the function data will not be restored upon the next system power up sequence This command also saves the currently selected input channel as the default selection upon power up If you do not perform the Save...

Страница 66: ...pt to exit the menu by pressing ESC TEST PAT or by selecting another input without saving changes the system displays the following prompt Figure 4 41 Save System Configuration Prompt Select Yes SEL to save changes Select No ESC to continue operation without saving the changes Save System Cfg SEL Yes ESC No ...

Страница 67: ...ds are as follows Input Type Specifies the type of input signal being processed Input Format Indicates the current input video format in the form Hact x Vact Vr Hz S 1280x1024 60 Hz If the currently selected input does not have a valid input signal the Input Format field displays Invalid Signal Output Type indicates the selected output type as well as HCDP status The following labels can appear de...

Страница 68: ...s function enables you to reset the ACS 2048 to its factory default condition in which all input output and system configuration files are deleted When the command is executed a confirmation menu is shown Press SEL to reset the system Press ESC to cancel the operation and return to the Main Menu The following attributes constitute a factory default condition The TEST PAT button is selected All Syn...

Страница 69: ... source Blinking indicates that sync has been lost from the current on air source In this situation internal black will automatically replace the previous on air source and the source cannot be used on air until sync is restored fåéìí pÉäÉÅíáçå oìäÉë Please note the following important rules regarding input selection Each input that you select will be routed to the output using the current transit...

Страница 70: ...uto Acquire is OFF and a valid input is selected with a saved input configuration file the system compares the library file to the input s timing If the timings match the system transitions to the input If the timings do not match the system displays black and the Invalid Signal message appears Three error messages can be displayed when In Auto Acquire is OFF Mismatch The ACS 2048 cannot match to ...

Страница 71: ...ct another input the system transitions to the new input When the TEST PAT button is already lit press the TEST PAT button again to toggle back to the last selected input Please note the following important points regarding test pattern usage When Menu Context is ON and TEST PAT is pressed the last selected test pattern is automatically enabled and the Type field is selected enabling you to change...

Страница 72: ... combination has been detected the following display appears Figure 4 47 System message Lockout Enabled In the lockout mode All button pushes and all turns of the rotary knobs will be ignored All Ethernet communications and commands will function normally All button lights will continue to reflect the proper state of the inputs 2 To disable the front panel lockout mode press and hold the SEL and E...

Страница 73: ... få qÜáë Ü éíÉê This chapter provides detailed instructions for upgrading ACS 2048 system software The following topics are discussed Software Upgrade Overview Hardware Requirements Software Requirements Downloading Software Ethernet Upgrade Method ...

Страница 74: ...ss Following the upgrade instructions in the browser e êÇï êÉ oÉèìáêÉãÉåíë The following hardware items are required for upgrading ACS 2048 software IBM compatible computer with an available Ethernet port Local Ethernet network including an Ethernet switch pçÑíï êÉ oÉèìáêÉãÉåíë The following list outlines software requirements for upgrading ACS 2048 software Ensure that your PC or laptop uses the ...

Страница 75: ... b If you are using a web browser point the browser to ftp ftp folsom com c To use Windows Explorer right click the Start button then click Explore When the Explorer window opens enter the FTP site in the address bar 4 Once logged on navigate to the following directory ftp ftp folsom com Image Processing ACS 2048 5 Transfer the following file to the target folder on your PC ACS2048_ _ tar gz 6 Ple...

Страница 76: ...ng steps to upgrade ACS 2048 software 1 Ensure that your PC or laptop uses the Windows 2000 or XP operating systems 2 Connect the ACS 2048 s Ethernet port to a Switch 3 Connect the Switch to your PC or laptop 4 Power up the ACS 2048 5 Note the ACS 2048 s current IP address a From the Main Menu select System to display the System Menu b From the System Menu select Ethernet to display the Ethernet M...

Страница 77: ...ications with the ACS 2048 several web pages are downloaded into the PC and the ACS 2048 Upgrade Page appears Figure 5 2 ACS 2048 Upgrade Page sample 9 Click the Firmware Upgrade link to continue the upgrade process The Select File page appears as shown below Figure 5 3 ACS 2048 Select File Page sample ...

Страница 78: ...gure 5 4 ACS 2048 Upload Status Page sample 13 When the procedure is complete you have three options Click Home to return to the ACS 2048 Upgrade Page If a problem was encountered during the process click View Log File to display a text based log of the upload procedure If the upload was successful click Restart ACS 2048 to complete the entire procedure 14 Close your browser and resume operations ...

Страница 79: ...thernet Switch to your PC c Turn on the PC or laptop d Open a command prompt window on the PC Click Start Programs Accessories Command Prompt e On the command prompt line type ping 192 168 0 5 followed by Enter f If the computer is able to successfully communicate with the ACS 2048 you will see a series of replies from the target IP address Repeat the upgrade procedure as outlined in the Ethernet ...

Страница 80: ...80 ACS 2048 User s Guide 5 Upgrading Software Ethernet Upgrade Method ...

Страница 81: ...appendix provides detailed technical specifications for the ACS 2048 The following topics are discussed Input Specifications Output Specifications Physical and Electrical Specifications Communications Specifications Agency Specifications Pinouts Input Format Table ...

Страница 82: ... HDCP hardware support HDCP version 1 0 compliant Composite S Video YUV Not supported Input 4 Connector HD 15 VGA Format YUV and RGBHV Sampling 10 bits color at 170 MHz maximum Supports 1 1 sampling up to 1600x1200 60 Hz Sources with native pixel rates 170 MHz will be filtered and undersampled at 170 Mhz including 1920x1080p 60 173 0 MHz 1920x1200 60 193 25 MHz 2048x1080p 60 183 75 MHz Composite S...

Страница 83: ... Input 8 Not currently implemented Table A 1 ACS 2048 Input Specifications Continued Parameter Detail Specification Table A 2 ACS 2048 Output Specifications Parameter Detail Specification Outputs Outputs A and B Dual channel Twin Link DVI output Connectors 2 x DVI RGB output Up to 12 bit color 4 4 4 8 msb on connector A 4 lsb on connector B 8 bit output on connector A only user selectable HDCP Enc...

Страница 84: ...sical and Electrical Specifications Parameter Detail Specification Power Connector Standard IEC integral on off switch Power 100 240 VAC 50 60 Hz Mechanical Chassis H 3 50 inches 8 89 cm W 17 00 inches 43 18 cm W 19 00 inches 48 26 cm with rackmount wings D 10 00 inches 25 4 cm Temperature 0 40 degrees C Humidity 0 95 non condensing Mounting 2 RU rack mount Weight 5 8 lbs 2 63 kg Shipping Weight 2...

Страница 85: ... péÉÅáÑáÅ íáçåë The table below lists ACS 2048 agency specifications Table A 4 ACS 2048 Communications Specifications Parameter Detail Specification Communications Ethernet RJ 45 10 100 Mbps Table A 5 ACS 2048 Agency Specifications Parameter Detail Specification Agency Specifications EMI EMC EN55103 1 E4 EN55103 2 FCC Part 15 Subpart B Class A Safety EN 60950 Class 1 ...

Страница 86: ...nector å äçÖ NRJéáå a çååÉÅíçê The figure below illustrates the analog 15 pin D connector Figure A 1 Analog 15 pin D connector chassis view The table below lists Analog 15 pin D connector pinouts Table A 6 Analog 15 pin D Connector Pinouts Pin Signal Pin Signal 1 Red 9 2 Green 10 GND 3 Blue 11 4 12 5 13 H Sync or C Sync 6 Red return 14 V Sync 7 Green return 15 8 Blue return 10 6 5 1 15 11 ...

Страница 87: ...3 2 T M D S Data 2 14 5V Power 3 T M D S Data 2 4 Shield 15 ground for 5V 4 T M D S Data 4 16 Hot Plug Detect 5 T M D S Data 4 17 T M D S Data 0 6 DDC Clock 18 T M D S Data 0 7 DDC Data 19 T M D S Data 0 5 Shield 8 Analog Vertical Sync 20 T M D S Data 5 9 T M D S Data 1 21 T M D S Data 5 10 T M D S Data 1 22 T M D S Clock Shield 11 T M D S Data 1 3 Shield 23 T M D S Clock 12 T M D S Data 3 24 T M ...

Страница 88: ...illustrates the 4 pin Mini DIN connector Figure A 4 4 Pin Mini DIN connector The table below lists Mini DIN connector pinouts Table A 8 Ethernet Connector Pinouts Pin Signal Wire Color 1 TX Data White Orange 2 TX Data Orange 3 RX Data White Green 4 Blue 5 White Blue 6 RX Data Green 7 White Brown 8 Brown Table A 9 Mini DIN Connector Pinouts Pin DMX Signal Description 1 C Chrominance 2 Y Luminance 3...

Страница 89: ...640x480 59 94 1 33333 RGB 640x480 60 1 33333 RGB 640x480 72 1 33333 RGB 640x480 75 1 33333 RGB 640x480 85 1 33333 RGB 800x600 50 1 33333 RGB 800x600 56 1 33333 RGB 800x600 59 94 1 33333 RGB 800x600 60 1 33333 RGB 800x600 72 1 33333 RGB 800x600 75 1 33333 RGB 800x600 85 1 33333 RGB 1024x768 47 95 1 33333 RGB 1024x768 48 1 33333 RGB 1024x768 50 1 33333 RGB 1024x768 59 94 1 33333 RGB 1024x768 60 1 33...

Страница 90: ...5 1 25 RGB 1280x1024 48 1 25 RGB 1280x1024 50 1 25 RGB 1280x1024 59 94 1 25 RGB 1280x1024 60 1 25 RGB 1280x1024 71 93 1 25 RGB 1280x1024 72 1 25 RGB 1280x1024 75 1 25 RGB 1280x1024 85 1 25 RGB 1360x768 60 1 77083 RGB 1364x768 47 95 1 77778 RGB 1364x768 48 1 77778 RGB 1364x768 50 1 77778 RGB 1364x768 59 94 1 77778 RGB 1364x768 75 1 77778 RGB 1364x1024 47 95 1 33333 RGB 1364x1024 48 1 33333 RGB 1364...

Страница 91: ...94 1 33333 RGB 1600x1200 60 1 33333 RGB 1280x720p 48 1 77778 SMPTE RGB 1280x720p 50 1 77778 SMPTE RGB 1280x720p 59 94 1 77778 SMPTE RGB 1280x720p 60 1 77778 SMPTE RGB 1680x1050 60 1 60 RGB 1920x1080p 23 98 1 77778 SMPTE RGB 1920x1080p 24 1 77778 SMPTE RGB 1920x1080p 25 1 77778 SMPTE RGB 1920x1080p 29 97 1 77778 SMPTE RGB 1920x1080p 30 1 77778 SMPTE RGB 1920x1080p 48 1 77778 SMPTE RGB 1920x1080p 50...

Страница 92: ...B 2048x1080p 48 1 8963 RGB 2048x1080p 50 1 8963 RGB 2048x1080p II 50 1 8963 RGB 2048x1080p 59 94 1 8963 RGB 2048x512p 59 94 4 RGB 2048x1080p 60 1 77778 RGB 1920x1200p 60 1 77778 RGB 1920 x 1200 II 60 1 77778 RGB 1920 x 1080 II 60 1 77778 RGB SMPTE 2048 x 1080 II 60 1 7778 RGB Apple 1200p 60 1 6 RGB 875p 1 33333 RGB Table A 10 ACS 2048 Input Formats Continued Format Aspect Ratio Color Space ...

Страница 93: ...s 3 For Telnet communications use the ACS 2048 s IP address and port 23 On a Microsoft Windows PC open a command prompt window and enter the following telnet xxx xxx xxx xxx 23 4 After you Telnet into the ACS 2048 you are presented with the login prompt Welcome to ACS 2048 Login as user Press ENTER for password a Type user and press ENTER to login b When prompted for a password simply press ENTER ...

Страница 94: ...uccessful the error code is a negative value A preliminary list of the error codes is included Refer to the Error Codes section on page 96 for details S Command response example ITYPE e 0 LF x4 nìÉêó léíáçåë Query type options are available for the commands The order of precedence for processing query option arguments is help help query and list list If more than one query option is sent in a comm...

Страница 95: ...arameter will have these min and max values returned with option flags min and max S Query option example IBRT i 4 CR S Response IBRT i 4 b 100 00 min 75 max 125 IBRT e 0 LF x4 Several commands have a list for the associated valid parameter values such as the format commands The list of these values can be queried with the list query option list The list shows has the numeric value for the paramet...

Страница 96: ...tion is not applicable in current state 9997 UI Related Did not get response from device 9996 UI Related Did not get valid response from device 9995 Timeout occurred 9994 Parameter data out of range 9993 Searching for data in a index no matching data 9992 Checksum didn t match 9991 Version didn t match 9990 UI Related Current device interface not supported 9989 Pointer operation invalid 9988 Part ...

Страница 97: ...ation for selected input 100 ICSAV Saves Input Configuration 100 IHCROP Input Horizontal Crop 101 IHPAN Input Horizontal Pan 101 IMAP Associates specified input file configuration with selected input 101 IP Set Static IP Address to be used when DHCP is OFF 101 ISEL Selects the selected input as the current input to display 102 ISTAT Query only command for the input status type and format 102 IVCRO...

Страница 98: ...ult off Query Format AUTOSAVE Query Response AUTOSAVE m mode min 0 max 1 _ihsfa Description Puts black into the scaler selected Command Format BLKVID s scaler m mode Parameters s scaler 1 2 m mode 0 off 1 on Query Format N A Query Response N A SAVE System Save 105 SELMODE Sets whether input selection of inputs w o valid syncs will be made 105 SUBNET Set subnet mask to be used when DHCP is OFF 106 ...

Страница 99: ...ption Get MAC Address Command Format N A Command Params N A Query Format EMAC Query Response EMAC a addr Response Params a addr MAC address formatted xx xx xx xx xx xx d qbt v Description Set gateway to be used when DHCP is OFF Command Format GATEWAY s static addr Command Params s static addr format will be xxx xxx xxx xxx Query Format GATEWAY Query Response GATEWAY a active addr s static addr Que...

Страница 100: ...e selected input s file association is updated and the settings in the input configuration file are applied if the f file parameter is specified Command Format ICREC i input f file Parameters i input 1 8 f file 1 64 optional Query Format ICREC i input Query Response ICREC i input f file List Format ICREC i input list The list returns all saved input configurations List Response 1 1 2 2 7 7 28 28 I...

Страница 101: ... p pan In pixels Query Format IHPAN i input Query Response IHPAN i input p pan min active min max active max fj m Description Associates the specified input file configuration with the selected input Command Format IMAP i input f file Parameters i input 1 8 f file 1 64 Query Format IMAP i input Query Response IMAP i input f file fm Description Set Static IP Address to be used when DHCP is OFF Comm...

Страница 102: ...nse ISEL i input fpq q Description Query only command for the input status type and format Query Format ISTAT Query Response ISTAT t input type f input format fs olm Description Input Vertical Crop Command Format IVCROP i input h height Parameters i input 1 8 h height In lines Query Format IVCROP i input Query Response IVCROP i input h height min pos min max pos max fsm k Description Input Vertica...

Страница 103: ...arameters o output 1 DVI g gamma 1 0 to 3 0 0 1 increment Default 1 0 Query Format OGM o output Query Response OGM o output g gamma min 1 max 3 ljlab Description Set the output mode Command Format OMODE o output w width Parameters o output 1 DVI w width 0 8 bits 1 10 bits 2 12 bits Default 10 bits Query Format OMODE o output Query Response OMODE o output w width min 0 max 2 List Format OMODE o out...

Страница 104: ...Query Response ORES o output f format List Format ORES o output list List Response 90 2048x1080p 50 92 2048x 1080p 59 94 lpq q Description Query only command for the output status type and format Query Format OSTAT Query Response OSTAT t output type f output format lqmj Description Output Test Pattern Mode Command Format OTPM o output m mode Parameters o output 1 DVI m mode 0 off 1 on Query Format...

Страница 105: ...Col bars 3 100 Col Bars 8 50 Gray 4 16x16 Grid 9 Gray Steps 1 5 32x32 Grid 10 Gray Steps 2 obpbq Description Reset unit Command Format RESET f s Parameters f factory reset Or s soft reset Query Format N A Query Response N A p sb Description System Save Command Format SAVE Parameters N A Query Format N A Query Response N A pbijlab Description Sets whether input selection of inputs w o valid syncs w...

Страница 106: ...uery only command for the temperature of the unit Query Format TEMP Query Response TEMP c celsius f fahrenheit qokqfjb Description Set transition time Command Format TRNTIME s seconds Parameters s seconds 1 5 5 0 default 1 5 Query Format TRNTIME Query Response TRNTIME s seconds min 1 5 max 5 sbo Description Display Version info Command Format VER Parameters N A Query Format N A Query Response N A ...

Страница 107: ... modifications lightning strikes abuse drop crush and or other unusual damages The customer shall pay shipping charges when unit is returned for repair Barco will cover shipping charges for return shipments to customers oÉíìêå j íÉêá ä ìíÜçêáò íáçå Eoj F In the unlikely event that a product is required to return for repair please call the following number and ask for a Sales Engineer to receive a ...

Страница 108: ...fornia 95670 USA Phone 916 859 2500 Fax 916 859 2515 Website www barco com Sales Contact Information Direct 916 859 2505 Toll Free 888 414 7226 E mail folsomsales barco com Barco N V Noordlaan 5 8520 Kuurne BELGIUM Phone 32 56 36 82 11 Fax 32 56 35 16 51 Website www barco com Technical Support Information Tech Line 866 469 8036 24 hours per day 7 days per week ...

Страница 109: ... restart 78 specifications 81 system diagram 29 upgrade page 77 upgrading software 73 Adapter information 26 Address company 3 IP 60 MAC 60 ADJUST knob 19 20 using knob 36 Adjust brightness 47 color balance 47 colorspace 45 contrast 47 EDID 60 hue saturation color balance 48 image 46 input format 44 input parameters 46 input type 44 output format 53 output gamma 54 output mode 53 output size and p...

Страница 110: ...ACQ 98 AUTOSAVE 98 BLKVID 98 CONTEXT 99 DHCP 99 EMAC 99 GATEWAY 99 ICDEL 99 ICLIST 100 ICREC 100 ICSAV 100 IHCROP 101 IHPAN 101 IMAP 101 IP 101 ISEL 102 ISTAT 102 IVCROP 102 IVPAN 102 list 97 LOCKOUT 102 OCSAV 103 OGM 103 OMODE 103 ORBM 103 ORES 104 OSTAT 104 OTPM 104 OTPT 104 protocol 94 remote 98 RESET 105 responses 94 SAVE 105 SELMODE 105 SUBNET 106 TEMP 106 TRNTIME 106 VER 106 VFDBRT 106 Commu...

Страница 111: ... outputs 23 twin link output 23 DVI I 18 DVI I connector pinouts 87 DVI I output connectors 53 b EDID DVI input format 60 DVI input format menu 60 format 61 input 61 program 61 Edit cursor 36 Electrical specifications 84 EMAC 99 Encryption HDCP 23 Equalization 62 set to default 62 Equipment marking terms 5 Error codes 96 general failures 96 no error 96 ESC 20 using 36 37 Ethernet address 59 connec...

Страница 112: ...CREC command 100 ICSAV command 100 IHCROP command 101 IHPAN command 101 Image adjust menu 46 IMAP 101 In Auto Acquire 42 Information cables and adapters 26 Input colorspace 45 configuration files 51 connections 29 connector 1 18 connector 2 18 connector 3 18 connector 4 19 connector 5 19 connector 6 19 connector 7 19 delete configuration 52 DVI cable equalizer 62 format 44 67 format table 89 menu ...

Страница 113: ...nc Detected 44 Notice 2 NTSC or PAL 19 l OCSAV command 103 Off button 21 OGM command 103 OMODE command 103 Operation 31 quick setup 33 Operators safety summary 4 ORBM command 103 ORES command 104 Orientation hardware 17 OSTAT command 104 OTPM command 104 OTPT command 104 Output adjust size and position 13 55 connections 30 DVI 23 format 53 67 gamma 54 menu 53 mode 23 53 mode 8 bit 10 bit 12 bit 53...

Страница 114: ...ut configuration 56 system config 65 system state 65 SAVE command 105 Scale output 55 SD SDI 18 Section display 20 inputs 21 SEL 20 using 36 37 Select file page 77 Selection input rules 69 SELMODE command 105 Set gateway 59 netmask 59 static IP 59 Signal installation 29 Site preparation 26 Software downloading 75 requirements upgrading 74 upgrade overview 74 upgrade via Ethernet 76 upgrading 73 ve...

Страница 115: ...RNTIME command 106 Troubleshoot Ethernet connection 79 Twin Link DVI output 23 Type input 44 test pattern 54 r Understanding auto acquire 70 button backlighting 69 Universal inputs 13 Unpacking 26 Upgrade software 73 software via Ethernet 76 Upload dialog 78 status page 78 User preference all inputs sel 63 auto input save 63 menu 63 menu context 63 Using auto acquire 42 ESC button 36 37 inputs 69 ...

Страница 116: ...116 ACS 2048 User s Guide Index ...

Отзывы: